You can start your own T-shirt business right there at home. You might want to do that to start earning some extra income or you might just want to do it to have an extra collection of fine T-Shirts. Either way, you can get it done easily. Here is a compilation of easy ways to make T-shirts on your own at home.
Easy Ways To Make Personalized T-Shirts At Home
#1 – Iron-On (Using an Iron or a Cricut Easypress)
To decorate your personalized T-shirt with an iron-on transfer, you will need the following materials: the T-shirt, the transfer design, scissors, a pressing iron or Cricut Easypress, transfer paper, and an inkjet or laser printer.
Here are some basic steps to make a T-shirt using iron-on method:
1. Create a Design
Now that you know all you’ll need, it is time to get your image or design. You can create this using editing software such as Photoshop, CorelDraw, or Illustrator. You can also hire a professional or ask a friend to help you with the design.
There are also countless images that you can download over the internet. However, when it comes to downloading images online, you need to be careful of copyright laws. To avoid any copyright issues, you can purchase the images or designs for a low price from certain websites. Also, there are some websites that offer copyright-free images. Just be sure to do your due diligence before getting an image online.

These are some tips to remember when choosing a design for your T-shirt.
- Light-colored designs stand out on dark-colored T-shirts and vice versa.
- Remember that white portions in your design will be left blank as regular printers do not print color white.
- Very light colors may come out discolored because of the heat from the iron or Cricut Easypress.
Next, you want to create a mirror image of your design, so that you’ll not have a T-shirt with a backward design. You can easily do so by using options such as “Mirror horizontally”, “Flip Image Horizontally”, “Reverse” or any other related words depending on the software you are using.
2. Select Transfer Papers
Now is the time to select the right transfer paper for your iron-on transfer. For light-colored fabrics, you will need a transfer paper that is specifically designed for light fabrics. It is usually transparent and lighter in feel compared to the transfer papers made for dark-colored fabrics which are thicker. The transfer papers for dark-colored fabrics also have a white backing.
3. Print The Design
Next, print out a sample of the design on a regular piece of paper or an extra piece of transfer paper so you can know what to expect. Once you’re satisfied with what you have, you can go ahead to print the actual design on a transfer paper.
Make sure you are printing on the right side of the transfer paper, which is not difficult to know. The right side should be plain, clear, and even a little bit shiny while the other side usually has a logo, watermark, or some other characters on it.
4. Transfer The Design
After the printout is dried, trim off any excess transfer paper from the design then place the T-shirt on a smooth, flat, and durable surface such as a table, floor, or any other surface of the sort. Ensure the fabric is clean, dry, totally flat, and wrinkle-free.
You can smooth out any wrinkles with an iron. Place cardboard or some thick paper inside the T-shirt to prevent excess ink from being transferred to the other side of the shirt when it is being ironed.
Now that the T-shirt is in place, place the design on the spot where you want it to be on the fabric. Put your iron on the hottest setting, place it on the back of the transfer paper, and using medium to maximum pressure, press the design onto the fabric. If you’re using a Cricut Easypress, apply gentle pressure and you will get the same results.
Once you are sure that the design is now on the fabric, allow the design to cool down a bit, and then you can remove the transfer paper. Just wait for at least 24 hours to allow the ink to dry completely after which you can wash or put on your T-shirt.
#2 – Heat Press Machine
You can always get a heat press machine for beginners when starting your T-shirt printing business. Although you might find some variations in the type of machines out there in the market, they usually are the same at the basic level.
To use a heat press machine for your personalized T-shirt design, you need the following materials: your T-shirt, the transfer design, scissors, transfer paper, an inkjet printer or a laser printer, and a heat press machine.


Here are some things you should remember when using the heat press machine:
- Always apply high levels of heat so that you can achieve a satisfactory output. If the heat is not high enough, the transfer may be ruined. Simply follow the heat instructions on the transfer paper.
- Also, remember that some fabrics are heat tolerant while others are not. If you use a material that cannot handle heat, you not only ruin the design, but you ruin the shirt as well. Cotton, lycra, nylon, polyester, and spandex are examples of materials that are heat tolerant.
- Ensure that the T-shirt is properly straightened when you load it on the heat press machine, otherwise, you get a crooked design at the end of the transfer.
- The transfer paper type is also very important. Understand that there are different transfer papers out there in the market. As mentioned earlier, some transfer papers are best suited for light-colored garments, while others are for dark-colored ones. Also, some transfer papers are designed to be used with inkjet printers while some are for laser printers. Do your research properly before getting one.
Now you’re ready to make some cool-looking Tees.
After designing or acquiring your image/design, print it onto the transfer paper. Then switch on your heat press. Set the time and temperature of the machine accordingly.
Place the garment flat on the bottom plate of the machine and warm the material a bit. Lower the handle to close the press and let it rest on the garment for a minimum of five seconds. Lift the handle to open the press then make sure the shirt is face down before laying the transfer paper on it.
Firmly lower the handle, ensure it is locked in place and set the timer in accordance to the timing guidelines of the transfer paper you are making use of.
Once the time is up, raise the handle and remove the transfer paper from the cloth. Allow the print to set for about 24 hours before washing your shirt.
Aside from using inkjet or laser-printed designs, you can also use CAD cut vinyl for the T-shirt design.
#3 – Screen Printing
To make screen-printed tees, you can easily get a screen printing kit online and you’ll find the following basic supplies in it: Screen printing fabric ink, the screen, a squeegee, plain paper, a craft knife, and masking tape rolls. In addition to these items, don’t forget your T-shirt.
Here are some tips that can come in handy for screen printing.
- Make sure you do a test print all the time.
- Once you wash the screen, you will have to discard any paper stencils, so create many stencils at a go if you want to make several of the same print.
Create a design on plain paper and cut it out with the craft knife to create a stencil. Pick up the screen and create a mask around the edges of the side that will be touching the garment to prevent paint from messing around the edges of the design.
When you lay the stencil paper, you want to make sure that the mesh is not showing around the edges but also, do not use the masking tape to stick the stencil to the mesh. Now, lay the garment flat and place the paper stencil on the area you want your design.
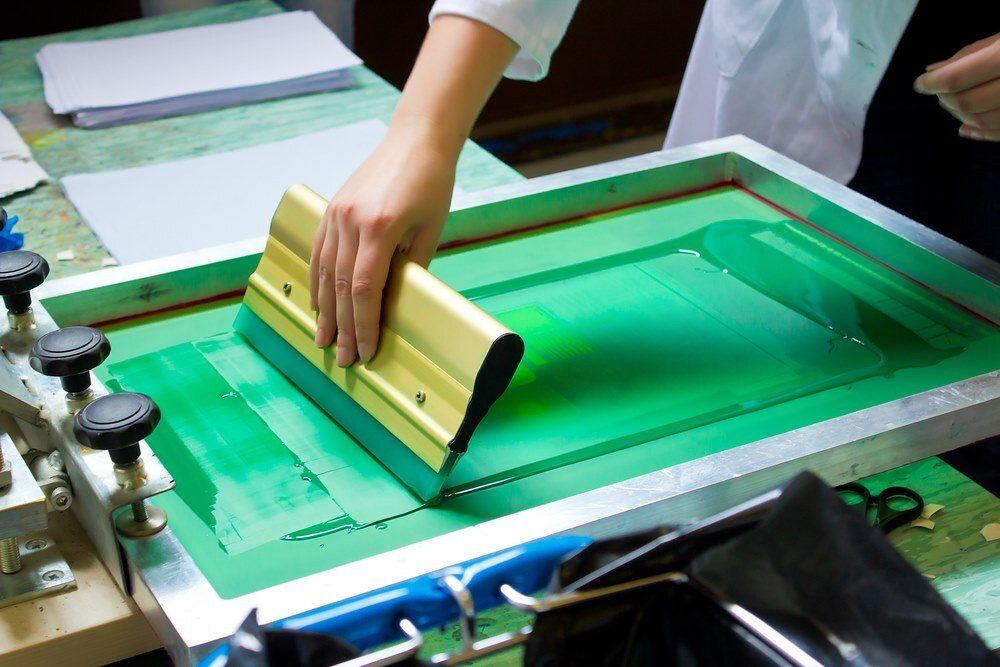


Remember to insert cardboard inside your cloth to avoid the ink from staining the other side of the shirt. Then carefully lay the screen on top ensuring it is centralized without moving the paper.
Drop some ink at the top of the screen and use your squeegee to pull down the ink on the screen with a bit of pressure. Repeat the process till you’re satisfied with the thickness of the ink. Now you can take away the screen and bring out your T-shirt.
The paper stencil will be stuck to the screen, so if you have any more shirts to print, quickly do so, but if you notice that the ink is starting to dry up, make sure you wash the screen immediately. It is virtually impossible to get water-based ink out of a screen once it gets dry.
Discard the paper stencil once you’re done printing and wash the screen using cold water. You can use a brush or sponge to gently scrub out any ink left. Air-dry the screen after washing it before your next print.
#4 – Embroidery
To make an embroidery design on your cloth, you will need a T-shirt stabilizer, embroidery needles, embroidery floss/threads, embroidery hoop, scissors, tweezers (optional), a pressing iron, and of course your T-shirt.
Hand Embroidery
Here’s how to make personalized T-shirts at home using embroidery by hand.
Start with cutting out some of the stabilizer material ensuring that what is cut is larger than the embroidery hoop size. Stick the stabilizer to your cloth by ironing it on the garment, and then place your transfer on the stabilizer. Your stabilizer can only be repositioned one or two times.
The design on the transfer will fade away drastically if you iron it over again but you can always use a pencil to draw over faint lines in the design.
Next, get your hoop and place your stabilizer over it and you can begin stitching. If you’re new to embroidery, familiarize yourself with some basic hand embroidery stitches to create your desired patterns and designs. During the stitching process, you will be going through both layers of the garment and stabilizer at once.
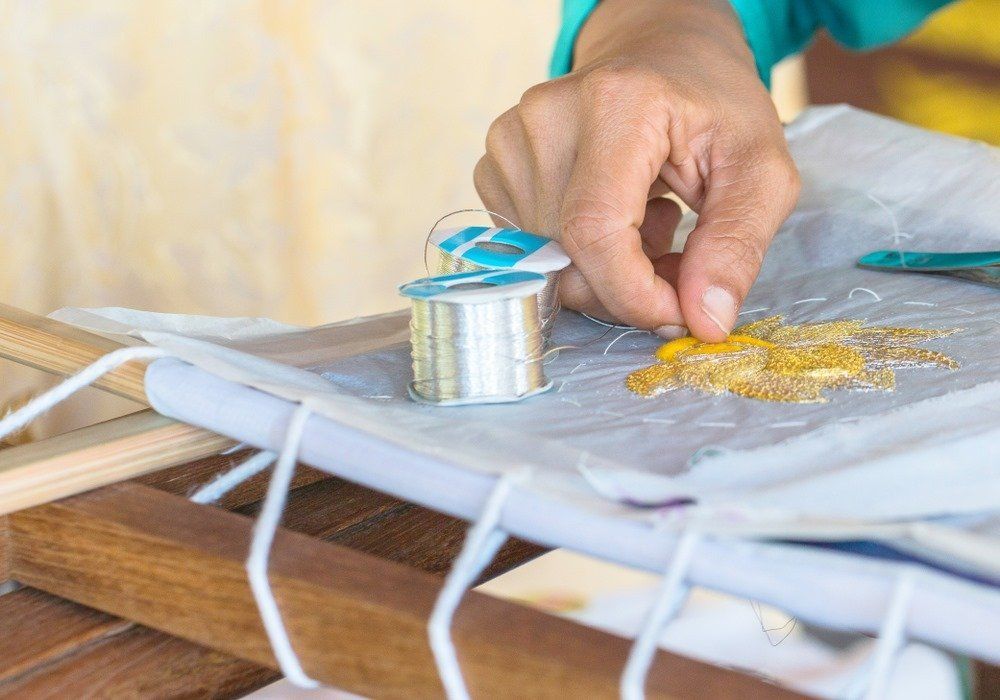


Make sure your cloth remain taut and not moving up and down. Your hoop should be tight although when you’re not working, it should be loosened.
Remove your hoop when the stitching is completed and peel up all the excess stabilizer material that wasn’t stitched so that it is not stuck anymore to the cloth before you eventually tear it out. Make a singular straight tear towards the design edge once all the excess stabilizer is peeled from the cloth.
With that same tear, keep tearing away the peeled stabilizer material around your embroidered design. Further stretch out the area that has been stitched, including the stabilizer material and the garment itself, in order to ease the removal of the stabilizer.
Once the stabilizer is removed, your T-shirt is ready to be worn.
Machine Embroidery
You can decide to try out machine embroidery as well which can be done in less time than you would require to embroider by hand. What’s more? You can decide to use a modern sewing machine (since most come with a zigzag stitch feature) to embroider if you don’t have an embroidery machine.
Always remember that whenever you want to embroider, make sure you wash the tee before you begin the process which gives room for any shrinking the garment might undergo once it is dipped in water.
For the machine embroidery process, start by pressing your shirt such that it is free of wrinkles but not totally stretched out. Mark the area you want your design to be, then turn the shirt inside out.
Next, spray the marked area lightly with a temporary adhesive spray or basting, and then smooth a layer or two of stabilizer on that spot. Turn the shirt to the right side, and then hoop it (ensuring you’re not stretching the shirt as you do so).
Confirm the positioning of the hoop and attach it to the embroidery machine in such a way that the rest of the shirt is free from the hoop except the part that will be stitched. Then you can just embroider the design according to the manual of your embroidery machine.
Appliqué
Another fabric embellishing technique you can use an embroidery machine or your hand to create is applique. You’ll simply need applique pieces that can be gotten from fabrics you already own or purchase precut applique pieces, a foundation fabric, and you can go on sewing with the machine using other basic supplies.
#5 – Cut and Sew
Just like the name implies, you cut out materials and you basically sew them into a T-shirt. Plain simple. But what makes it unique is that you can be creative and print each material in any design you want and create your unique T-shirts.
We’ll be looking at a basic method of creating T-shirts, feel free to use any design of your choice on the fabrics, and sew them up.
The supplies you will need for this DIY cut and sew T-shirt include cotton or other suitable fabric for the body of the T-shirt, matching thread, a pre-made T-shirt sewing pattern, scissors, pins, chalk/air erasable marker, a pencil, and a ruler.
Start with cutting out the pattern pieces (front, back, and the two arms) of your T-shirt. Be gentle in this part and ensure you cut out neatly and accurately. Lay the fabric over a flat surface, making sure it is not wrinkled, stretched, nor distorted in any way. Lay one of the pieces of the pattern paper atop, aligning it properly so that the stretch of the cloth goes across the width.
Use some weights to hold the fabric in place then using the air erasable marker or tailor’s chalk, draw around the edge of the pattern pieces taking care not to pull the cloth. Once you’re done drawing, cut out the shapes with the scissors.
Now is the time to sew the T-shirt pieces together with a sewing machine. Add a neckline using an extra piece of fabric, and then add any other finishing touches to the shirt. With this, you have your custom-made cut and sew T-shirt ready to be worn.
#6 – Apply Sequins
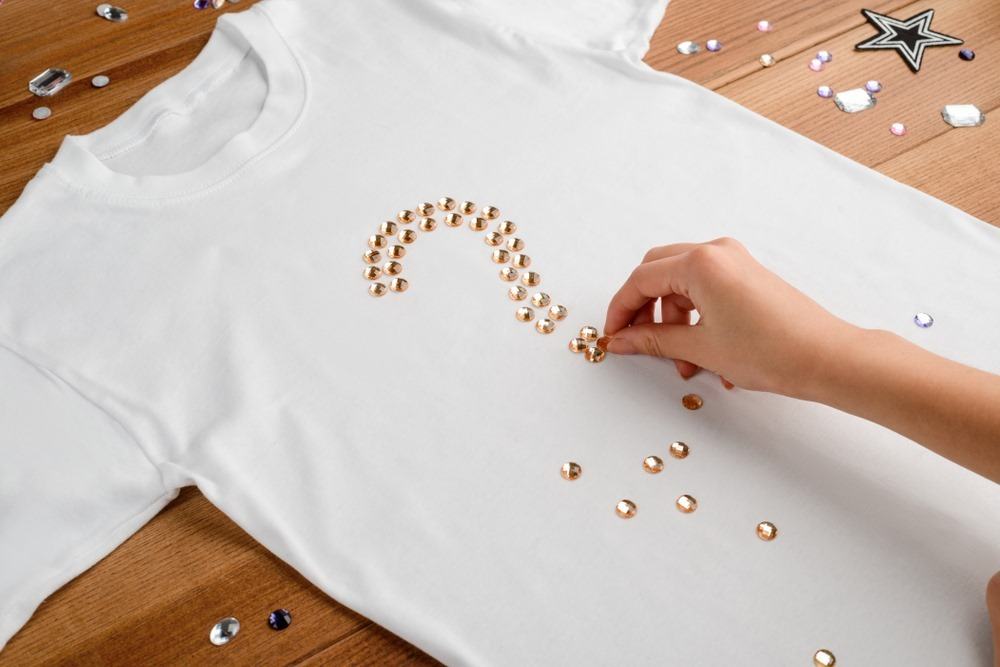


This is a very simple way to decorate your T-shirt. All you’ll need are a few basic materials like your T-shirt, fabric glue, sequins, and a cut-out card stock shape.
Ensure your shirt is clean, dry, and ironed. Place a piece of cardboard inside the shirt to prevent the glue from staining the other side of the shirt.
Next, lay the cut-out shape on the area of the shirt you want the design to be. Use the fabric glue to trace around the edge of the shape then remove the shape carefully. Now there should be an outline of the shape on the shirt. Then simply place your sequins along the glue outline.
If the glue dries up quickly, you can add extra glue or simply do it in small bits at a time.
Your creativity is your only limit with using sequins to decorate T-shirts. You can decide to use a hand-drawn image or design, or you can even arrange them in an abstract form. When you’re done, allow it to dry for about 24 hours before wearing it and let it stay for about 7-10 days before you wash the shirt.
#7 – Tie-Dye
Tie-dyeing is a very old method of designing fabrics yet it is still relevant and quite aesthetic even in today’s world.
The basic supplies you will need to tie-dye your shirt like a pro include a table, sealable plastic bags, soapy water, paper towels, buckets, your T-shirt, soda ash, squirt bottle, rubber gloves, tarp/garbage bags/plastic sheeting, fabric tie-dye color, marbles/coins/strings, and elastic bands.


Start with pre-washing your shirt to ensure that no dirt, oils, or chemicals will affect the dye. Dyes are quite permanent so you want to make sure you set up your working space in such a way that everything that is stainable is protected from the dyes. Use the tarp to completely cover the space including the table you’ll be using.
Also, ensure that the bucket of soapy water and paper towels are near you so that you can easily clean your hands or any spills on surfaces before the dye sets in.
Now you want to tie up your shirt according to the design you want. This is where you’ll be making use of the elastic bands, marbles, coins, and strings. Depending on the pattern you want, you will twist the garment into various shapes which will make the ink seep into the crevices creating different patterns as a result. The most popular tie-dyeing patterns are bull’s eye, crumple, and spiral.
Put on your gloves and soak the tied-up shirts in a bucket of soda ash mixed with water for like 20 minutes or so before you add the colors. Get one bucket for each of the different colors and start mixing the dyes.
Next, dip separate sections of the garment in the dyes trying as much as possible not to mix the dye colors on the shirt or in the buckets so as not to get a messy-looking pattern. To get more accurate dyeing, use squirt bottles to apply the different colors.
If you want a few white spaces in your shirt, let the dye get into the crevices of the tied-up shirt as much as possible. The reverse is the case if you want a lot of white spaces – don’t allow the dye to seep too far into the crevices.
Don’t unwrap the shirt, but instead allow it to dry the way it is for some time and let any remaining dye drip off the garment. Then seal it up in a plastic bag and leave it overnight or for a minimum of 8 hours.
Now you can untie it while running warm water over it. Once you’re done untying it, let cool water run over it. Once the water is clear, squeeze out the shirt and wash it alone in your washing machine with hot water and some soap. Then allow it to air dry before putting on your awesome-looking piece of art.
#8 – Stencil Printing
The stencil printing process is somehow related to screen printing in that they both require stencils but with the regular stencil printing method, you do not need a screen. All that is needed are the following items: a masking tape, your T-shirt, paper, fabric paint, a craft knife, a stencil design, and a cutting mat.
You can download a stencil design online or simply create one with design software on your computer. You can even type out only letters using a Word document and print it out.
Place the printout on the cutting mat and use your craft knife to cut out the stencil. Next, take your T-shirt and place the cutting mat or thick cardboard inside it to prevent the paint from staining the other end of the shirt. Straighten the garment out properly and use tape to securely place the stencils onto the shirt.
Then use the fabric paint to fill up the stencils. Make sure you hold down the stencil paper properly to prevent the paint from seeping out of the edges. It is best you create an outline first before filling up the design. You can also use acrylic paint or shirt ink if you like. Allow it to dry overnight and your shirt is ready to be worn.
#9 – Cutting
One of the most popular T-shirt cutting techniques is fringed cutting. Start with marking a line around the point you want the shirt to end, then mark many straight lines downwards about half an inch apart, and then simply cut out the fringes. That’s it. Simple and easy.
Conclusion
The entrepreneurship bug might have bitten you or you might just be feeling creative. Either way, you can try out any of these methods for creating a personalized T-shirt at home. You can make use of some stencil printing, tie-dyeing, sequins, cutting and sewing, embroidery, screen printing, a heat press machine, or iron-on technique.

