Want to add extra charm and sparkle to your garment? Then its high time you rhinestone it.
In the previous series, we discussed several decorating methods used in the garment (such as heat transfer printing, screen printing, sublimation print), their processes as well as their differences to help you select the right one for your needs.
Now, it’s time to go rhinestone.
So, what is a rhinestone heat transfer? How can you make your rhinestone transfer?
Please read on as we provide answers to the questions you might have about rhinestone heat transfer.
What is Rhinestone Heat Transfer?
Rhinestone (also known as strass, or artificial diamonds) are shiny and eye-catching imitation diamonds used to decorate jewelry or add sparkle to clothes and accessories.
Hotfix rhinestones used in rhinestone heat transfer are the rhinestones with flat backs and heat-activated adhesives that you can transfer onto your garment with the application of heat and pressure.
So, a rhinestone heat transfer can best be described as a collection of hotfix rhinestones arranged in a particular design so that you can heat press it onto your garment to decorate it.
How to Make Rhinestone Heat Transfers
Making your rhinestone heat transfer can seem like a daunting prospect since the rhinestone designs are a bit more difficult to create than the simple vector designs.
Fortunately, you can easily create a rhinestone design with the help of rhinestone software. Now, let’s see how to create your rhinestone heat transfer and the materials you need.
Materials Needed
- Hotfix rhinestones
- A pressing iron or a heat press
- Tweezers
- Rhinestone software
- Heat transfer paper or rhinestone transfer mask
- Rhinestone brush
- Cutter
- Squeegee
- Template board
- Template flock (stencil flock)


Step 1: Create a Design
Open your rhinestone design software and create a design for your rhinestone heat transfer. The software will create a design with dots to indicate where you can place the rhinestones.
Make sure you adjust the size of the dots according to the size of the hotfix rhinestones you are planning to use. The size of hotfix rhinestones ranges from 2 to 7 mm, with 3 and 4 mm being the most common sizes.
Step 2: Cut Out The Design
Load your template flock with its face up into your cutter. Export the rhinestone design you created to your preferred cutting software, adjust the blade and the cutting pressure, and send the design to the cutter to cut it out.
Normally, template flocks are cut using a 60-degree cutting blade at a heavier pressure.
Step 3: Peel The Template Flock
Remove the template flock from your cutter and peel it away from its liner to reveal the holes that you cut using your cutting machine. These holes will act as the placements for your rhinestones.
Step 4: Pour The Rhinestones
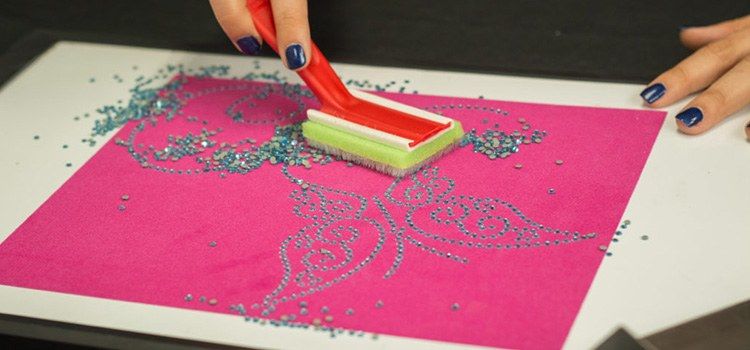
Now, place the template flock on your template board with its sticky side down. Pour the hotfix rhinestones over the flock in your template board and gently use your rhinestone brush to brush the rhinestones across the cut design.
Continue brushing until all the placement holes in the template flock are filled with rhinestones.
Most of the hotfix rhinestones will fall properly (with their shiny sides, up and the adhesive sides, down) into the holes, some may be too stubborn to fall into the hole, and others may fall upside down. In this case, you need to use your tweezers to position the rhinestones properly in the holes.
If you want to use different rhinestone colors, you can also use your tweezer to position the rhinestones in the hole, just as you want it.
Step 5: Use The Transfer Paper
Now that your hot fix rhinestones are in place, remove the excess rhinestones, then grab your transfer paper (rhinestone transfer) and cut a portion larger than your design to transfer the stones to your garment.
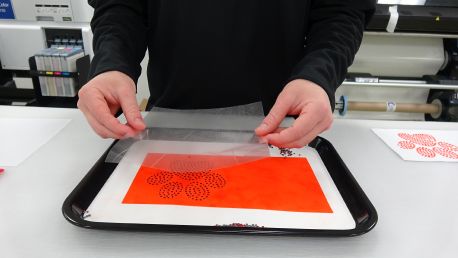

Do not peel off the liner (paper backing) before you cut; doing so before cutting will only create a mess.
After cutting the required size needed to transfer your rhinestone design, peel off the liner, and carefully place it on top of the design.
Apply pressure firmly across the entire rhinestone design that you have on your template board; this will make the rhinestones stick to your rhinestone transfer mask.
You can use your hand for smaller designs, but we recommend using a squeegee, especially for larger designs.
Step 6: Peel Rhinestone Transfer Mask
Gently peel your rhinestone transfer mask away from the template flock. Make sure all the rhinestones are sticking to the transfer mask.
If some of the rhinestones are not sticking to the transfer mask, just lay the mask back on the flock, apply more pressure to the affected area, and gently peel it off again.
Now, you should have all the rhinestones on the transfer mask. If you’re not ready to apply the design to your garment, place the transfer mask back on its paper backing (liner) to store it until you are ready to heat press it onto your garment.
You may notice that some of the fibers of your template flock stick to your transfer mask, you don’t have to worry about them as they will not stick to your cloth when you heat press it.
Step 7: Use The Heat Press
We recommend that you complete a short pre-press/pre-heat of your garment before you heat press the design onto it. This process will provide you with a smooth, even and wrinkle-free surface and help you remove moisture from the garment for a perfect transfer.
Now that you’ve prepared the garment and ready to apply your rhinestone design, place the transfer mask containing the design on the garment and heat press at 330 to 350 degrees Fahrenheit for 10 – 20 seconds.
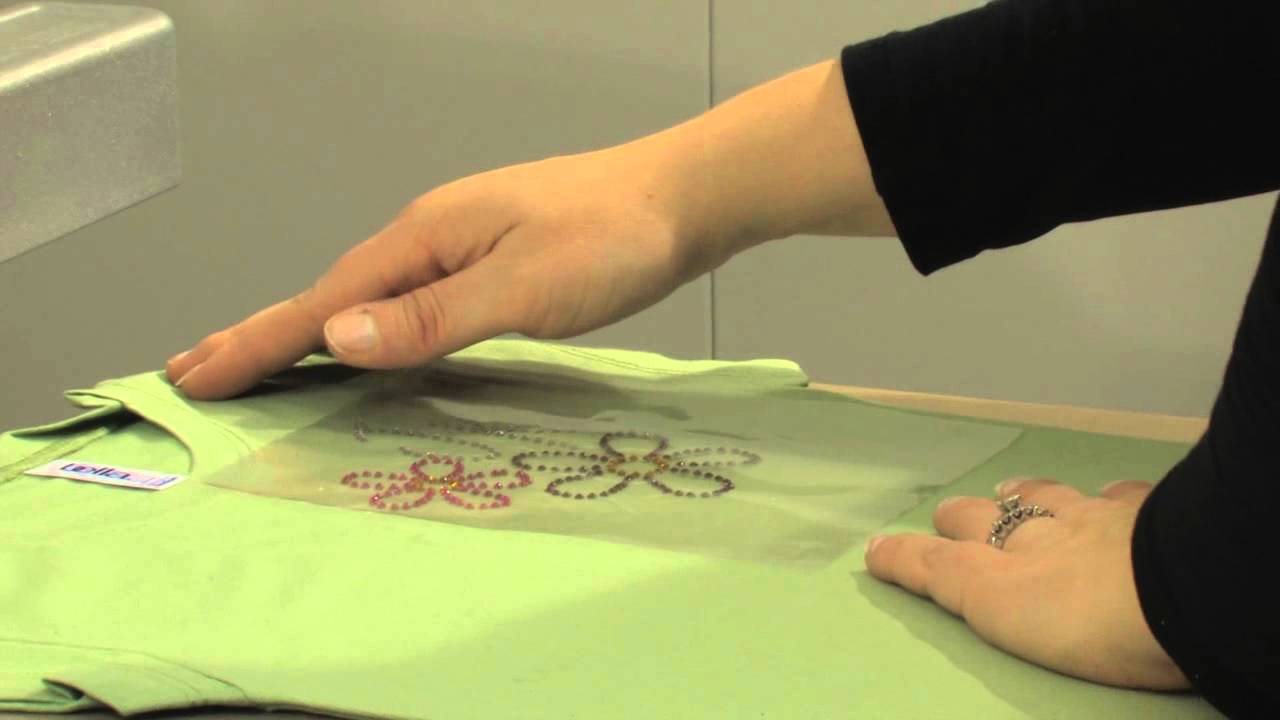

If you would be working with thinner garments (such as baby clothes, undergarments, women’s fashion shirts, etc.), place a piece of Teflon sheet or parchment paper between the sides of the garment (i.e., inside the garment) before you heat press. That will stop the adhesive from leaking through the garment and sticking the back of the garment to the front.
Allow it to cool for 5 to 10 minutes and gently peel off the transfer mask from your garment.
If you find any rhinestone that has not adhered to the garment, peel it off the transfer mask with your tweezers and place it in the right position on the garment and heat press again. Repeat steps 4 through 7 to design another garment with rhinestones using the same template flock.
Note
- The lower the heat pressing temperature, the longer the pressing time required.
- If you’re using a pressing iron such as a Cricut EasyPress 2, use the highest setting and heat press the garment for 40 to 45 seconds.
- Do not apply rhinestone to garments that cannot withstand the time and heat of transfer, especially the garments with “Do Not Dry Clean” or “Do Not Iron” inscription.
Congratulations – you have successfully made your rhinestone heat transfer! That was very easy, wasn’t it?
Rhinestone Transfer FAQs
Now, let us proceed to answer other questions you might have about rhinestone designs.
How Long Will The Rhinestoned Design Last On My Garment?
If you apply the rhinestones correctly, they should last the life of your garment.
Can I Wash My Rhinestoned Garment Without Damaging The Design?
Of course, you can! However, you should ensure that you applied the rhinestone transfer correctly as it is the only way your design can withstand the normal wear and tear of daily use.
When washing your rhinestoned garments, we recommend that you turn the garment inside out and wash it with cool or warm water using the normal settings on your machine. Do not wash with hot water.
Also, you should not dry clean the garment. Either you tumble dry it on low heat, or you hang it to dry.
Conclusion
Creating your rhinestone heat transfer is easy when you follow the instructions above. If you successfully made your rhinestone heat transfer, kindly share it with us.

