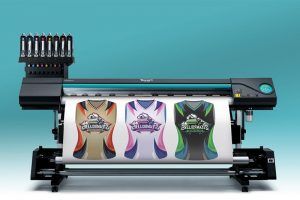
People are embracing custom decorated items now more than ever. The fashion-conscious generation of the day is crazy about custom-decorated apparel and other merchandise.
Opportunely, innovation has worked its magic and brought us sublimation printing. A new way of producing designs that penetrate the surface of the substrate to produce vibrant and colorful images that are long-lasting and resistant to scratching, fading, and cracking.
Nonetheless, contrary to what people think, sublimation is no child’s play. There is much more to sublimation printing than merely taking the bold decision to invest in the necessary sublimation equipment and set up a workshop.
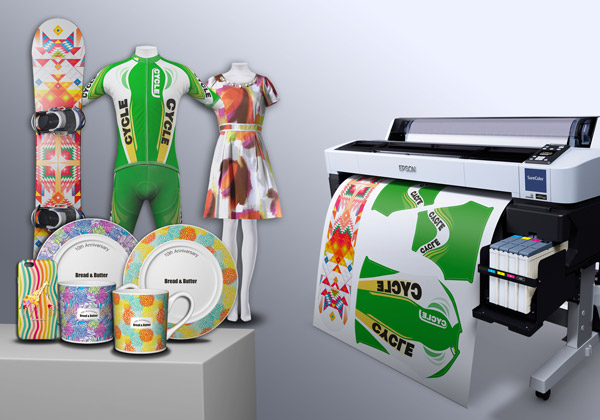
You also need to equip yourself with innate knowledge and understanding of the technique and grasp some tricks of the trade.
Thankfully, I have been lucky to be part of a team that, through decades of trial and error, has gathered immense experience and trick as far as sublimation printing goes. And I do not want to see you put in countless hours of research and practice.
Ahead, I’ve got you covered with everything you need to know to polish your mastery of the procedure and get you on your way to correctly sublimating your blanks.
Things to Consider Before Starting
Before you get down to designing and printing your alluring design, you need to consider various aspects.
Material Fabric
Please note that sublimation printing works by bonding vaporized sublimating ink with polymers in polyester or polyester coated materials. The sublimating blanks you settle for should, therefore, have a composition of at least 50% polyester or more such as Polyester, nylon, and spandex fabrics.
Sublimation printing will not work on natural fabrics like 100% cotton because the gaseous ink will not bond with the garment fibers due to the absence of polymers. The image in such material will appear faded and blurry, and won’t hold up for long.
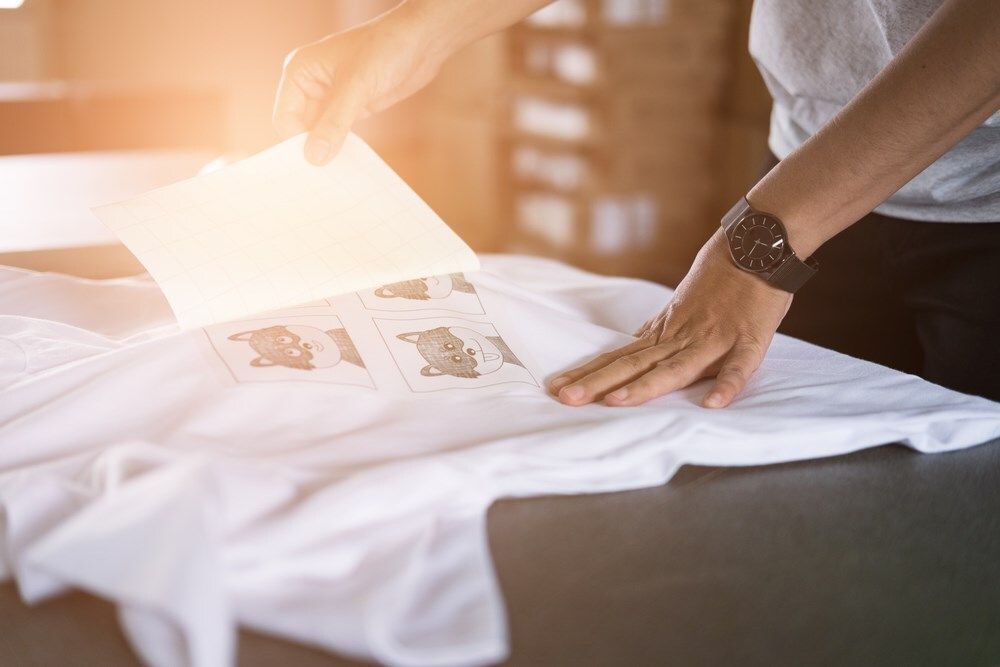

Make sure what you have for the sublimation blank has not less than 50% polyester composition. We recommend tri-blend fabrics rather than 100% polyester since they feel softer, and offer a wide variety of colors and fits.
Not just that. Look for materials that do not heat sensitive and can withstand the high temperature in the heat press without melting, getting ripped, or wrinkled. If you will be decorating hard non-fabric substrates such as aluminum, brass, glass, fiberglass, acrylic, and more, ensure the material is sublimation friendly.
Color of Sublimation Blank
You will want to note that the sublimation ink is translucent, and depends on the background to give a base color and brightness to the final image. That said, white blanks and other light colors do work best for producing vibrant, full color and lifelike images.
Ensure the surface you intend to print your image is white or as light-colored as can be. Remember, the darker the color, the less vibrant your ultimate design will be and black colors will entirely block an image out.
Equipment
Unlike your ordinary transfer processes, sublimation is quite a demanding process that calls for proper equipment. Ensure that the printer, sublimation ink, and paper are intended specifically for sublimation. Do not try to convert an inkjet printer to a sublimation printer if you’re not sure of what you’re doing. Rather, sacrifice and grab a sublimation printer.
What’s more, it is very difficult to achieve the consistency of heat and pressure needed for sublimation printing using a home iron. So, you will need to invest in a well-made heat press. Besides, if you will be printing on t-shirts, coffee mugs, and other smaller items, you need no more than a small format heat press.


Look for a flatbed heat press for thick and sturdier materials like aluminum and floor mats and a calendar heat press for physically large fabrics such as flags, mats, and outdoor signage. Those who will be printing on curved or irregularly shaped surfaces will want to get a 3D vacuum sublimation press for the best results.
Moreover, it is advisable to use gloves to protect your hands from burning when handling hot finished items. Teflon sheets will prevent ink from causing messes and stains on the platen of your press.
Also, if you will be working with blanks with irregular shapes, it wise to secure them firmly in place using a heat resistant tape that won’t melt when put in a heat press. Foam pillows are effective when printing on heat-sensitive fabrics and that requires protection from the harsh direct heat of the press. These pillows also prevent press lines.
Type of Design
If you’d like to save time and are not strapped for cash, you can save yourself the trouble and purchase a ready-to-press transfer paper. But if you are the handy type who loves personalized graphics printed on your blank as much as I do, then you can use your image from your computer. The image will have to be saved in digital form. If you have it in hard copy, you will have to scan it.
You’ll also need a computer and image editing design software like Adobe Illustrator Photoshop, or CorelDraw, for designing and processing the digital graphics image. While some sublimation printer manufacturers offer free software with the machine, some will require that you purchase the software separately.
Sublimation Printing on T-Shirts
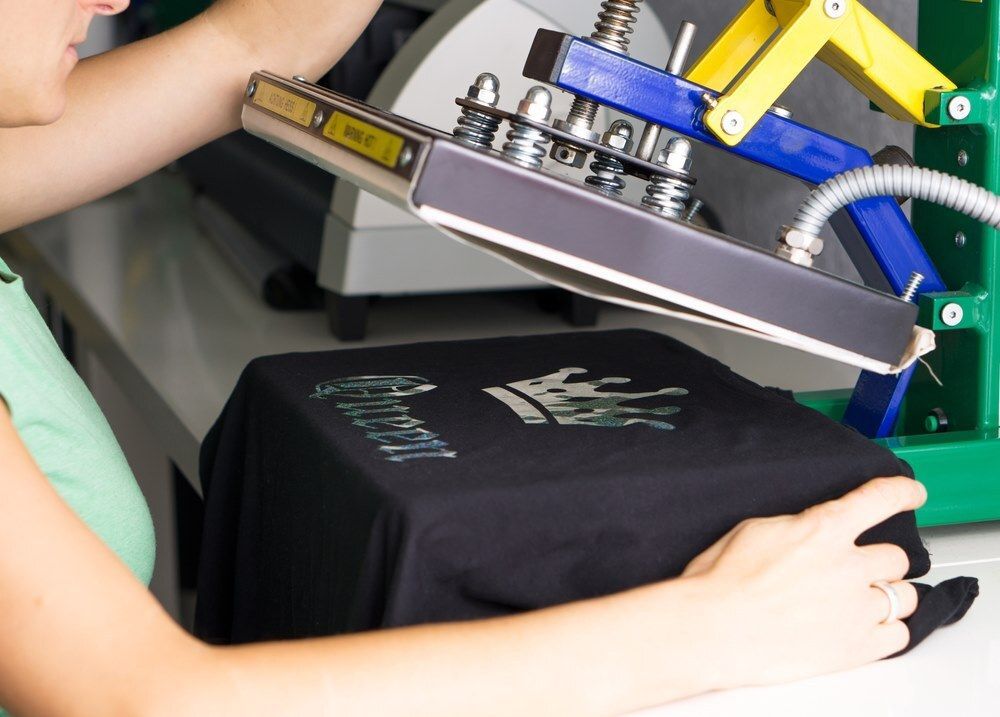

T-shirts are considered wardrobe staples by many for the simple reason that they are comfortable, practical, and versatile. If you have gone commercial, printing t-shirts is a sure way of getting a worthwhile return on investment due to the high consumer appetite.
When looking for blank sublimation t-shirts for your project, ensure what you get has a reasonable polyester composition to ensure striking best-in-class prints.
Needed tools & supplies
- A sublimation printer with dye-sublimation inks
- A flatbed heat press.
- Sublimation transfer paper
- Blank sublimation t-shirts
- Cotton pillow
- Digital image
- Pair of scissors or paper cutter
Step by Step Guide
Step 1: Find the image
Look for a high-quality image with stunning colors and save a digital copy in your computer as a jpeg file. Remember, the quality of your artwork will largely affect the quality of your final design. Use your image editing program to adjust the color profiles of your artwork, and manipulate the design the way you want.
Do not forget to mirror the image from the “reverse” or “mirror” setting in the print options, if there is a text or number on the image. If you do not have design software and do not want to spend extra, search for free resources available online.
Ensure the artwork is sizeable enough to fit the intended space without being cut out. If the image is too large, choose the “fit to scale” option and scale it down from the design software.
Step 2: Print the image
Test print the image on a blank piece of ordinary paper for a preview before inserting the blank sublimation transfer paper into your sublimation printer and printing the graphic onto it. Confirm that you are printing on the film side of the transfer paper.
Step 3: Weeding
Cutting out the artwork and trimming off or weeding any blank parts that are not colored around the image using a pair of scissors is the next crucial step.
When you trim it to size, you prevent the unprinted areas from being transferred to the printing surface and showing up as a thin film. Try to avoid touching the parts of the transfer paper with the image.
Step 4: Setting up the heat press
Check the instructions that are given with your transfer paper for the best temperature and time settings for your blank. Switch the heat press on, adjust it to the directed settings, and leave it for a few minutes to warm up.
Step 5: Test Printing
You do not want to throw away a finished t-shirt due to errors in the final image. Test print the design on a standard paper or an old garment you do not mind discarding. Confirm if the colors are well represented and the texts are well-positioned and aligned. As soon as you encounter any spelling or logo errors, make sure you fix them.
Step 6: Placement
Lift the upper platen of your heat-press, gently wipe the print surface clean to eliminate any lint or ink from the previous press run and dirt, dust, and particles. They may affect the quality of the final image.
Lay a cotton pillowcase on the lower platen and ensure it covers enough space to accommodate the T-shirt you’ll be printing. Place the blank shirt over the pillowcase with the print surface facing upwards.
Pre-press the blank t-shirt shortly for about 3 seconds and ensure the print surface is flat and free from any wrinkles and creases that may show up in the transferred image. Afterward, place the sublimation transfer paper facing down on the surface you plan to print on.
Step 7: Pressing the t-shirt
Pull down the upper platen to close the press before pressing the start button. Exert firm pressure to force the vapor to go exactly where it is supposed to. Sit aside and wait for the timer to go off before pressing the power off button, and pulling up the handle to open the press.
Give it time to cool, remove your garment, and then peel the paper off to reveal the image underneath. You can now discard the used sublimation transfer paper.
Sublimation Printing on Mugs
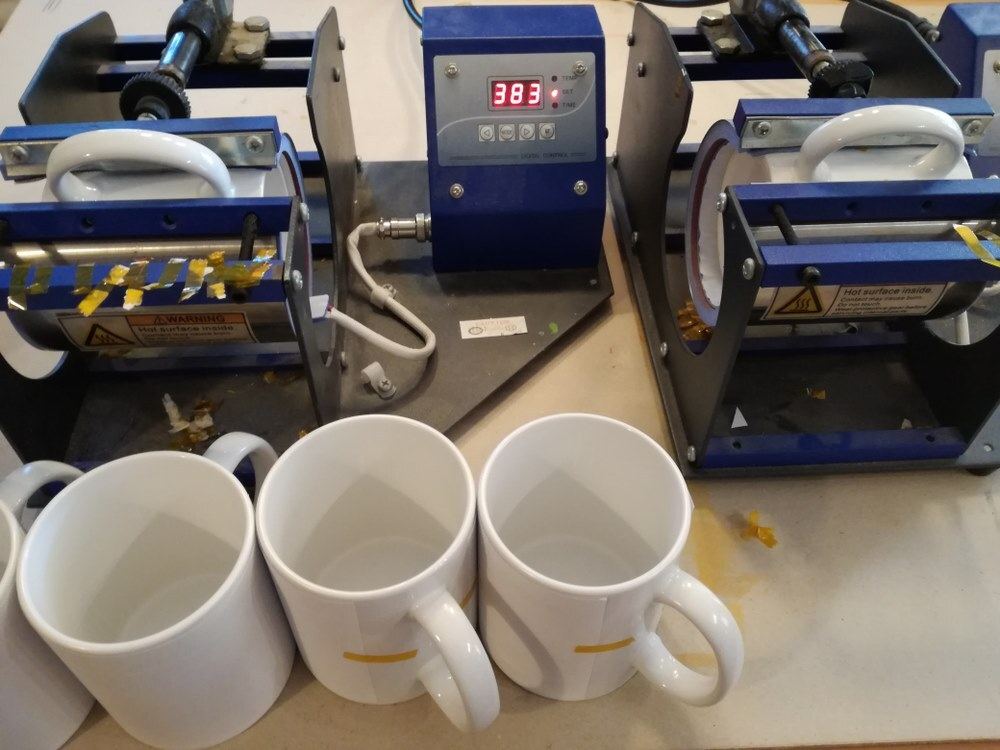

Sublimating on the cylindrical ceramic mugs means printing on rigid surfaces with curved and irregular shapes. This makes it difficult for ordinary heat flat presses to embed the image all around the curved surface. Ideally, you will need a dedicated mug press, purposely designed to print around these cylindrical items.
But if you cannot afford one, simply purchase mug wraps and use them with your ordinary heat press. That’s not all. Ensure the mugs you use have a special coating for sublimation printing.
Needed Tools & Supplies
- A sublimation printer with dye-sublimation inks
- A mug press or mug wraps
- Sublimation transfer paper
- Blank sublimation mugs
- Digital image
- Pair of scissors or paper cutter
- Heat tape
- Heat-resistant protective gloves or oven mitt
Step by Step Guide
Step 1: Find the image
Identify a high-quality graphic and save a digital copy on your computer as a jpeg file. Edit and customize the artwork using your design program and adjust the color profiles of the image to match your printer. Resize the image and ensure it is sizeable enough for the intended space and then reverse the image.
Step 2: Print the image
To avoid wasting your transfer papers due to errors, test print the image on a blank piece of ordinary paper. Check for any errors and fix them. After that, insert blank sublimation transfer paper into the sublimation printer and print the graphic onto it. Make sure you are printing on the film side of the transfer paper.
Step 3: Weeding
Using your scissors or paper cutter, cut out the graphic and trim off the blank parts that are not colored around the image to prevent the unprinted areas from being transferred to the printing surface and showing up as a thin film. Do not touch the parts of the transfer paper with the image.
Step 4: Setting up the heat press
While adhering to the given directions on your transfer paper, set the temperature to the directed settings, and leave it for a few minutes to warm up.
Step 5: Placement
Turn the transfer paper with the image facing the mug and wrap the paper tightly around the mug. Ensure the image is correctly placed and aligned. Using the heat resistant tape, secure the transfer paper firmly at each end.
Place the mug carefully into the heat press and ensure there aren’t any wrinkles or folds in the transfer paper. Rotate the paperback and forth to ensure you have about the same amount of space showing between the margin of the mug and the top and bottom of the paper
If you will be using mug wraps, you will need to slightly dampen the transfer paper or use a damp towel before placing the mug wraps around the mug. You can then place it in your heat press.
Step 6: Pressing the mug
Close the press gently without breaking the mug and punch the start button. Give it time until the timer to go off before pressing the power off button and opening the press.
With your protective gloves on, remove the mug and give it time to cool or place it in warm water. Peel the paper off to reveal the image underneath.
Dye Sublimation Tips & Tricks
- Always wash sublimation printed items in cold water and dry them in cold temperatures. Do not use harsh detergents like bleach but rather, use powdered detergents. Avoid using brushes directly on the printed image.
- When printing mugs, ensure that the handle of the mug is not in contact with the metal edges of the press. Every mug press varies in terms of operation, read the instructions on the user guide.
- You should also know Your Design Software. You should have knowledge of basic functions like cropping and re-sizing images to fit a specific item. Look for online tutorials and guides to get you ramped up faster.
- Test and train yourself regularly until you are perfectly familiar with the procedure and confident before working on the real project. Always use plain paper or discarded apparel to test print and check for errors before printing on the sublimation blanks.
- Keep your printer on if you are on a budget and would wish to cut down on costs. When your printer is switched after shutdown, a significant amount of the costly sublimation ink is used to clean the lines and print head. Therefore, keeping it on will reduce the consumption of the ink and save you a ton in sublimation ink purchases.
Conclusion
As the industry floods with garment and merchandise decorators, you need to be much more than a mere designer. Grasping the entire process of sublimation printing with take your design prowess to the next level and give you a competitive advantage over your friends. We won’t promise how long it will take you. But with this guide at your disposal, you will be pro before you even know it.
