Burlap is a classic fabric that manages to give even the most modern of homes a rustic feel. This makes it one of the most common fabrics for decoration.
One of the best things about burlap is that it’s very easy to make crafts using it.
In this piece, we have collected some of the best burlap sewing ideas for home decoration.
1 – Burlap Ottoman Cover
If you love the sweet combination of burlap and ruffles, this is the project for you.
Using this Burlap and Blue tutorial, you can easily make a burlap ottoman cover with ruffles at the bottom.
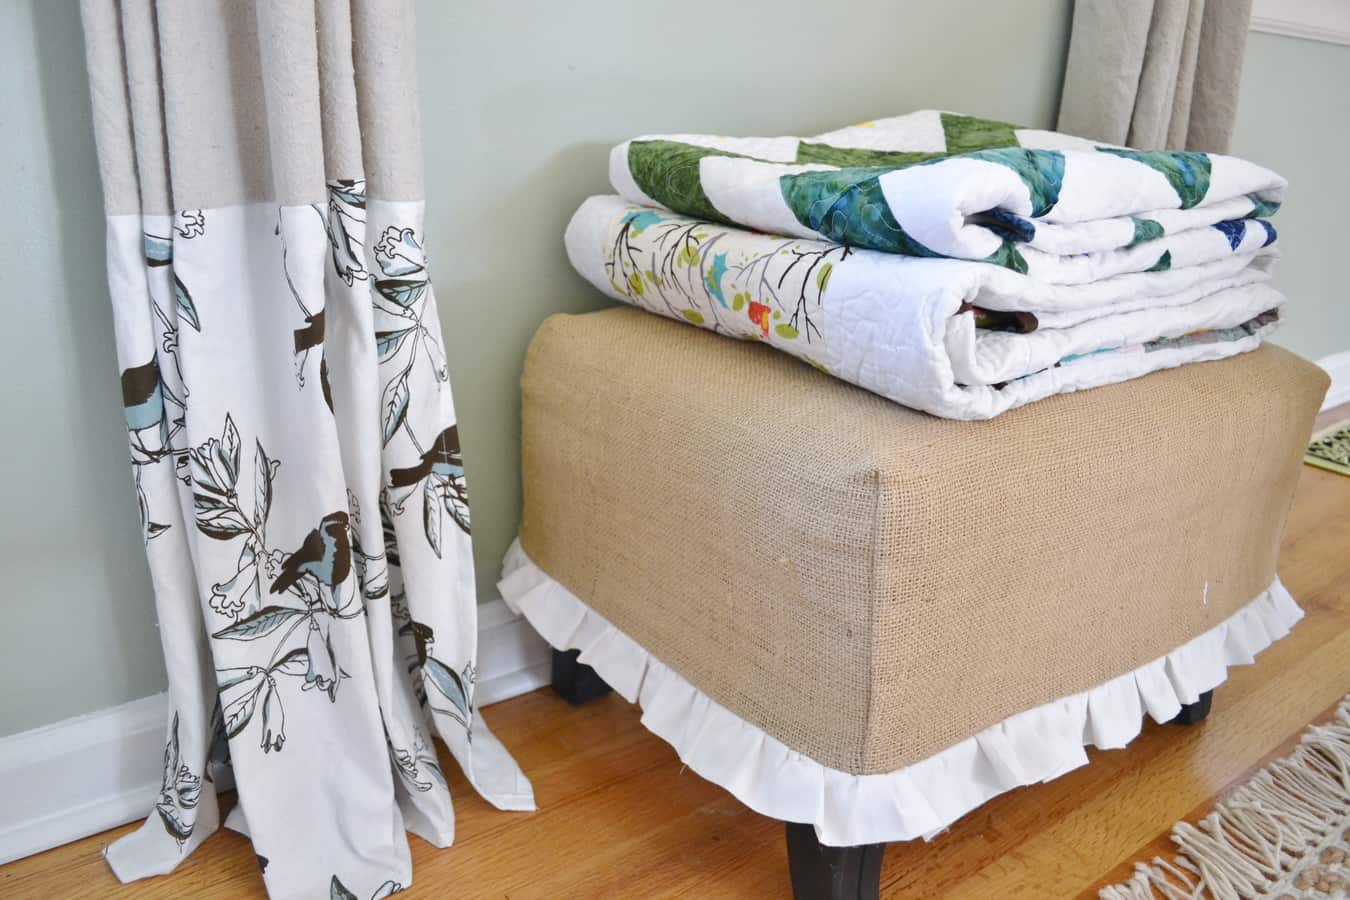
For this project, you will need some burlap fabric, some cotton fabric, a cheap fabric for lining and a glue gun.
You will first have to cover your ottoman with the lining fabric you chose and cut off the excess fabric.
The hanging sides should then be hot glued. Your burlap should then be placed over your ottoman to get the right sizing.
The burlap at each corner of your ottoman should be pinned in order to avoid creating a loosely fitting ottoman cover. These pins will indicate where you will sew.
After pinning, sew all the corners in a straight line and eliminate excess fabric.
You are then free to make the ruffles using your cotton fabric. These ruffles are to be attached to your ottoman cover at the base.
2 – Painted Burlap Table Runner
Your dinner table is yet another place to showcase your home décor skills. Make your dinner table more interesting with this Painted Burlap Table Runner.
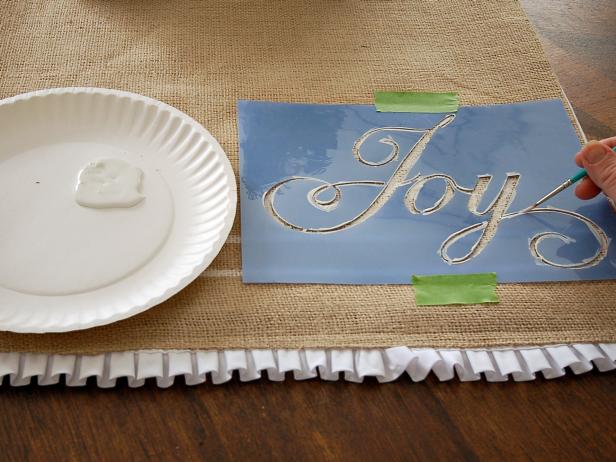


To make this, you will need a size 6 flat artist brush, a 1.0 liner brush, painter’s tape, white acrylic paint, yardstick, scissors, white pleated trim and white all-purpose thread.
More importantly, you’ll need burlap and white cotton twill which are 20 inches longer than the table length. These two fabrics will be sewn together, and the white pleated trim will eventually be sewn on them.
The final touch to this masterpiece is the paint lettering that you can choose to do freehand or using a stencil.
3 – White Burlap Bunnies
Making burlap bunnies is a nice way to add some life to your house, especially if you have kids.
These white burlap bunnies from the Cottage at The Crossroads are quite easy to make.
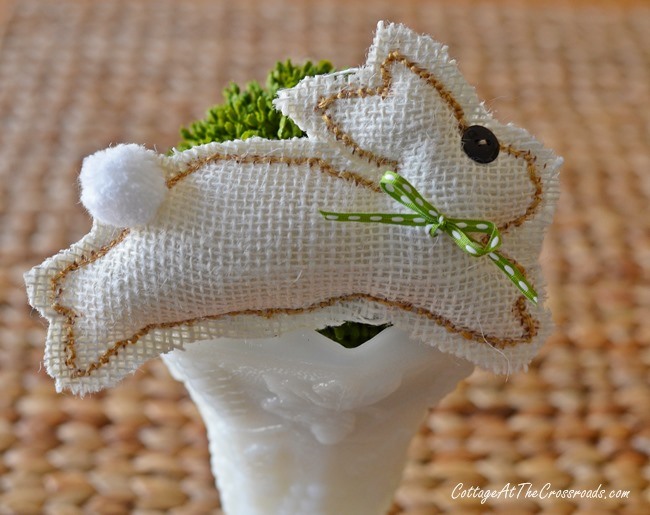


All you need is some white burlap, scissors, black buttons, a brown marker and embroidery thread.
You simply need draw out the pattern on two pieces of fabric and stitch them together leaving a small space for filling.
Then all that’s left is filling the bunny out, trimming the excess fabric and sewing the buttons as eyes.
This project is an easy way to add a little oomph to your home.
4 – Barrel Shade Chandelier
In this day and age, you can easily make your very own burlap barrel shade chandelier like this one from Burlap and Denim.
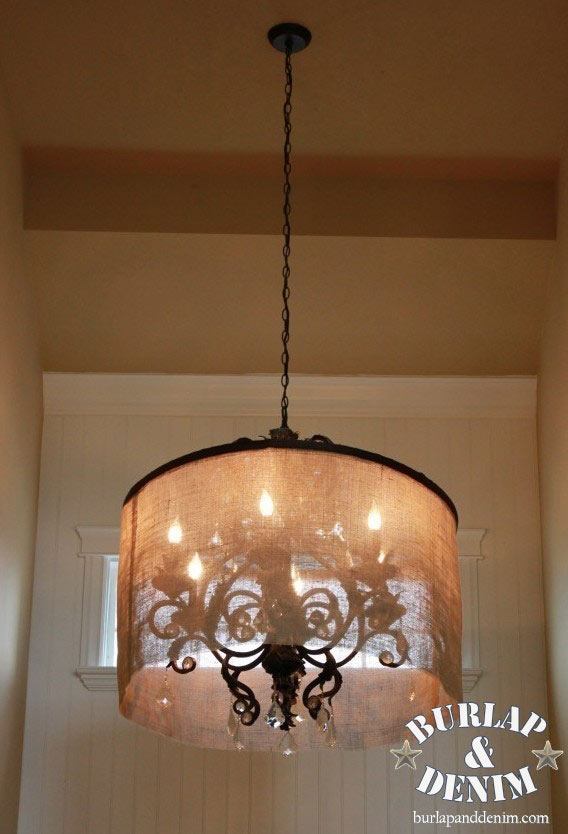


It doesn’t require much. Just some burlap, hula hoop, ribbon, wire, fishing line, and thread. The creation process is also easy.
First of all, you will have to iron your burlap, fold it up lengthwise and cut it along the fold. The two ends should then be pinned and sewn together.
From the seam line, around a half of the hula hoop circumference should be measured.
The seams are then sewn, trimmed and ironed. Now it’s time to insert the hula hoop into the burlap tube, pin the top edge around it and sew along it. Eventually, you will also have to insert the fishing wire.
Although it seems like a lot of work, the final results are worth all the trouble.
5 – Burlap Christmas Ornaments
Burlap Christmas ornaments are really easy to make and can be a project you undertake with your kids. This will definitely be fun for all of you.
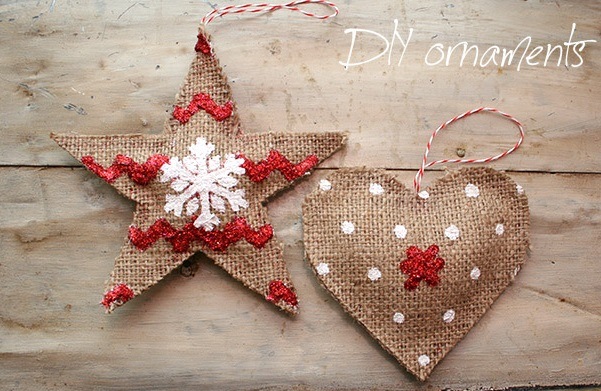


Some of the stuff you need includes burlap, stencils, thread, scissors, glitter, paint, glue and a brush. These ornaments can be created by either sewing or using glue.
A good tutorial for this project is available at Trinkets in Bloom. Here they simply traced out two patterns for each ornament, decorated them and glued them together.
Afterwards, the ornaments were simply stuffed.
Needless to say, the procedure for this project is pretty straightforward.
6 – Burlap Stenciled Placemats
Yet another creation for your dining table, the Burlap Stenciled Placemats are to die for. Not only are they pretty, they are also easy to make.
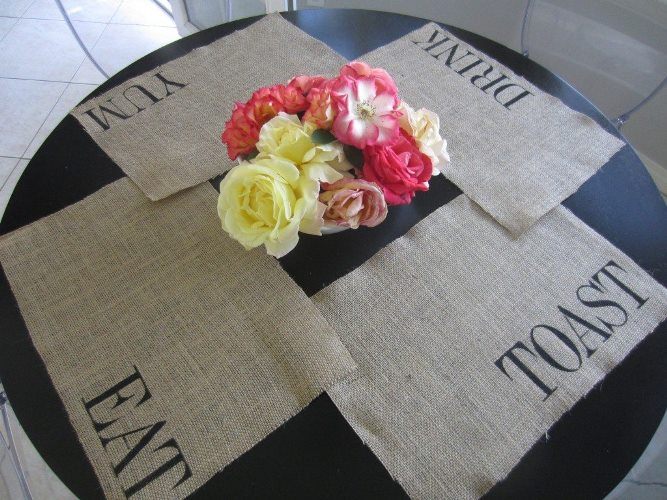


All you’ll need is burlap, craft paint, fray check, spouncer, stencils, scissors, stencils and straight edge.
In this tutorial, a 18.5 by 12.5-inch placemat is created. This process starts by first measuring and cutting out the fabric and washing it.
After the fabric has dried, you are now ready to start stenciling. With projects like these, the less paint you use the better.
The end products are really cute.
7 – Burlap Napkin Ring
Another worthy home décor project is this Fab You Bliss Beaded Burlap Napkin Ring.
This napkin ring is simple yet elegant. It is sure to add a touch of sophistication to your home. Fortunately, it’s not difficult to make.
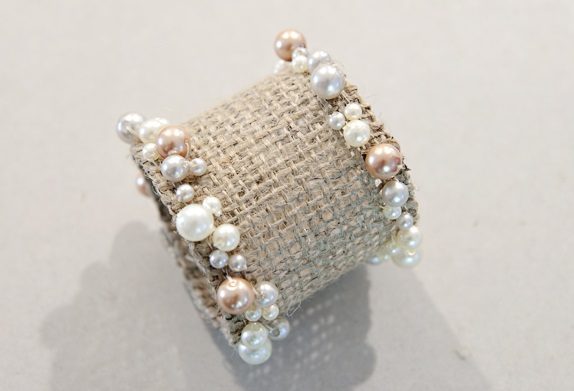


The supplies needed for this project include thread, tape measure, scissors, a home sewing machine, a hand sewing needle and assorted beads.
The ideal size of burlap fabric you need to cut out for this project is 7.5 inches long and 2.5 inches wide.
To avoid fraying, you will have to fold and sew a quarter of an inch around all edges.
You can then start inserting your beads in whatever arrangement you want along both lengths of fabric. Leave about 1.5 cm at the end of the fabric.
Finally, you’ll just need to fold the unfinished end under the other one and hand stitch them together. Any gaps between the beads should be filled.
See also: Gemini Die Cutting Machine Review
8 – Burlap Utensil Holders
Utensil holders are one of the most convenient things you could ever own. If you don’t have any yet, you can make some using burlap.
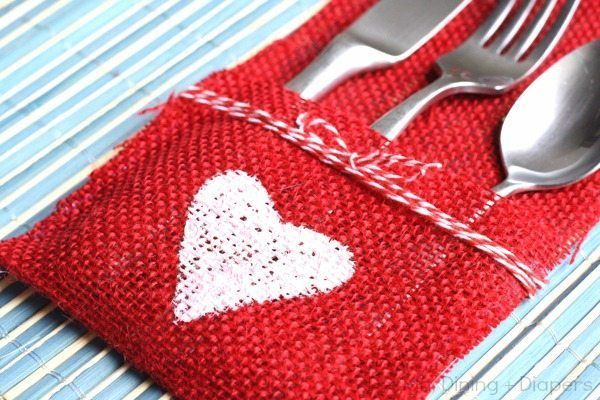


You can even choose a certain festive theme for them as done for these Valentine’s Day themed utensil holders from Taryn Whiteaker.
They are made using red ¼ yard burlap, scissors, paint, a paintbrush, a hot glue gun and baker’s twine. This is one of the easiest home décor projects.
All you need to do is measure out the fabric you need, fold it up a little and glue the two open sides.
The painted heart and baker’s twine are just for embellishment. You can decorate your utensil holders as you please.
9 – Burlap Pumpkin
As much as Halloween has already come and gone, it’s never a bad time to make a pumpkin craft such as Sondra Lyn at Home’s Burlap Pumpkin. This is yet another easy-to-make decorative craft.
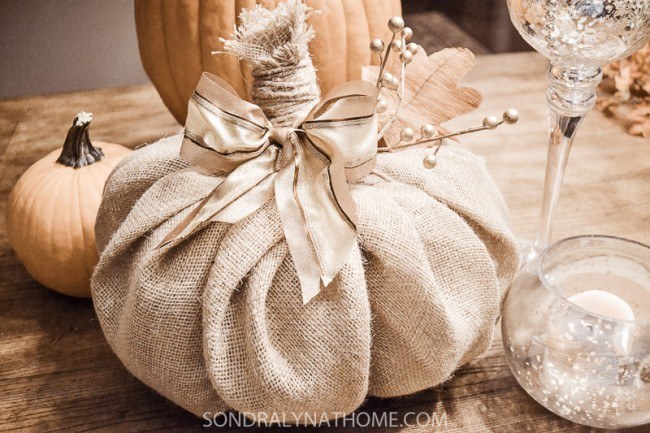


This project requires a yard of burlap, a hot glue gun, twine, grocery bags, ribbons and stones or beans.
After gathering all your supplies, find the center of your fabric by folding it in half twice. You should then round your edges to form a circle.
Place four 48-inch twines symmetrically on the fabrics back and hot glue a circle burlap patch where the twines intersect.
After that, you just have to stuff a paper bag with stones/beans and paper bags, place it in the center of the fabric and tie it up.
10 – Burlap Topiary Tree
We sometimes forget that our front porch is also a significant part of our home and like the other parts of our home, it also needs some decorative attention.
Fortunately, we have just the thing for you in the form of this Burlap Topiary Tree.
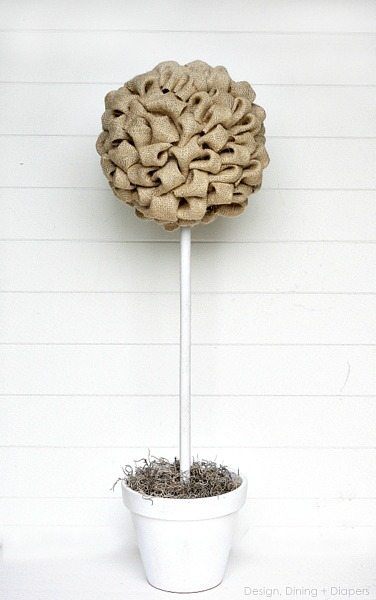


For this project, you’ll need 3 yards of burlap, two Terracotta pots, white spray paint, pins, two dowels, two green Styrofoam blocks and four Styrofoam 8-inch half balls.
The process of making this tree is pretty straightforward.
You will first have to spray paint the pots and dowels. Secondly, place the block at the bottom of your vase and plant the dowel on it.
After this, you should glue two half balls together to form a circle and perch it on the dowel.
Finally, cut your burlap into 4” by 4” pieces and make a pocket with each piece by holding its corners and folding in the remaining two.
These pockets should then be pinned to the Styrofoam circle until it’s entirely covered.
11 – Burlap Bubble Wreath
Another decoration you can create for your outdoors is this burlap bubble wreath from Today’s Fabulous Finds.
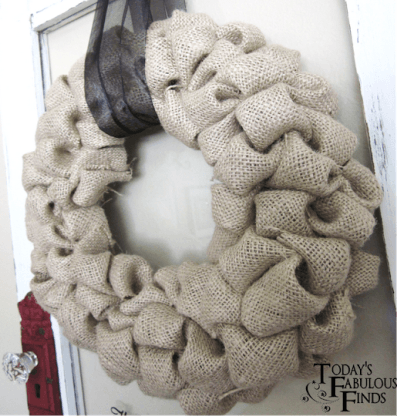


All you need to create this cute wreath is one to ten inches of foam wreath, 1.5 yards of burlap and about 100 pins.
This project requires that you pin many pockets of burlap onto a foam wreath. These pockets should be made in the same way as we have previously explained in the making of a burlap topiary tree.
This is one of the easiest home décor projects out there.
12 – Burlap Curtains
Your choice of curtains generally sets the mood of your home. Getting some burlap curtains will definitely add some personality to your home.
When it comes to making these curtains, you can either manually sew them or use other techniques such as using stitch witchery.
This is how the folks at Four Generations One Roof made their burlap curtains.
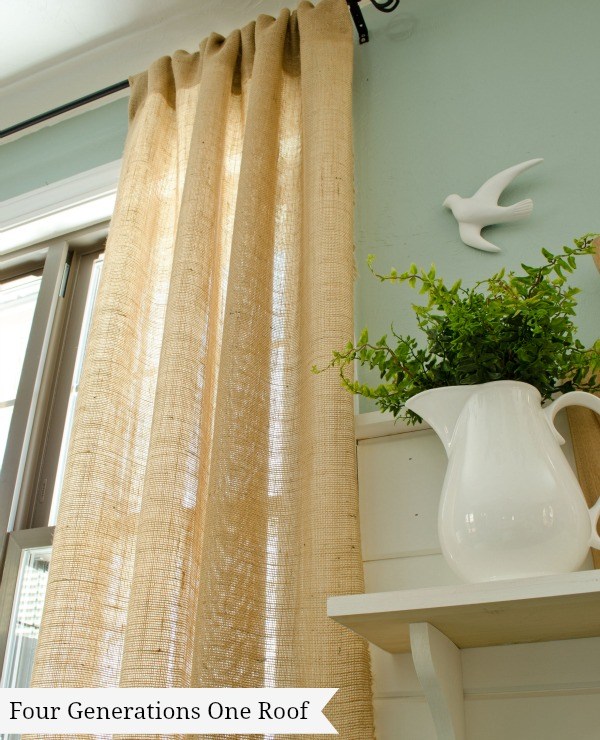


Apart from stitch witchery, they also used pins, a pair of scissors and of course burlap fabric.
First of all, fold a hem and use your stitch witchery where you would usually sew a hem.
Then if you want a hemmed look, you can go ahead and use stitch witchery on all the other sides of the curtains.
Ultimately, it’s up to you if you want to use manually sew or stitch witchery.
13 – Burlap Christmas Stockings
This is yet another Christmas decoration that is quite easy to make.
According to the Crafts Passion Blog, all you need is some burlap, muslin, linen, twine, embellishment and sewing tools.
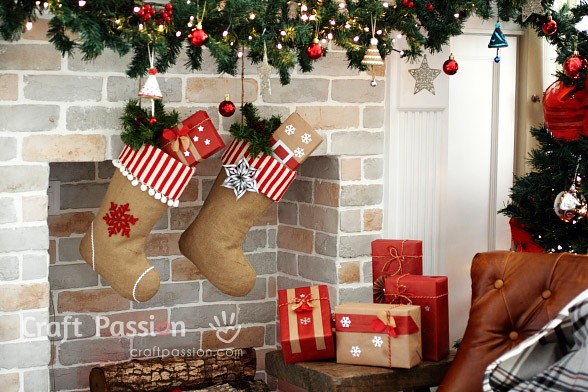


Generally, you are required to sketch out the stocking pattern on the fabric, cut it out and sew all its sides apart from the entrance.
After turning the project right side out, you can now add any embellishments you so please.
This project is very fun and easy. It’s one of those projects you can undertake as a family.
Read more: 35 Easy Sewing Projects for Kids
14 – Burlap Lampshade
If you love ruffles as much as I do, you will appreciate this Tatertots & Jello Lampshade.
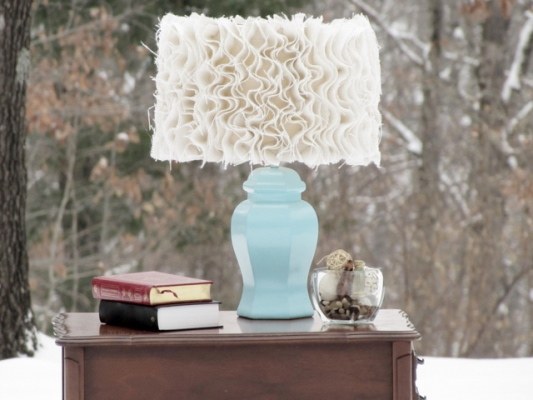


You will be happy to know that this lampshade only requires a shade, some burlap, and a glue gun.
First of all, you need to cover your shade with burlap.
You will then cut the rest of your burlap into strips. These strips should be twice the width you want your ruffles to be and as 1.5 times longer than your lampshade.
These strips are to be folded in half, lengthwise, ironed and glued to the shade.
The strips will turn out to be straight at the point where they are glued and bent in other places, therefore creating ruffles.
Another part of your home that also needs decoration from time to time is the mantel. This I Heart Naptime Burlap Banner can help with that.
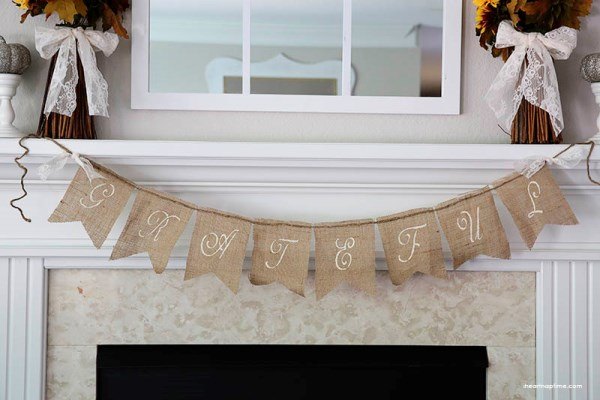


All you have to do for this project is to download a banner template, trace it out on your burlap, cut out the patterns, decorate them and hot glue a piece of jute to them.
Whatever you want to stencil on your banner is entirely up to you. You may even want to decorate the banner further by including some lace.
When you’re done, tie this banner on your mantle and enjoy the amazing view.
16 – Burlap Cork Board
For a home décor project with a lot of functionality, you should go for this Uncommon Designs Cork Board.
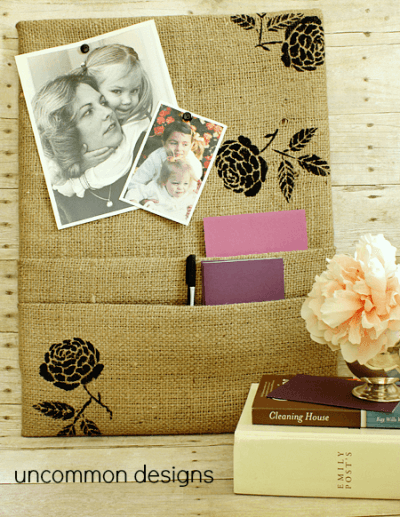


You will need some burlap, acrylic paint, a cork memo board, iron, stencil, paint dabbers and a hot glue gun or staple gun.
The first step in making it is ironing it. Next, staple or glue it to the top and bottom of the memo board using its edges.
To make pockets, fold some burlap and iron it down. Do this twice to get two pockets.
Secure the pockets and trim any excess fabrics. Now you can decorate the cork board by painting whatever pattern you want.
17 – Burlap Coasters
Coasters come in handy whether you love the indoors or the outdoors. They manage to protect your precious furniture from beverages.
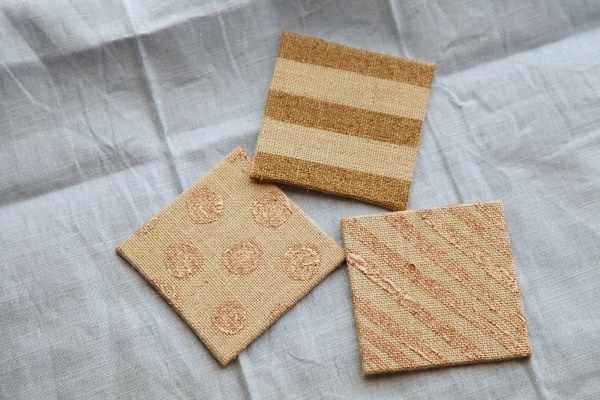


According to Alyssa and Carla, the main thing you need is 4” by 4” burlap canvas panels.
Once you have decorated the panels, you are set to go. You may decide to paint them using freehand or stencils.
This is really cheap and affordable and can be undertaken using leftover materials from previous projects.
This not only prevents wastage but also saves you some money.
18 – Burlap Vase Cover
Almost anything can be decorated these days, even vases.
You will be happy to know that burlap can also be used to make some of the most beautiful vase covers. A good example of one is this one from Thistle Wood Farm.
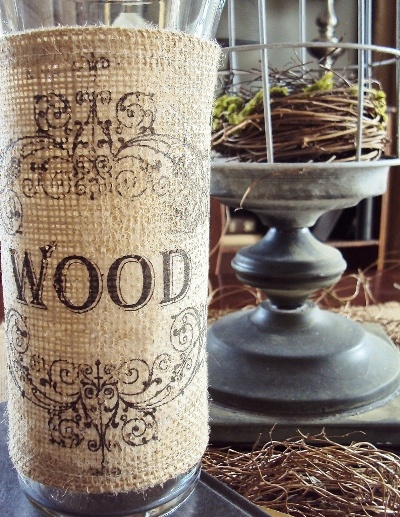


The first thing you’ll have to do is to measure and cut out your fabric. Measure the circumference and height of your vase then add ¾ inches to this measurement.
Once you have cut out your fabric, fold a ¾ inch border and sew.
Sew a strip of Velcro on one side of your fabric and then on the other side. These Velcro strips are what will keep your cover securely on the vase.
19 – Burlap Pillow
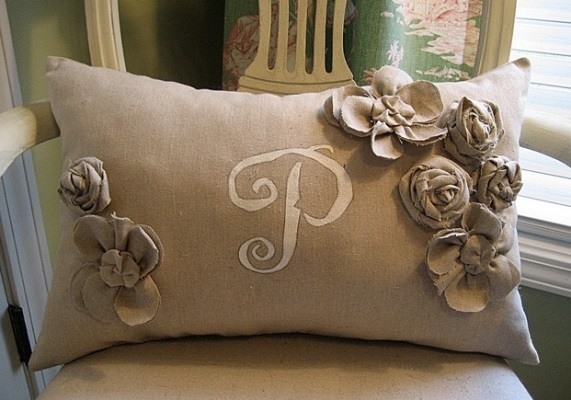


The only part of this Confessions of a Plate Addict project that is a little complicated is making the flowers.
However, they are not a compulsory part of the project. For the pillow, what you need to do is measure and cut out the pillow pattern and simply sew it.
You may also decide to paint it either using free hand or stencils. Whatever you decide, this project will definitely give your house a homely feel.
20 – Hurricane Lantern
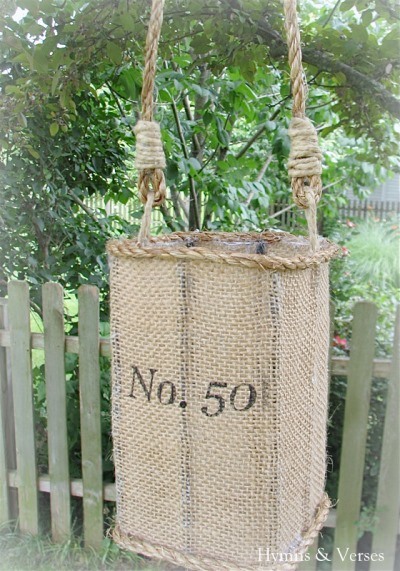


To make a hurricane lantern, you will need burlap, jute rope, number stencil, garden twine, acrylic paint, a glue gun and an iced tea container.
You will start by cutting the top of the container.
Next, cut the cord into six pieces each measuring the height of the container and glue each one on the corners, middle front and middle back of the container.
Use your garden twine to create a loop and glue it to the left side of your container.
Continue to glue this twine across the base of the container till you get to its right side and make a loop there too. Glue this loop to the right side of the container. Then use glue on the six black cords to stick burlap around the container.
Finish the hurricane lantern off by gluing the jute cord to the very top of the container.
If you so wish you can use the number stencil to indicate a number on your project. Now all you have to do is place a battery-operated candle inside it and hang it up.
Read more: 8 Basic Steps to Sew Leather by Hand
21 – Burlap Magazine Rack
For those of us who are addicted to reading magazines, a magazine rack is a worthy investment.
Making one at home is definitely cheaper than buying one. It is also very easy, as demonstrated by The Graphics Fairy Blog.
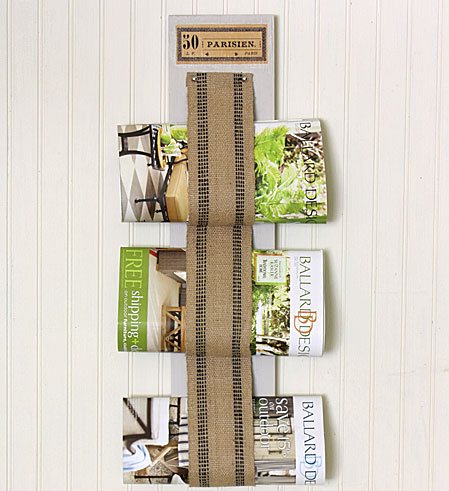


For their project, they used a 1×6 pine which is 24 inches long, jute webbing, the print of a French label, Mod Podge, and other tools.
To start off, you should paint your pine and prepare your French label. Next, use the Mod Podge to stick the label to the pine.
Attach the jute webbing on the opposite side of the board using a hammer and tacks.
Measure 10 inches, fold, then measure 7 inches and tack it down. This is how the loops are made.
Continue until you reach the end of the board.
22 – Yo-yo Burlap Candle Wraps
This 4th of July-themed candle wrap by The Country Chic Cottage are truly a worthy addition to your home. I mean, just look at them, they are undeniably really cute.
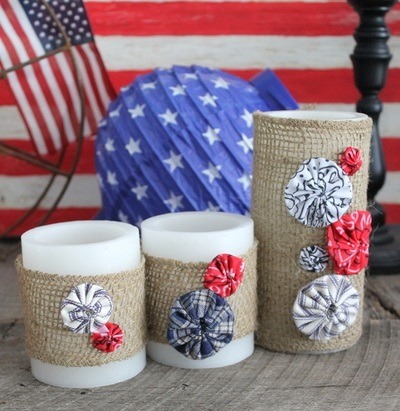


To make one, you will have to employ the use of burlap ribbon, fabric, yo-yo makers, candle sleeves and hot glue.
Use your yo-yo maker to make your yo-yos. It comes with instructions. You will use it to pinch your fabric which you will then sew as instructed.
As for the burlap ribbon, you’ll simply have to wrap it around the candle sleeves and join the ends with hot glue.
Finally, simply hot glue the yo-yos to the ribbon and you’re practically done. This project is fast, easy and convenient.
23 – Burlap Garland
With only burlap ribbon, bobby pin and string, you can make this impressive Southern DIY Diary burlap garland.
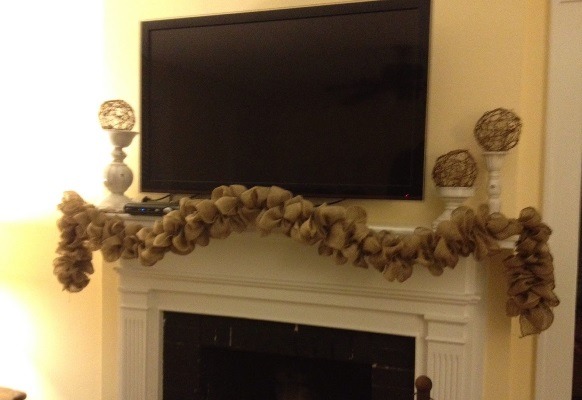


This simple process starts by tying a knot around the bobbin pin. Measure 4 feet of the string and cut it.
The other side of the string should be tied to the bottom right corner of the burlap.
You should then weave the string through the fabric in a zigzag pattern. This produces puckers.
Once you have reached your desired length, you can now hang it on your mantel.
24 – Burlap Flag
If you are looking to show your patriotism through decoration, we have just the right project for you.
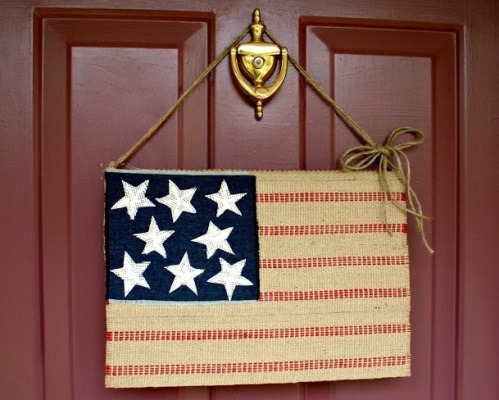


You can make this Somewhat Quirky Design Burlap Flag. You will need twine, scissors, glue, burlap, fray check, blue fabric and white fabric.
You will have to glue the burlap onto a book or board and glue a blue fabric or denim on top of it.
Then you can cut out stars and stick them. This project is really fun and easy.
25 – Burlap Flower Pot
Lovers of flowers know how important flower pots are. Fortunately, you can easily make your own on your own, saving you some money.
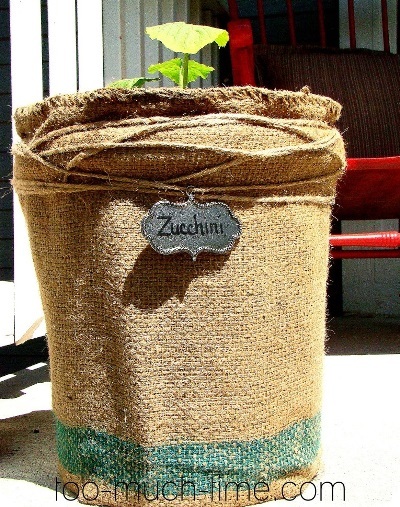


You will need a 5-gallon bucket and burlap coffee sacks, scissors, jute twine and metal labels.
This project is just about hot gluing the burlap coffee sack on the bucket and securing it with the twine. The metal label just serves as a decorative accessory.
The Bottom Line
In conclusion, there are an endless number of burlap sewing ideas for home decoration out there.
Needless to say, burlap is an undeniably popular fabric that is not going out of style anytime soon. Its ability to be simple but yet elegant and classy is something to be admired.
