In improving your embroidery skills, you should try to experiment with the other tapestry styles so you could practice creating an intermediate level of embroidery art.
Usually, embroidery involves a flat form of stitches that emphasize the image and designs.
The modern way of producing a finely-detailed, fashionable, and high-quality masterpiece is through the integration of innovation into the fundamental design to make the embroidery a professional art.
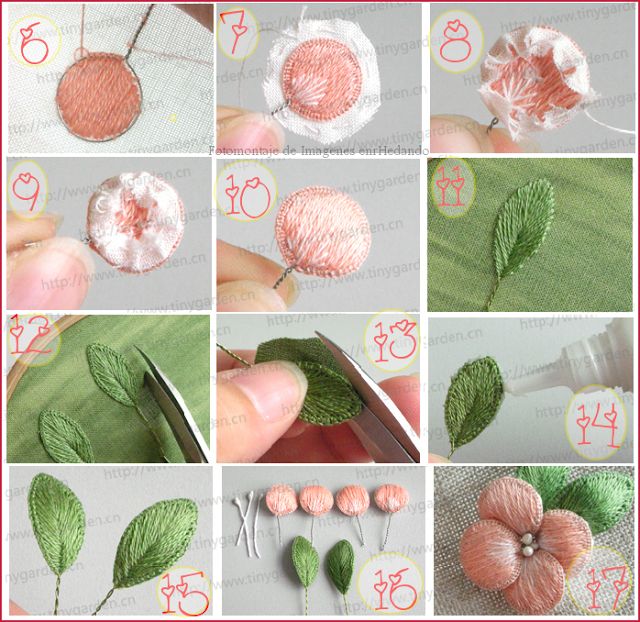
Simple embroidery can be a remarkable creation if combined with dimensional effects. This type of embroidery is known as the stumpwork.
Making the design into a 3D effect by using a coated paper wire is the key element that makes a stumpwork differently from the rest of the embroidery styles.
What Are the Uses of Stumpwork Embroidery?
Stumpwork is not only limited to a display and place it on a frame rather you can attach the stumpwork on the bags, pants, blouses, stuff toys, home fabric amenities, caps, curtains, and even shoes to enhance the feature and appeal of the appearance of the object.
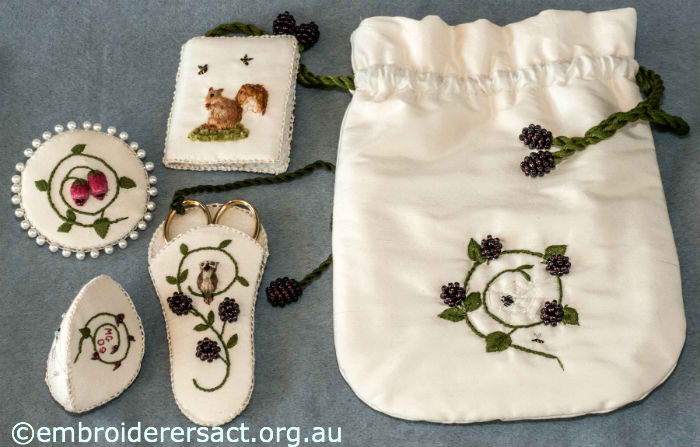

The stumpwork is a trendy voguish art applied nowadays because of its ability to increase the aesthetic nature of an object or textile.
How to Create Your First Stumpwork?
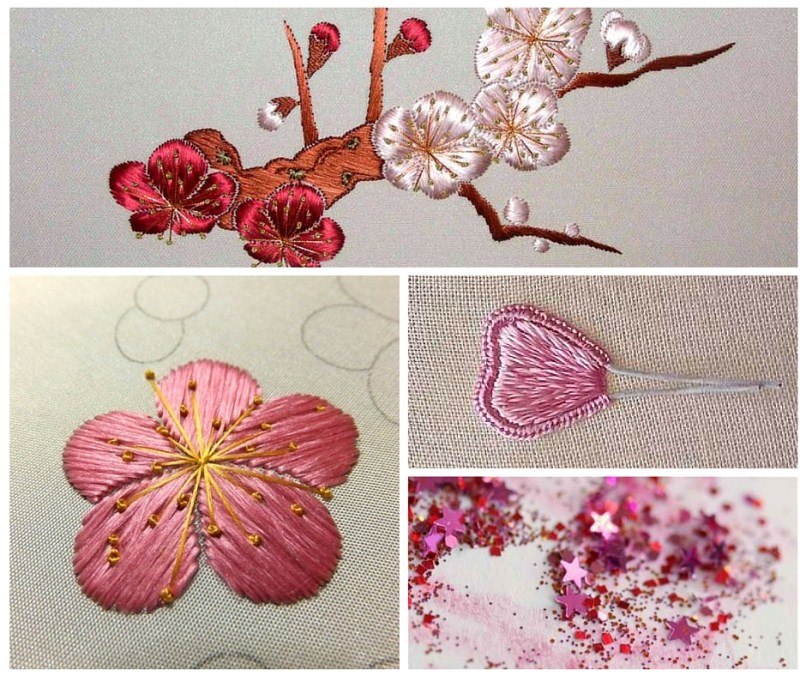
For neophytes, a flower image is usually the beginner’s choice in practicing stumpwork art. The figure of a flower is not too complex as a starting point in stumpwork embroidery.
Its petals, leaves, stems, and vines follow a basic contour; hence, it is a helpful way to practice your first stumpwork.
Whenever you start stitching your stumpwork, be sure to check all of the necessary materials if they are complete and available.

Step 1 – Preparation
Prepare the materials needed for the stumpwork art such as the background textile, needle, woven cotton, wire coated with paper, embroidery flosses, beads, sequins, and the stumpwork pattern for the flower image.
Be sure to select the best quality of embroidery flosses to make the stumpwork’s appearance elegant and pleasing to the eyes.
You may draw your own flower image or choose from the internet and modify it so you can personalize the style of the flower.
Step 2 – Hooping
Place the background textile on a tight hoop for a stable foundation when you do the needlework so that when you insert the needle back and forth, the hoop will not be shaky and the image will not be deformed.
Step 3 – Trace the Pattern
Trace the stumpwork flower pattern onto the textile by using any writing tools that produces a thin stroke such as a ball pen or a pencil.
In this way, you are guided with the pattern of the image as you follow its contour, angles, and lines.
Step 4 – Embroider the Background
You may now start embroidering the background textile with the different floss colors that you’ve picked to enhance the beauty of your flower stumpwork.
By following the trace, start tailoring the background image such as its stems, or vines. You can check online regarding the different tapestry techniques in sewing the background of the image.
Be sure to use a thimble so that when you sew, you will not prick your fingers with the sharp pointed needle. In addition, try not to make the thread loose as you sew the background textile.
In addition, try not to make the thread loose as you sew the background textile.


Step 5 – Create the Petals and Leaves
On a separate cloth, stitch the wire coated with paper onto the woven cotton forming the petals and leaves. Be sure not to cut the excess wire because it will be used to tighten the stumpwork onto the background textile.
Be sure not to cut the excess wire because it will be used to tighten the stumpwork onto the background textile.
Step 6 – Cut the Finished Petals and Leaves
Thereafter, cut the finished petals and leaves from the woven cloth to be attached on the background textile that you’ve created in step 4.
Step 7 – Attach Petals and Leaves to the Background
Attach the petals and leaves on the background textile by inserting the excess wire on the textile and folding the excess wire at the back of the textile for a stable stumpwork.
As you insert the petals, you may now form the image of a flower. It depends on you on how many petals and leaves that you want.
Step 8 – Decorate Your Artwork
You may add sequins, glitters, and beads by sewing them on the textile to add more beauty in the art.
You may put the sequins, glitters, and beads on the petals, leaves, stems, vines, or at the background of the textile to add some glitzy effects.
Step 9 – Finish
Finally, unhoop the textile and the stumpwork masterpiece is ready for display or to attach it to the other objects or apparels to enhance their appearance.
Read more: Best Die Cutting and Embossing Machines Review
Conclusion
Creating a stumpwork requires patience and perseverance. You have to sew every now and then to finish the formation of the image and change the colors of the floss to enhance the effects.
It is recommended to continue practicing this craft to improve your embroidery skills. You may also check books or guidelines via the internet to study the different techniques in sewing stumpwork.
