Brother sewing machines are the long-established and most popular sewing machines of all time because of their patented technology and quality parts to produce efficient stitches.
In this article, we will tackle the steps on how to thread a Brother sewing machine.
First of all, you have to master the different parts of the Brother sewing machine because these are relevant in following the threading steps.
Thereafter, you may now start your threading guide by thoroughly reading this threading process.
Threading a Brother Sewing Machine: Bobbin Winding
As the first step before you start sewing, you should set up your spool of thread, bobbin, and thread because these steps are a crucial part of the threading process.
Just follow this guide and learn how to make the first move!
1. Locate Your Spool Pin and Place the Thread
Turn on your sewing machine.
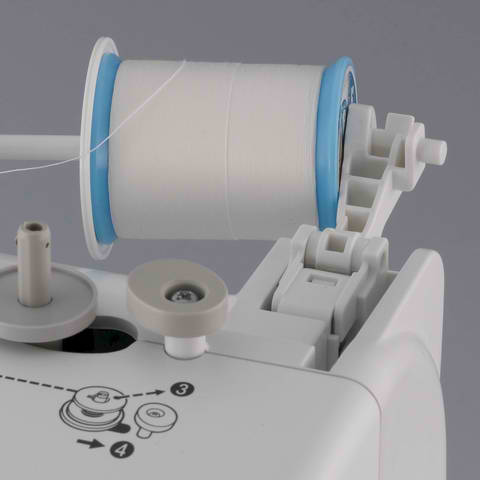
Place the thread on the spool pin, usually found on the upper right part of your machine.
Check if the spool of thread rotates clockwise.

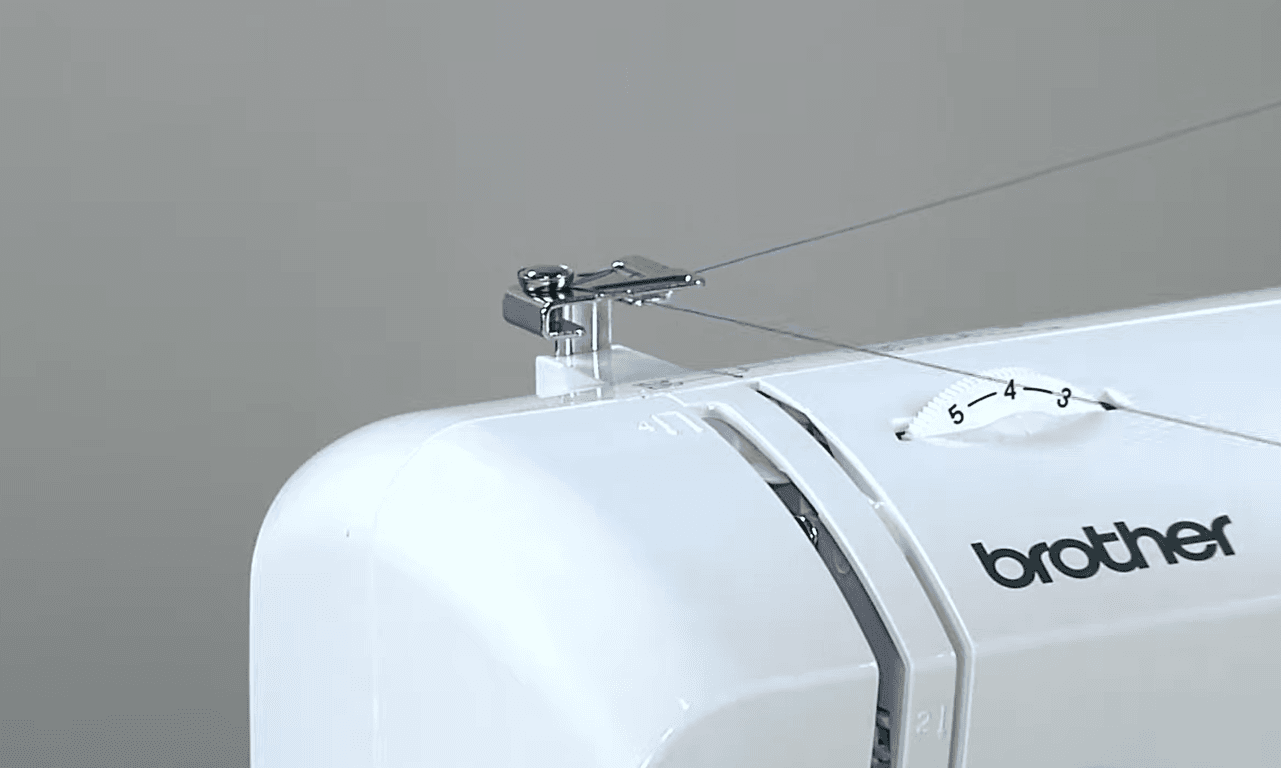
Now, locate the thread guide.
The thread guide is a small, usually smooth, piece of metal or plastic that directs the thread along the correct path. It’s typically located near the spool pin at the top of your sewing machine. You might see it labeled with a “T” or an arrow indicating the direction the thread should flow.
Wrap the thread from the spool pin to the thread guide. Refer to the diagrams on the machine’s body for instructions.
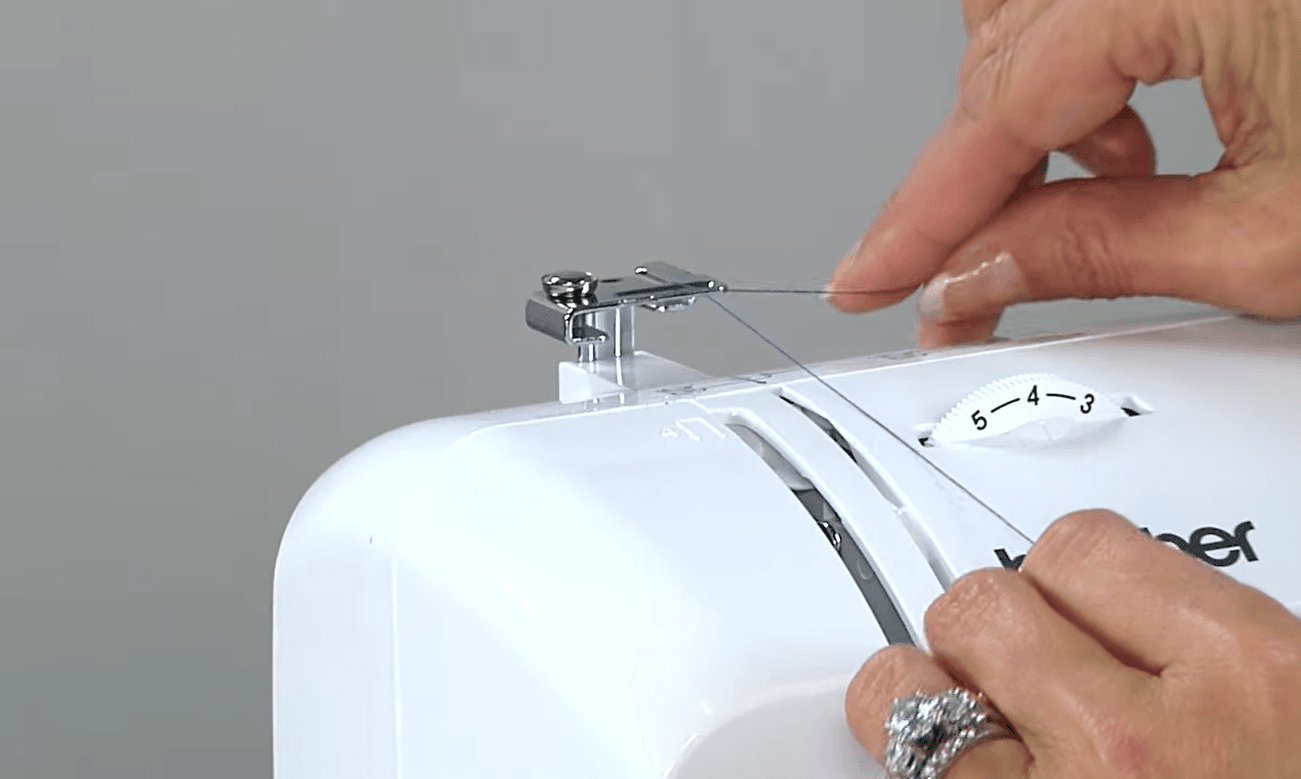


Locate the tension disk.
Next to the thread guide, you’ll find a disc with a slight slit in it. This is the tension disc. Wrap the thread around this disc from front to back, left to right.
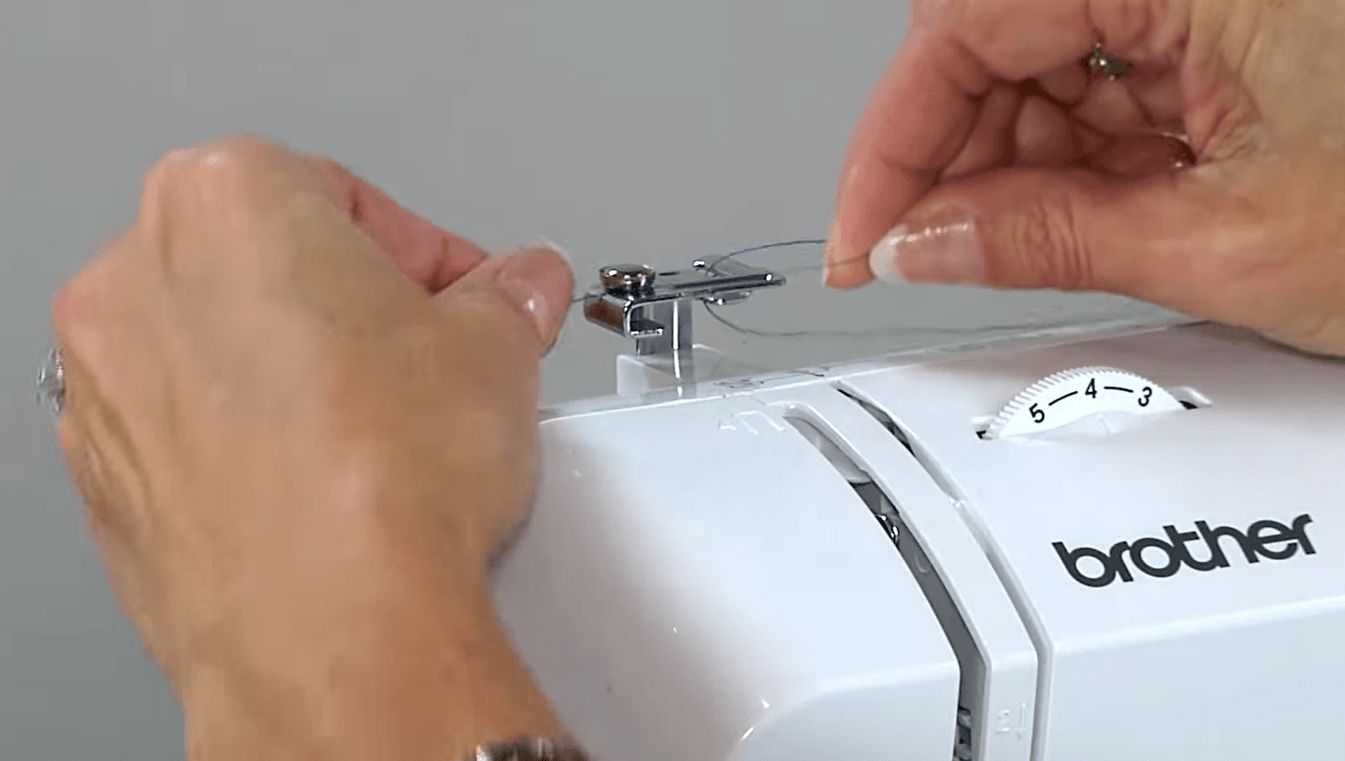


Make sure the thread is sitting comfortably in the guide and on the tension disc. It shouldn’t be popping out or snagged.

2. Place the Bobbin on The Winder
Get your bobbin and insert the tip of the thread into the bobbin’s hole, passing it from the inside out.
Measure at least 2 to 3 inches of thread through the bobbin’s hole.
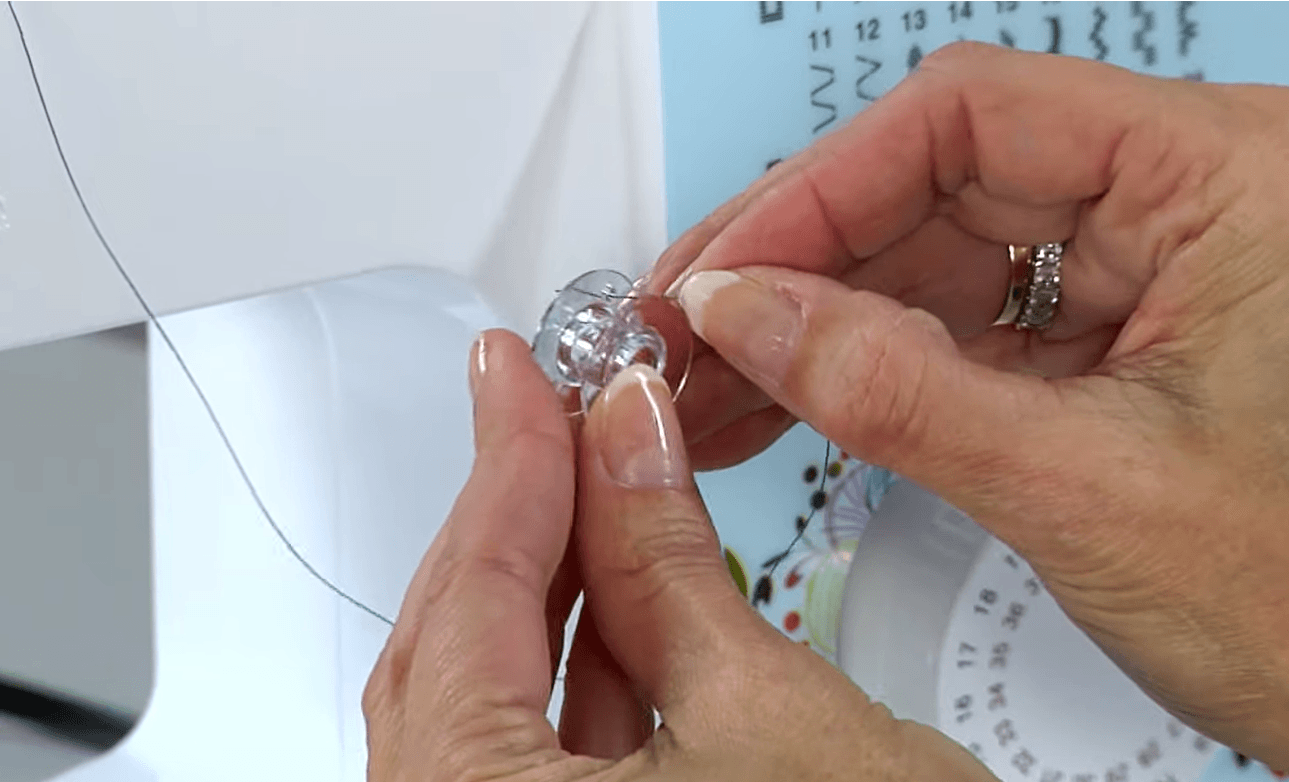


Place the bobbin on the bobbin winder.
Slide the bobbin winder so that it will be properly locked in place.
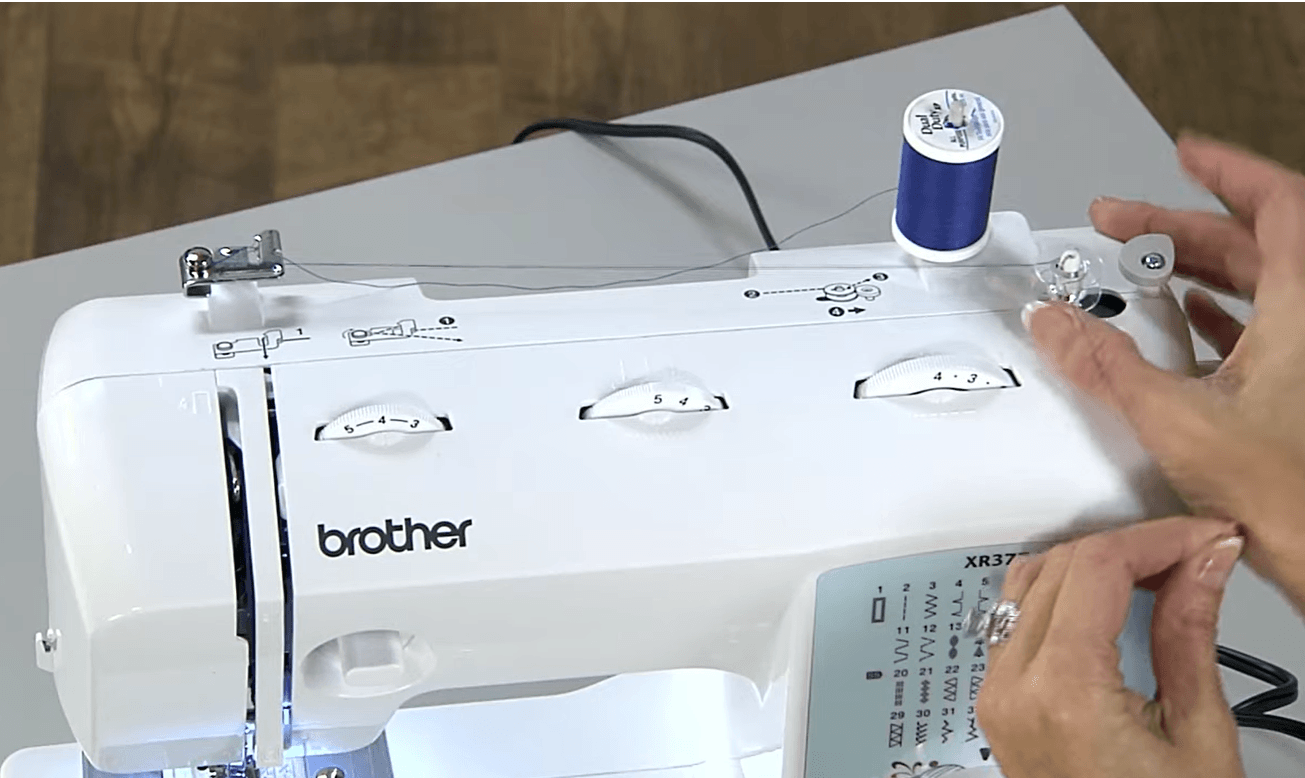


3. Winding the Bobbin
Hold the threads straight up with one hand.
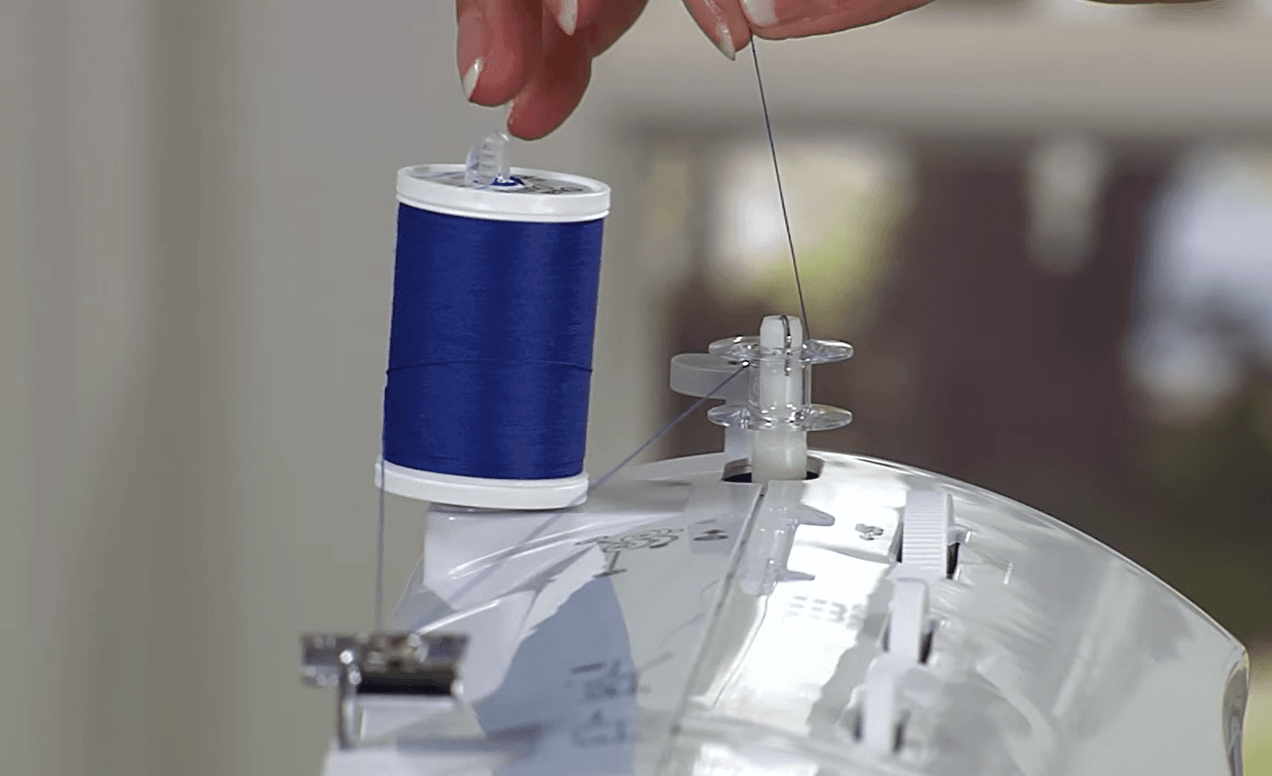

Then, press the foot control or start button on your sewing machine. The machine will start winding the thread onto the bobbin.
4. Stop Winding
The bobbin will stop winding automatically when it’s full. You can also stop winding by taking your foot off the foot control or pressing the stop button if your machine has one.
Once the desired thickness is achieved, cut the thread and remove the bobbin.
Also, don’t forget to lock again the bobbin winder in its place after removing the bobbin.
Brother Sewing Machine: Threading the Needle
You’ve just learned how to thread the bobbin, properly install it, and remove it from the bobbin winder.
The next set of steps will teach you how to thread the sewing machine’s needle.
1. Lift the Thread Take-up Lever
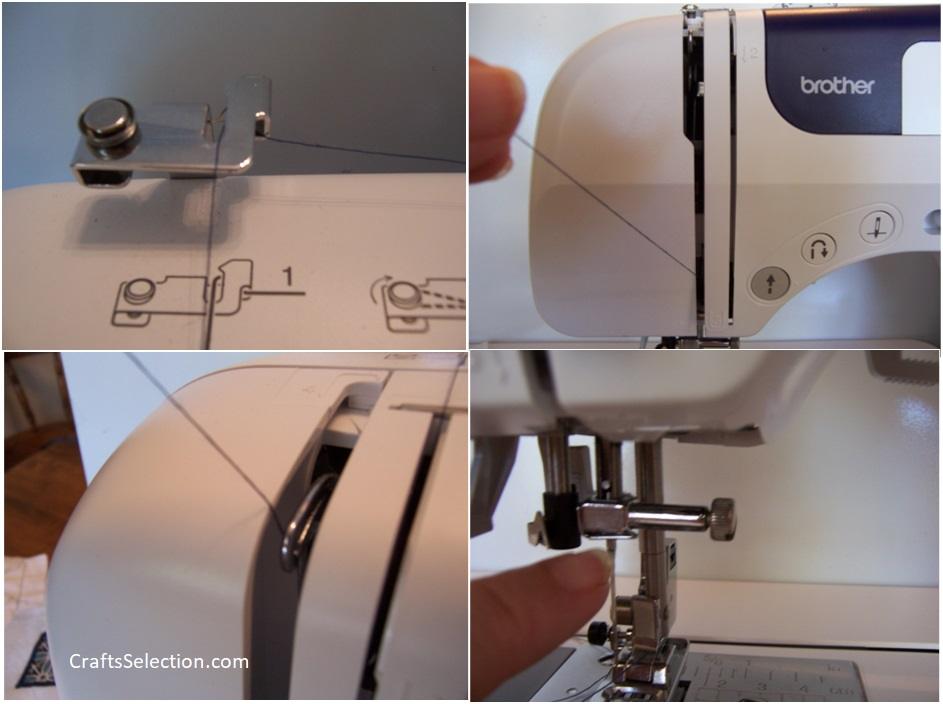


To uplift the thread take-up lever, rotate the handwheel of the sewing machine. You will notice that the thread take-up lever will rise from its position.
Make sure to rotate the handwheel in a counter-clockwise direction.
In addition, you should turn off your sewing machine at this time to avoid any injury or damage.
2. Rotate the Stitch Selector and Set the Tension Control
Make sure to properly set up the tension control and stitch selector. This will ensure that you can rotate the thread without damaging it or losing its rotation.
Ensure you complete the first set of steps before performing this activity.
As a summary, locate your spool pin, place the thread, position the bobbin, thread the bobbin, and wind it up until it’s full and thick with thread.
Thereafter, you may now proceed with this step.
3. Guide the Thread Along the Take-up Lever
You may now pull the thread towards the take-up lever and ensure it is properly locked in place.
Make sure to use the paddle and handwheel when pulling the thread so that it will smoothly flow all over the paths where the thread was carefully installed and positioned.
In addition, check whether the thread is properly positioned from the spool pin through the thread guide and ensure it correctly reaches the tension control, stitch selector, and take-up lever.
Then, you may now insert the last tip of the thread inside the eye of the sewing machine’s needle.
Take a look at the below instruction video on how to thread a Brother sewing machine:
How to Thread a Brother Sewing Machine: Bobbin Threading
Insert the Bobbin
Start by removing the plastic cover from the bobbin compartment.
Hold the bobbin with the thread wrapped around it in the direction indicated by the arrows on the bobbin case. Slide the bobbin into the bobbin compartment.
Thread the Bobbin
Wrap the thread around the thread guide as shown by the arrows on the bobbin case, and cut the excess thread.
Bring Up The Thread
Put the plastic cover back on the bobbin compartment.
Hold the needle thread and turn the handwheel counterclockwise until you see the needle thread pull up the bobbin thread from the compartment.
Things You Should Know When Using Your Sewing Machine
1. Getting to Know Your Machine
It is important that you have to know the features and functions of your sewing machine.
Generally, most of the parts of the sewing machines are somehow similar as to each other. However, it will take time for you to recognize a specific location and function since the brands and models differ as to their physical appearance.
2. Check the Settings of Your Sewing Machine
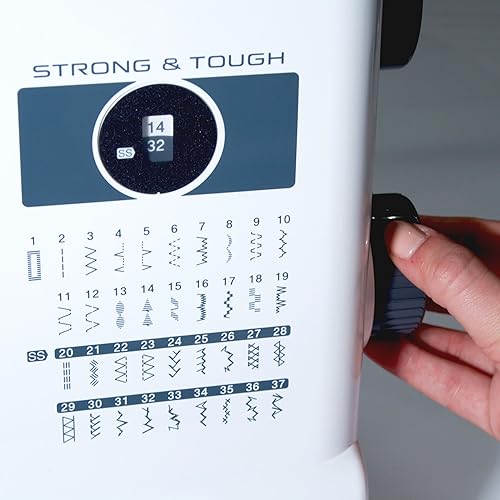


You may check your manual in setting up your sewing machine. The higher its version, the more advanced its settings are.
Make sure to read the manual as thoroughly as you can so that you will never miss anything with regard to its functions and parts.
Take note to fix the settings of your sewing machine first before doing the threading and operating the machine.
3. Memorize the Parts of the Sewing Machine
This might take time for the beginners but I’m pretty sure that you will get it immediately.
You should memorize the parts, functions, and location so that you can determine the parts whatever brand or model it is.
You will have the primary background of the sewing machine and it will help you in choosing the perfect sewing machine for you.
4. Check the Overall Sewing Machine Before Using
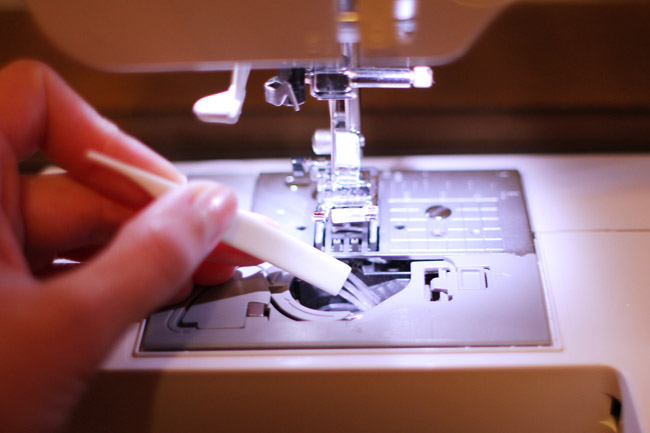


Have a regular monitoring of your sewing machine, let’s say about 2x to 4x a week so that you will be able to see if the steel parts have no rust and unnecessary damage.
The sewing machine should be well-maintained and rust-free.
You might also consider the machine’s oil which is enough to lubricate the steel parts so that it will not cause any tangles on the thread while winding and stitching.
What Have You Learned About This Topic?
Have you completed reading all of the contexts?
If yes, you may now have sufficient knowledge in dealing with sewing machines, especially in threading the bobbin and needle.
This article will also remind you of a few tips on how to properly use your sewing machine before and after use.
In addition, you were able to learn the proper steps in threading the bobbin which includes locating the spool pin, threading the bobbin, and winding the bobbin.
You have also learned how to thread the needle which consists of lifting the thread take-up lever, rotating the stitch regulator, setting up the tension control regulator, and guiding the thread from the spool pin until it reaches the eye of the needle.
Hopefully, you have learned a lot in this blog segment, and feel free to give your comments. Enhance your sewing skills by referring back to the basics.


