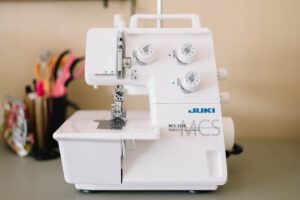
A serger is an overlock machine that is essentially required to bring the finishing to your work and make it look like professional sewing.
When you want to step up the sewing game, it’s necessary to have a machine that can help you in simplifying the work and for the special sewing. A serger is an important part of sewing which can help the tailors in getting rid of stubborn edges.

If you are a new sewer and you have no idea how to use the serger then today we are providing you with an ultimate guide about how to use a serger.
From now on, you can finish off the seams and edges with the help of a serger and in the end, there will be visibly fine stitches on the fabric.
Check here if you want to find the best serger for beginners.
How To Use A Serger?
Let’s go through the tips I have for beginners who are about to use the serger.
#1 – Choose The Right Kinds of Threads
As well know serger is a bit different as compared to the standard sewing machine in terms of settings and working. The thread is one of the necessary and most important factors when we are talking about the overlocking/serger.
Without the even settings of a thread, there won’t be any finishing in your work. You need to set the thread spools on the cone of the overlocker.
The coils must be medium in size as small ones are not desirable for the project and you have to change or fill up the spool again and again even for one project.
If you compare a conical-shaped coil and a small coin, then the conical shape supplies thread to the machine quickly and smoothly as compared to the small coil which is quite difficult to deal with.
#2 – Setting Serger Tension
Tension is another factor that is important to adjust in almost every machine. Without the proper tension of the sewing machine or serger, you are not going to achieve the desired results and the quality of the stitches will not be up to the mark.
At the time of doing overlocking on the serger, it’s extremely important to take care of the complete settings of the machine.
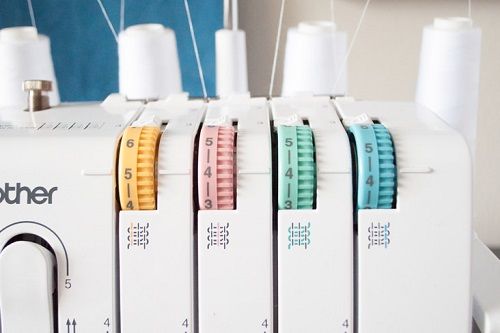


The thread tension of the serger should not be too strong to maintain the constant loop of the thread. With the value of 1-2 tensioner dial, start adjusting the knob according to your work.
Thick threads with too strong tension can damage the looper. Once you are done with the tension settings, then you can move on to the work.
#3 – Different Colors of Threads
At the time of setting the serger for the work, one thing you need to take care of is, never pull out the ends of the thread completely.
In the beginning, it may happen that you may find great difficulty in adjusting the settings but with time definitely, you are going to understand the whole mechanism. In the starting, when you have a little skill, you can differentiate on the basis of colors.
To adjust the thread tension, use four different colors on the coil. With the help of this trick, you can actually adjust the settings individually.
Another trick is that if you want to make the thread go easily throughout the system, then loosen the tension for some time. Also, you can trim the nodule before inserting the thread into the eye of the needle.
#4 – Oiling
Oiling is the necessary thing if you want to keep any kind of sewing machine going. In the same way, when we are talking about the serger, oiling enhances the performance and efficiency of the machine.
Every overlocking machine constantly asks for oiling and cleaning to work on the next project without delaying or creating problems in the middle of the work.
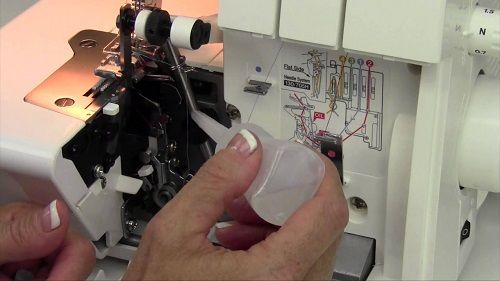


Before you apply oil in the serger, first clean the lint and dust inside the machine and once the machine is clean then you can apply the oil. Never use oil without cleaning because it will make the lint stubborn and hard to remove.
When you are oiling use a plastic syringe to pour the oil so it won’t be hard for you to handle and you can add an accurate amount.
#5 – Threading Scheme
The threading scheme can be different for every serger based on the model and brand you are choosing. If you are replacing your machine with the latest one then definitely few functions and the system must be different as compared to the previous one. To understand the serger completely you need to read the manual.
The threading scheme must be on your fingertips once you are sewing professional projects. On the covers of the sergers, you can also see the diagram pasted of the threading scheme. Make sure to practice the scheme completely to get familiar with the system.
#6 – Replacing Thread
Of course with the changing of projects, you need to replace the threads as well according to the requirements of the projects.
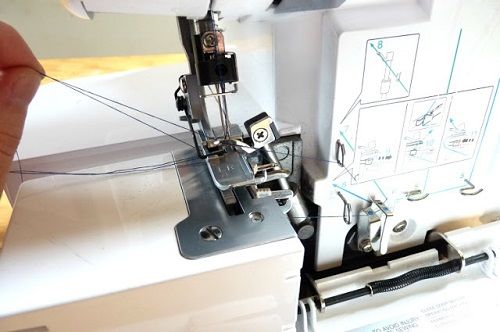


There is a technique to replace the threads in the serger and you don’t have to pull them out strongly as it will break them.
You need to pull all the old threads together to replace them with the new ones for the next project.
Pull the old thread until it’s out of the needle eye.
Once the thread is near the needle eye, remove the needle because it’s not possible to pass the bundle of the thread through the eye.
Remove the old threads and replace the new ones with the right tension settings.
#7 – Thread Chains
In the normal sewing machine, it’s possible to do backstitches and we usually apply that in some of our projects. In a serger, things are pretty different because it’s not possible to backstitch.
To adjust the thread chain edges, we need to go for a different trick. When the thread chain is close to the seam, never cut it.
Instead, make a long tail of that thread chain and then cut it out. Leave that end of the chain and move it to the seam back for the overlocking.
You can use the latch tool as well to hide the useless tail of the thread.
#8 – Do Not Use Pins
We also use pins in the sewing machine because we know pins are not going to damage the needle of the regular sewing machine. When it comes to the serger, then never use the pins we use for the sewing machine.
Always go for the binder clips as it is not going to ruin the blade of the serger. The pointed pins will damage the knives of the serger and later the only fix is to replace it with a new one.
#9 – Foot Controller
At the beginning of anything, I always recommend people to keep the pace slow. Sewers who are absolutely new to the field or who are trying overlocking for the first time should go for the slow speed first.
Never go too hard on the foot controller as it will only make things mess up and you will end up making some mistakes in the project.
Do not press too strongly on the foot controller. Always go for the slow speed so you can keep a check on the stitches and if everything is going according to the needs.
Basically, the serger consists of 2 knives and if you work at high speed then the serger will cut the fabric more than the necessary part. It will be hard for you to undo things.
#10 – The Feed
This is going to be fun when you get to know the serger for the first time this closely. Once you understand the features of the serger, this is not going to be a big problem for you and later you can make the serger work on any kind of fabric easily.
The feed dog of a serger is basically divided into two parts. These two parts can operate on the basis of your requirements.
Both parts can move at the same speed and at different speeds as well. In short, you can adjust it the way you want it to be.
This feature of the serger helps in sewing almost any kind of fabric like knitted ones or thick ones. If you want these two parts to run at different speeds then change it with a knob from 0.5 to 2.5.
These modern features will help you in adjusting the machine as you want according to the requirement of the project and the overlocking will be up to the point.
Conclusion
The serger is something that is of great use when you are improving every day and creating the best thing you can. To get complete control over the serger, you need to understand and read every function it has to offer you.
The one thing that needs to be taken care of at the time of using serger is speed. If you go at a faster pace then the possibility of making mistakes will be too high. Focus on the work you are already doing and make it your best one.


