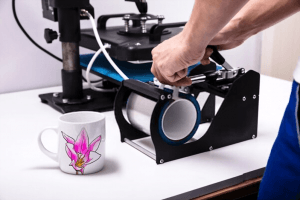
Cricut routinely scores high in the innovation and value departments, and they nailed it again with the Cricut infusible ink transfer. It is the new heat transfer technique in town of embedding no-feel designs onto white or light-colored fabrics with a high polyester count.
Cricut infusible ink designs are used to decorate t-shirts, bags, totes, coasters, and onesies, and non-fabric blanks like infusible mugs among others.
Although the procedure is easy peasy and may only take 10 minutes to learn, it can take a lifetime to master. Ahead is a detailed guide that will guide you every time you wish to decorate your garments using Cricut Infusible Ink.
What is Cricut Infusible Ink?
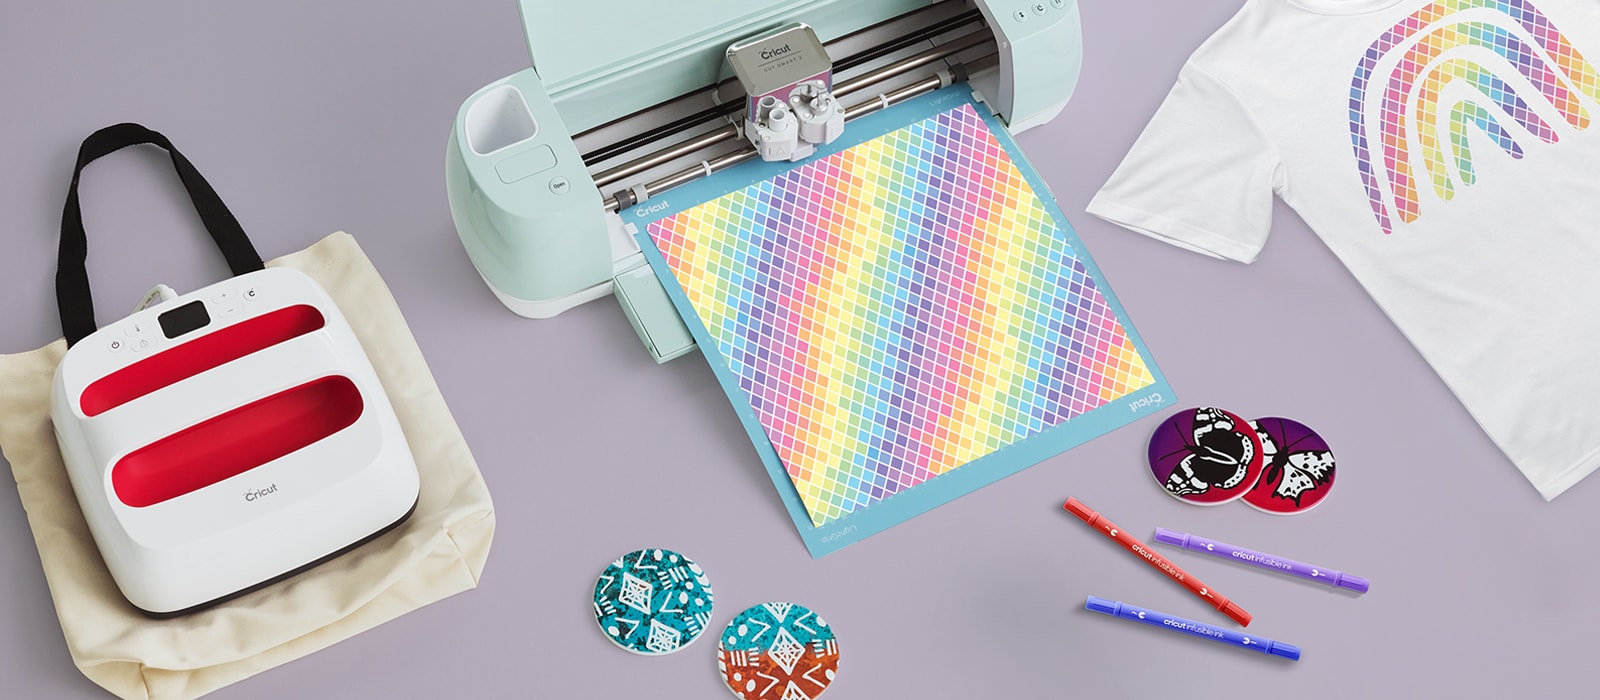
Cricut Infusible ink is a type of sublimation dye that converts from solid to gas directly when heated without first changing to a liquid state. The gaseous vapor then penetrates the base material and binds with the polyester in fibers of the fabric and becomes part of the material, rather than sitting on top.
The ink then dries inside the matrix of the blank material forming a long-lasting, no-feel design. What sets it apart from ordinary sublimation ink is that the Cricut Infusible ink comes in special infusible ink transfer sheets or infusible ink markers and pens that eliminate the need for a sublimation printer.
What Can Cricut Infusible Ink Be Used on?


The compatible blanks that can be used with Cricut infusible ink should be made of polyester or poly-coated. You can press your infusible ink design onto t-shirts, bags and totes, pillowcases, coasters, onesies and bodysuits, and non-fabric blanks like infusible mugs, mousepads, key holders, and more.
Remember, the infusible ink only works on white or light-colored fabrics.
Pros & Cons of Infusible Ink
- Long-lasting, fade-free designs
- The prints are colorful and vibrant
- The process is simple and straightforward
- The designs can be layered
- Limited to white or light-colored blanks
- Only applies to poly-based materials
What is Cricut Infusible Ink Transfer Sheet?


Cricut infusible ink transfer sheets are pre-printed heat transfer papers that contain infusible ink. The sheets come in varied solid colors and attractive patterns to suit different preferences on the market.
The intended design is cut onto the infusible ink transfer sheet using a vinyl cutter. When heat from the press is applied, the ink on the sheets will be released from the paper onto the infusible ink blank.
Infusible transfer sheets usually appear dull and faded in their original state. But once transferred to the base materials, they produce eye-popping graphics with vibrant colors and striking details.
What is Cricut Infusible Ink Pen/Marker?


Cricut pens and markers have a special infusible ink that allows you to draw your design, using a Cricut cutting machine or freehand onto laser copy paper.
Cricut cutting machines come with pen holders that let you fit the writing tool to the Clamp A of the Cricut cutting machine and draw more professional-looking images.
The machine-friendly pens are also especially practical because you usually want your design to be mirrored, and that’s very difficult by hand.
You will, however, need to do more coloring and detailing freehand. Thereafter, you can transfer the image to the base material using a heat press.
Infusible ink pens usually come with 1mm writing tips making them great for writing and drawing fine details. Markers, on the other hand, have thicker tips of about 4mm and are ideal for coloring your designs.
What are Cricut Infusible Ink Blanks?
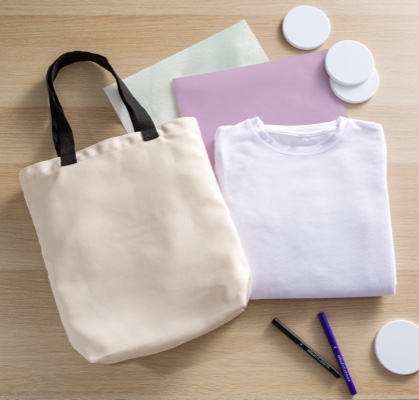


A Cricut infusible ink blank is the base material where you intend to embed the design. As aforementioned, to ensure your image adheres permanently, the material needs to be poly-based (made of polyester or poly-coated).
Infusible blank materials can range from plastic, polyester, micro-fiber, and other poly-based fabrics to poly-coated canvas, wood, glass, and many more.
How to Use Cricut Infusible Ink Transfer Sheets
Equipment
- Cricut cutting machine
- Lint roller for fabric blanks
- Cricut Easy press
- Scissors or paper cutter
- Pair of tweezers
- Design Space software on a mobile device or computer
Materials
- Infusible ink blank
- Infusible ink transfer sheets
- Butcher paper (comes with the Infusible ink transfer sheets)
- White sheet of cardstock
Step by Step Guides
1. Come up with the Artwork

Begin by identifying the design you would like to transfer to the base material. Use the Cricut design space program or any other design software on your computer or mobile device to select, edit, and customize the artwork to your liking. Remember to size the design to fit the base material without being cut out.
When you are done, mirror the design to prevent it from appearing in reverse. Select ‘Infusible Ink Transfer sheet’ from the list of materials.
2. Put the Infusible Ink Transfer Sheet on the Standard Grip Mat
Place the infusible ink transfer sheets on top of the mat with the colored side facing upwards and the shiny liner side facing down. Make sure the transfer sheet snugly adheres to the mat.
3. Connect your Cutting Machine
Plugin your Cricut cutting machine and connect it to your computer or smartphone. Choose the Cricut machine you will be using from the dropdown menu in the Cricut Design Space application. Make sure you select the material type as Infusible Ink Transfer Sheet.
4. Loading and Cutting
Load the mat and the infusible ink transfer sheet by clicking the flashing arrow button. Confirm the fine point blade is in the B slot of the carriage.
Go ahead and cut by pressing the flashing C go button. After you’re finished cutting, unload the mat by pressing the flashing arrow button.
5. Trimming and Weeding
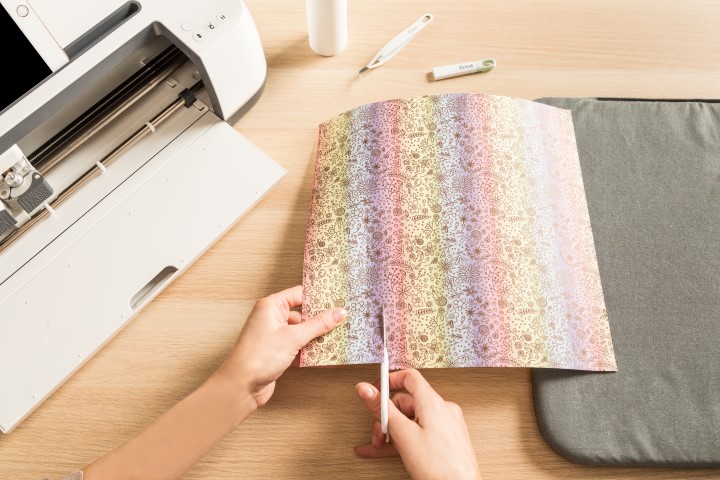

Flip the mat over and peel the mat away from the transfer sheet to remove your design. Use a paper cutter to trim any excess, unused material, and remain with only your design.
Before you begin weeding, gently roll the transfer sheet into a cylindrical form to bring out the cut line and make it easier to see. Thereafter, spread out the transfer sheet and use your fingers to carefully weed.
Although using tweezers may be necessary when some of your cuts have clung on to the carrier sheet, Cricut discourages using weeding tools as much as possible.
6. Insert the White Cardstock
If you are working with a t-shirt or double-layered blank, insert a sheet of cardstock inside the shirt between the layers to prevent the infusible ink from bleeding through to the other layers. The cardstock also helps elevate the print area above the seams and enhances even distribution of heat to your design.
Ensure you position the cardstock directly under the design. And do not hesitate to cut the cardstock to size should it be larger than the blank.
Also, for blank fabrics, roll the lint roller up and down and left to right to remove any lint or particles from the surface. Lint and particles may affect the quality of the transfer.
7. Placement
Before placing the blank on the press, it is advisable to gently wipe the heating surfaces clean to remove any lint or ink from the previous press run and dirt, dust, and particles. They may affect the quality of the final image. Place the blank shirt on a flat printing surface with the print surface facing upwards.
Cover the top of your blank garment with a piece of Butcher paper. Remember the Infusible ink converts to gas during the heat transfer process. Therefore, the Butcher paper, like the cardstock, helps prevent the ink from bonding with adjacent layers and protects the plate of the heat press from smears.
It is also effective in capturing any moisture that may be present in the blank. We recommend using a sheet of butcher paper that is larger than the bottom heat press plate.
8. Preheating
Set the temperature to about 385°F (195°C) and preheat the blank with the Butcher paper on top for about 10 seconds. Preheating helps remove moisture from the blank and flattens the print surface to remove any wrinkles and creases that may show up in the transferred image.
Remove the Butcher paper and allow it to cool completely before proceeding to apply the transfer to ensure it does not start to transfer the design immediately after you place it on the blank.
9. Pressing the t-shirt
Place the cut and weeded design onto the blank with the side with the transfer ink facing down and the shiny side with the carrier paper facing up. Put the Butcher paper on top and press the design at 385°F (195°C) for about 40 seconds while applying light even pressure.
When the timer goes off, allow time to cool before removing your printed garment. Gently peel the carrier paper off to reveal the image underneath. Feel free to discard the carrier paper.
Tips to Use Cricut Infusible Ink Transfer Sheet
- Always make sure your hands are clean and dry, and your fingers free of any dirt or oil before handling the infusible ink transfer sheets. Deposits of oil and dirt may interfere with the proper transfer of the image.
- When unboxing the infusible ink transfer sheets, be careful to remove the butcher paper. You will definitely need this when applying your design.
- The colors on the infusible ink transfer sheets may appear dull and faded but once transferred to the base material, they become more colorful and vibrant.
- Cricut discourages using traditional weeding tools like weeding hook with infusible ink sheets and recommends using your fingers. Such tools may push the Infusible ink into the carrier sheet which may then transfer over to the finished design during heat transfer.
- If you will be working on fabrics, always use a lint roller regardless of whether your blank material is brand new. You will be surprised by the number of small bits of lint, dust, and other particles you will capture. Such residue can interfere with the proper transfer of your design.
How to Use Cricut Infusible Ink Pens and Markers
Equipment
- Cricut cutting machine
- Lint roller for fabric blanks
- Cricut Easy press
- Scissors or paper cutter
- Pair of tweezers
- Design Space software on a mobile device or computer
Materials
- Infusible ink blank
- Infusible Ink Pens or Markers
- LightGrip Machine Mat
- Heat Resistant Tape
- Laser copy paper (2)
- Butcher paper (comes with the Infusible ink transfer sheets)
- White sheet of cardstock
Step by Step Guides
1. Come up with the Artwork
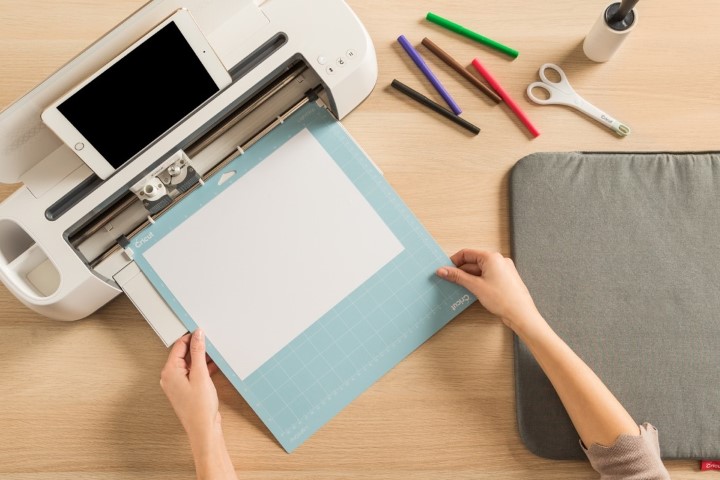

Identify the artwork you would like to transfer to the blank. Put a sheet of laser copy paper on top of the LightGrip mat and load them into the Cricut cutting machine.
Use the Design Space software to select, edit, and size the artwork to suit your preference and fit on the blank. You must change the line type of the Linetype to ‘Draw’. Not just that, ensure you assign the pen or marker color.
Afterward, make sure you mirror the design to prevent it from appearing in reverse. Select ‘Copy Paper’ from the list of materials.
2. Inserting the Infusible Pen or Marker
Load the Infusible Ink Pen or Marker into the Clamp A of the Cricut cutting machine. Those who will be using different colors will wait for the prompt from the Design Space software whenever there is a need to load the specific colors. After loading the pen or marker, hit the flashing Go button.
3. Drawing
After loading the pen or marker, hit the flashing Go button to begin drawing. Give the machine enough time to draw. When it is done, unload the mat and remove the laser copy paper with the design from the mat. If you wish, you can use colored Infusible ink markers to make the design more colorful.
Also, for blank fabrics, roll the lint roller up and down and left to right to remove any lint or particles from the surface. Lint and particles may affect the quality of the transfer.
4. Placement
From here, the procedure is identical to using Infusible ink transfer sheets. You will need to put the cardstock between the layers of the blank garment. We mentioned the reasons earlier in this post. Place the blank shirt on the print surface with the print surface facing upwards. Use the lint roller to remove any lint or particles from the surface.
Place a piece of Butcher paper on top of your blank to prevent the ink from bonding with adjacent layers and avoid unwanted transfers on the plates of the Easypress.
5. Preheat
Set the Cricut EasyPress to 385°F (195°C) and preheat heat the blank with the Butcher paper on top for about 10 seconds to remove moisture and smooth out the print surface.
Ensure the sheet of butcher paper that is larger than the bottom heat press plate. Remove the Butcher paper and give the blank time to cool completely before you apply for the transfer.
6. Pressing the T-shirt
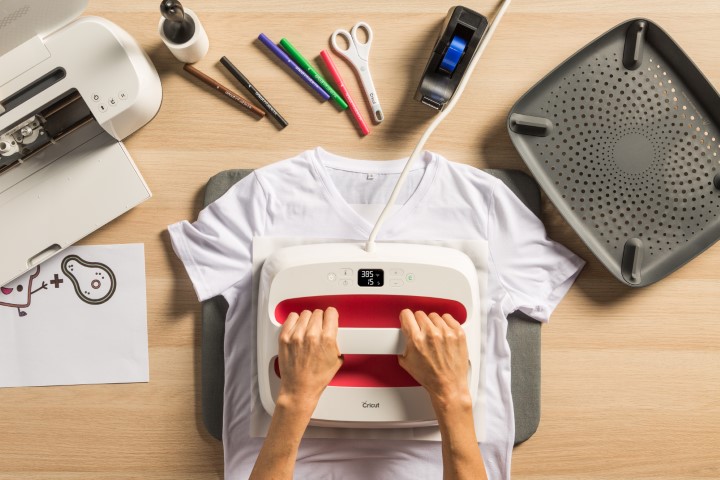


Place the design onto the blank garment with the side with the drawing facing down. Secure each corner of the laser copy paper with the design using Heat Resistant Tape to avoid shifting during transfer.
Cover the laser copy paper with the Butcher paper on top and place the Easypress on top to start the heat transfer. Press the design at 385°F (195°C) for about 40 seconds using light even pressure.
When the beep sound for the timer rings, allow time to cool without moving anything including the butcher paper before removing your printed garment. When it has cooled, slowly remove butcher paper, tape, and laser copy paper to reveal the design.
Tips to Use Cricut Infusible Ink Pens and Markers
- Ensure your hands are clean and dry when handling the materials.
- When placing the Cricut Easypress machine, look out for seams. Avoid seams since they interfere with the even distribution of heat and result in flaws during pressing.
- During the transfer, avoid sliding the press or moving your hands. Keep your hands still to avoid any imperfections.
- Never reuse the butcher paper or cardstock.
Cricut Infusible Ink FAQs
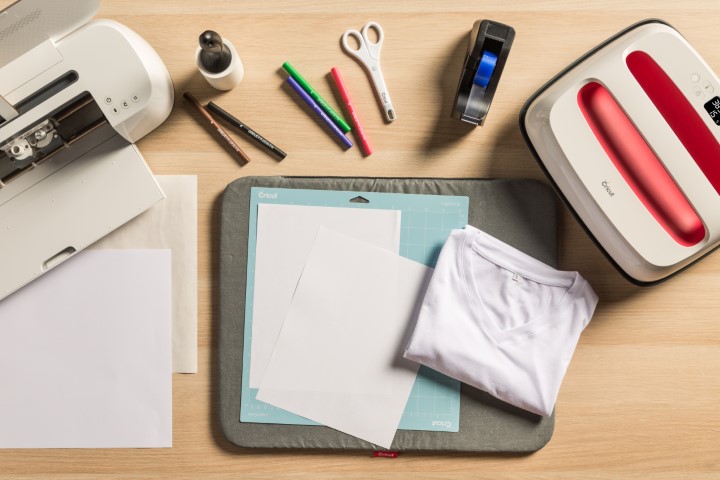

Infusible ink vs Iron-on: What are the differences?
Iron on transfers sit on the surface of the base material it is printed on, whereas infusible ink penetrates deep into the fibers.
Unlike the ordinary iron-on vinyl transfers, the images here infuse into the fibers of the fabric rather than sticking on top. The result is a more colorful and sparkly image that will not crack, fade nor lose its color due to frequent washing and wear like iron-on designs.
What material is best for infusible ink?
The best material for Infusible blanks is plastic, polyester, micro-fiber, and other poly-based fabrics. You can also transfer infusible ink designs to poly-coated canvas, wood, glass, and ceramic among others. The higher the polyester count in the material, the brighter the image will appear.
Can you use Cricut infusible ink with a Silhouette machine?
Yes. Although Cricut does not recommend so, the Cricut Infusible Ink sheets can be cut with most cutting machines including Silhouette machines.
Can you use Cricut infusible ink on cotton?
Infusible ink does not work on cotton and other natural fabrics because of the absence of polymers in the garment fibers. The polymers are responsible for bonding with the ink. Should you use infusible ink on pure cotton, the image will appear faded and blurry, and won’t hold up for long.
Can Cricut infusible ink be used on any shirt?
No. Infusible ink can only be used on shirts made from fabrics that have a composition of at least 50% polyester or more. Examples include polyester, nylon, and spandex fabrics
Can you use Cricut infusible ink on wood?
Yes. But not ordinary wood. You need to make sure that the wood needs to be poly-coated before applying infusible ink.
Can I use infusible ink on glass?
Yes. But the glass must be poly-coated for the ink to infuse into the surface.
Can you use infusible ink on metal?
Yes. Although the metal must be poly-coated.
Can you use infusible ink on cardstock?
Yes. But the cardstock needs to be poly-coated.
Can Cricut infusible ink be layered?
Cricut infusible ink can be layered. You can combine multiple design layers and colors for a more colorful image. You only need to ensure that each layer is applied separately. You will also need to use a new sheet of butcher paper every time to transfer a new layer so that you do not re-transfer ink. Furthermore, wait for the blank item to cool down before you apply a new layer.
How long do Cricut infusible ink pens last?
Depends on how frequently and the size and details in the designs you will be drawing. Cricut promises that their pens can last at least four 8.5×11-inch pages of uninterrupted drawing.
What kind of paper do you use for infusible ink pens?
The kind of paper used with infusible ink pens is called Laser copy paper. It is preferred because it is thin with very few layers hence the Infusible ink will easily be released and melt off onto the blank item. It is also heat resistant and can stand up to the high temperatures of heat transfers without getting damaged.
Do you have to use Cricut blanks for infusible ink?
You must not use Cricut blanks for infusible ink. Just make sure the fabric of your blank is composed of at least 50% polyester.
How long do you heat press infusible ink??
Cricut recommends pressing infusible ink for about 40 seconds at a temperature of about 385°F (195°C).
Conclusion
Those of us who love iron-on transfers but still desire the no feel texture and resilience of sublimation prints have a reason to be excited! The Cricut infusible ink transfers. It is a new game-changer in the printing world and worth checking out.
The best part, you have this post to keep you up to speed and get you ready to hit the ground running as far as infusible ink transfers go. Happy crafting!


