Sublimation remains the top choice among many elite design professionals for the simple reason that the product decorating technique ticks all of the crucial boxes in matters of quality and long-lasting heat transfers. You get crisp and vibrant designs that almost pop at you, and will stand up to fading, washing, and cracking and hold up for years upon years.
Nevertheless, the top-in-class quality and out-of-this-world graphics that sublimation is known for do not come cheap. A brand new, well-made sublimation printer can come more priced than a new small car, costing upwards of $10,000. And while we all express admiration for this modern equipment, our wallets often disagree.
The good news is that with a small chunk of cash, you can still enjoy the same level of fluid sublimation printing performance and convenience, by converting an ordinary printer to a sublimation printer.

Before We Begin…
Inkjet printers have two ways of delivering ink to the print head; by cartridges including refillable, and through an external bulk ink delivery system.
Smaller printers come with cartridges riding on top of the print heads in the print carriage and feeding ink directly into the print heads. The cartridges perform perfectly but their capacity is low and the cost is high. They are ideal for the hobbyist who does small scale production.
But for professionals, we have bulk ink systems as well. Here, the ink is stored in bags and fed using the ‘siphon effect’ to the printer through the tubing. Inside the printer, the ink will be temporarily stored in damper cartridges which will be exactly where regular cartridges would be.
After prolonged use, the ink system and damper cartridges may lose their prime and fail to deliver the ink freely as required. Then, you will need to run a printer cleaning cycle through the printer driver or replace the damper cartridge to correct the problem.
How to Convert a Printer to a Sublimation Printer
1 – Converting a Brand-New Inkjet Printer to Sublimation Printer
If you intend to turn your spanking new inkjet printer that has never been printed before to a sublimation printer, it is advisable to settle for printers with a continuous ink supply or CISS system. Here, external ink supply systems are connected to the ink cartridges to increase the volume of ink supply to your computer.
Remember, sublimation printing requires a massive amount of ink so using refillable cartridges may mean the frustration of frequent stops to refill. Also, check the description of the inkjet printers and ensure that it is sublimation compatible.

Needed Tools & Supplies
- A brand new Inkjet Printer
- Refillable Cartridge
- Sublimation ink
- Injection syringe and needle
- A pair of plastic gloves
Step by Step Guide
Step 1
You will need to check if your printer is functioning correctly. So, begin by setting up the inkjet printer as you’d normally do using the provided set of instructions from the manufacturer. Install the manufacturer’s cartridges provided with the printer.
Step 2
Test print on a blank piece of paper to check if the nozzle is okay. Make sure the nozzle prints consistent sharp and vivid images with no broken lines. If the image is fuzzy and off-color, try adjusting the settings using the provided user guides.
Remember, installing sublimation ink voids the warranty of the printer. Therefore, you must identify any problems with your new printer prior to conversion so you can seek help if needed.
Step 3
Use the injection syringe and needle to fill the set of refillable cartridges with the sublimation ink. Keep in mind the directions provided with your ink cartridges.
If your cartridges came pre-filled with sublimation ink, then you can skip this step. Those who will be purchasing your sublimation ink separately are advised to choose ink from manufacturers with proper ICC profile to avoid color problems and have the colors come out just right
Step 4
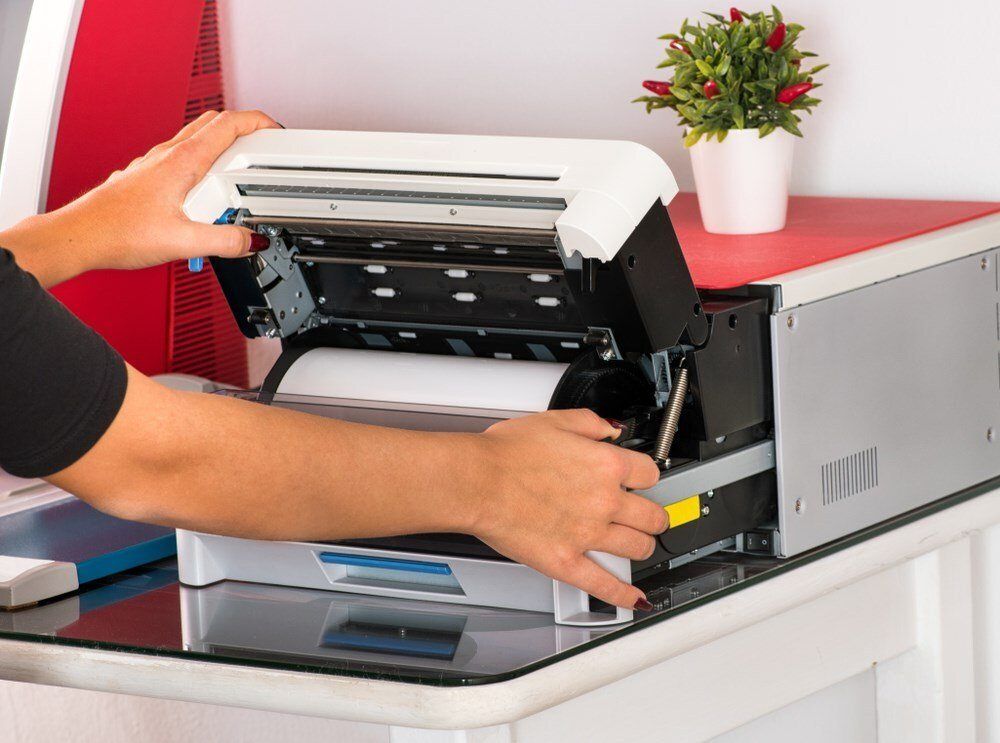
Lift the lid of the printer and raise the ink cartridge holder lever. Take out cartridges that came with your inkjet printer and swap them with the refillable cartridge. Confirm that the cartridges are properly installed and secured. You should hear a clicking sound when installing them. You can then close the ink cartridge lever and close the lid.
Ensure you keep safely the original cartridges that came with the printer since you may encounter issues with your refillable cartridges in the future.
Step 5
Since you just installed a new cartridge with specialty ink you must purge the print head and lines of all of the old ink before you can begin to print with the new ink. Once more, run at least 5 print head cleanings to eliminate the old ink completely before you begin printing.
Step 6
Thereafter, run a nozzle check to find out if the lines are straight and accurate. In case of any broken lines, run as many as needed until you have perfectly straight lines.
2 – Converting a Used Inkjet Printer to Sublimation Printer
You can also transform your existing ordinary inkjet printer such as an Epson large format printer into a dedicated sublimation printer. But since the inkjet printer has been using other types of ink before, it is essential to properly clean the printer and ensure that the specialty ink does not come into contact with the other ink used initially.
Therefore, you will need to flush out the old ink and entire contents from the print head and the lines and replace it with the new ink. We recommend using a cleaning cartridge if you can access one, or filling purge fluid in a refillable cartridge to effectively remove all the traces of the old ink from the ink system.


Needed Tools & Supplies
- A brand new Inkjet Printer
- Refillable Cartridge
- Sublimation ink
- Injection syringe and needle
- A pair of plastic gloves
- Cleaning cartridge/purge fluid(Optional)
Step by Step Guide
Step 1
Put on your gloves and like we did before, start with setting up the inkjet printer as you’d normally do. Nozzle checks on a blank piece of paper and ensures that the lines are perfect and the printer is functioning correctly.
Step 2
Lift the lid of the printer and raise the ink cartridge holder lever. Take out cartridges with the old ink.
Step 3
Install the set of refillable cartridges filled with bottled purge fluid. If you have a set of cleaning cartridges, install them. Do not forget to confirm that the cartridges are correctly installed and secured. Ensure there is a clicking sound when installing them. Afterward, close the ink cartridge lever and close the lid.
Ensure you safely store the cartridges with the old ink just in case you come across issues with your refillable cartridges later on.
Step 4
You will need to repeat numerous power cleanings using the cleaning cartridges or purge fluid to flush out the old ink. After you have cleaned the print head more than once, you will have to leave the printer for at least an hour.
If you do not have the cleaning cartridge or purge fluid, proceed to the next step.
Step 5
Using the injection syringe and needle, fill up the set of refillable cartridges with the sublimation ink. Follow the instructions provided with your ink cartridges. If your cartridges are pre-filled with sublimation ink, move to the next step.
Step 6
Lift the lid of the printer and raise the ink cartridge holder lever. Take out cleaning cartridges or cartridges with the cleaning fluid.
Step 7
Install the cartridges with the sublimation ink.
Step 8
Carry out at least 5 print head cleanings to do away with the old ink completely before you begin printing. It is also necessary to purge and push all the old ink down to the print head.
3 – After Converting the Printer
After you are done with modifying your inkjet printer, used or new, you may think you are good to go. However, observing the precautions below
- Run Print Head Cleanings and a Nozzle Check
Since you just installed a new cartridge with specialty ink you must purge the print head and lines of all of the old ink before you can begin to print with the new ink. Once more, run at least 5 print head cleanings to eliminate the old ink completely before you begin printing.
Afterward, run a nozzle check to confirm that the lines are accurate and consistent. In case of any broken lines, run as many print head cleanings until you get a clean nozzle check with perfectly straight lines. Should this fault persist, wait for 24 hours before running more head cleanings since more head runs may break the print head.
- Acknowledge Prompts
If you have never used a different type of ink before, it will be no surprise should your printer prompt you to acknowledge on the screen that you have installed third-party ink cartridges. If so, simply press “Ok”. And if another screen appears informing you that you have voided your warranty. Do not fear to punch ‘Proceed’ before selecting ‘Yes’.
- Troubleshooting
Should your printer fail to recognize your cartridges, take out the cartridges and wait 10 – 20 minutes before reinstalling them. If this procedure fails to after three attempts, you will have to install the original cartridges that came with the printer and start over.
- Test Print
Try printing a test image onto a transfer paper specifically intended for sublimation. Go ahead and transfer the artwork using an appropriately-sized heat press onto a test sublimation blank and check the quality of the final graphics.
Check that the ink company offers the profile files. If the ink requires printer profiles, and you have design programs that support color management such as Adobe Photoshop or Corel, then you will need to install Printer Profiles.
Frequently Asked Questions
Can you turn an existing inkjet printer into a sublimation printer?


Not just any.
You will need an Inkjet printer with sublimation compatibility. There are two main types of printers, thermal technology printers which use HEAT to disperse or ‘boil’ the ink onto paper, and ‘cold’ Piezo technology (patented by Epson) which relies on PRESSURE to print.
Sublimation inks are heat sensitive and are activated by heat. So, using the sublimation ink in printers that perform thermal printing could ‘bake’ and smear the ink all over the sublimation transfer paper.
Therefore, Piezo printers are the best for sublimation. Here, the print head is fitted with a small crystal that vibrates when an electrical charge is introduced. The vibrations then force the ink out of the print head nozzles onto the paper.
Can you use any Epson printer to convert to a sublimation printer?
Most modern Epson printers and a few Sawgrass printers use Piezo technology, unlike other brands like HP which use thermal technology. That’s why most designers prefer to turn EPSON printers to sublimation printers.
You will, however, before you find out how to set up an Epson printer for sublimation, you need to know that you’ll have to pour in sublimation ink. The best part; Epson printers are compatible with many brands of sublimation ink with good color profiles.
Even so, the manufacturer does not offer the printers as sublimation printers. So you will not enjoy the tech support and warranty should you convert an Epson printer to a sublimation printer.
Can regular and sublimation inks be used on the same printer?
Experts in the space highly discourage regular interchanging between regular and sublimation inks on the same printer. This is because of the high risk of contamination since you will not be properly flushing out all the ink every time. The result of this is a clogged print head and poor quality of the design.
Changing the inks back and forth also means using an enormous amount of ink used in purging and cleaning which may lead to astronomical costs.
After several conversions, you will end up using much more than the cost of a second printer. Additionally, frequent flushing reduces the service lifespan of the ink pads and ultimately affects the functionality of the printing machine.
How to clean a printer for sublimation?


It is a prerequisite that you clean your printer to keep it in pristine working order. Prolonged operation without cleaning leads to messes during print runs and causes clogged heads which may result in streaks, blemishes, and blurs on the printed image.
However, cleaning the machine requires a good amount of ink. If you print frequently, you can simply clean the print heads by allowing the ink to flow freely through the nozzle-heads.
But when you have not used the printer for some days, chances are the sublimation ink has dried in the nozzle-heads and may cause the print head to choke and simple head cleaning cycles may not clear the print head.
In this case, remove the entire ink system and re-install cartridges. Perform a nozzle check to confirm if the issue is corrected.
And although some advanced systems will automatically perform the head check when switched on without your command to keep your ink flowing smoothly, most printers demand that you perform the manual running of print head cleaning.
Before using a printer for sublimation, you can run up to 5 power cleanings to flush out the old ink. But for printers like Epson Stylus Pro Printers, you only need to perform an initial fill and save time.
The initial fill procedure only requires you to restart the computer in “Self Testing Mode” by holding down the PAUSE, RIGHT, DOWN buttons when switching it on. Hit the MENU button and choose the CLEANING and the INIT FILL options to initiate the print head cleaning cycles.
In others, you will need to connect to a computer with an adjustment program, run the program in the “Individual Adjustment” mode, and select the “Ink Charge” option.
How to add sublimation ink to an inkjet printer?
The owner’s manual should be your handy companion when adding sublimation ink to your inkjet printer. You should be very careful while refilling it impurities do not find the way into the lines. Dust particles, for example, will not only lead to poor print quality but may also choke and damage the print system.
Moreover, ensure you do not let any air bubbles in by shaking the ink to remove void or bubbles and filling the ink in small quantities. Furthermore, due to the messy nature of this process, we advise that you carry it out on a porous surface.
What you Need
- Syringe with needle
- Bottles of sublimation ink
- A pair of plastic gloves
- A refillable cartridge
Procedure
- Begin by putting on your gloves to prevent ink spills from messing your precious hands.
- Put only the tip of the need in the opened sublimation ink bottle. Pull the top of the syringe gently to suck in the sublimation ink. Ensure there are no bubbles in the syringe to avoid problems when filling.
- Most cartridges come with 2 holes, the fill hole, and the vent hole. Insert the syringe gently into the fill hole. Be careful not to puncture the thin plastic lining inside the cartridge.
- Fill the cartridge by pushing the top of the syringe slowly. Do not fill the cartridge to the brim, leave it at 7/8th full to allow some allowance.
- If you will be refilling mixed color inks, handle one at a time to avoid mixing inks of different colors. After adding the sublimation ink, check to confirm that the printer is working correctly.
