What are embroidery stitches?
Embroidery stitch is the movement of the needle and thread in an artistic manner and style.
You can blend the simple textile with various embroidery techniques to produce a voguish fabric and designs.
Working out with embroidery begins at the smallest unit of stitch but eventually, it will come up with a stunning masterpiece. There are two ways on how to run a stitch namely hand sewing and embroidery machine.
However, the hand sewing is more sentimental than embroidery machine because it is made out of effort, skill, and passion.
In this context, you will discover embroidery stitching techniques using your talented hands to suffice you with knowledge and improve your skill in embroidery.
6 Common Embroidery Stitches to Improve Your Skills
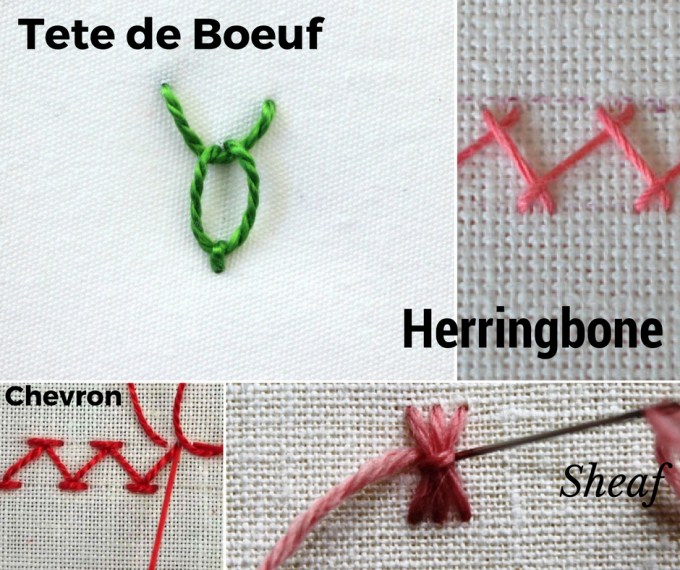

1. Tete de Boeuf
This stitch can be grouped with the chain stitch family’s stand-alone stitches. The stitch’s name explains its appearance, being a “head of the bull”. The upper stitches resemble the horns of the bull while the lower ones for the head.
This stitch is actually handy for creating ornamental works and ticking.
2. Sheaf
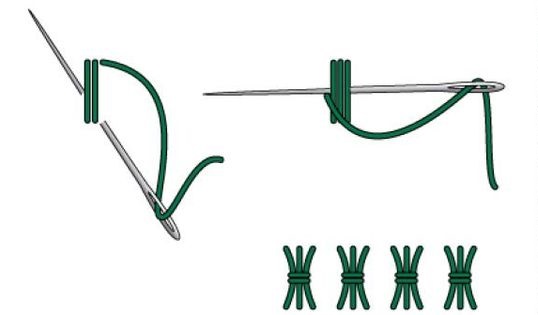
This stitch is easy to work with because it only consists of three groups of straight stitches that are set side-by-side. The group of stitches is then brought to the center and start threading below the left-hand stitch.
The stitch is then tucked below the right-hand stitch and to the back after making the thread around the sheaf.


3. Herringbone
This is recognized by many as a versatile, easy to work and effective stitch.
This stitch is also most popularly used in crazy quilting seams decorations, but other than that, it is actually functional when used and is also decorative and can be useful in other creations such as hemming garments.


4. Chevron Stitch
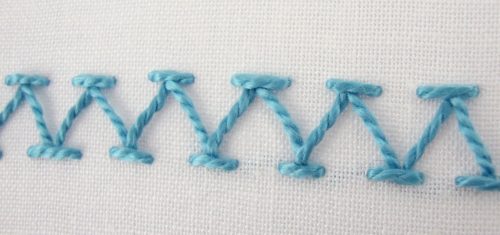
This type of stitch is used for a surface by utilizing long diagonal stitches added with a horizontal cap stitch at the top but is most commonly used in a single row because of its easy process.
It can also be mixed or embellished to other stitches in order to create a seam treatment or border.


5. Fishbone Stitch
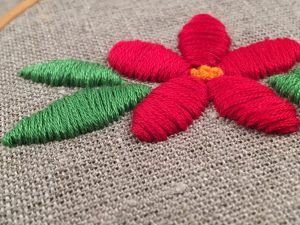
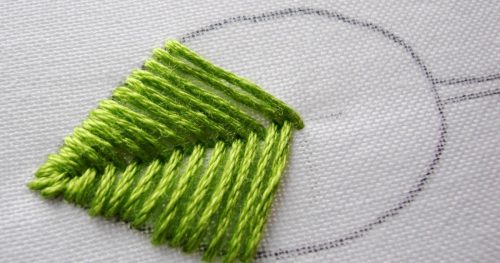
Its name may define its usage, but this stitch can also be used in embroidering leaves.
The veins are created down the center as the work continues. Several leaves and floral designs can be created with fishbone stitch.
To give a solid color and design to the embroidery, you can make the stitches closer together.


6. Couching
This is a technique used in attaching a thread to a fabric as a base by utilizing small stitches over it in regular intervals.
A length of ribbon can be couched with a row of French knots that are running down the center or just by laying herringbone stitches at the top.
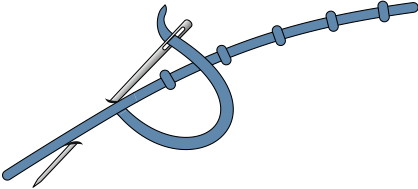


How to Do the Tete de Boeuf Stitch?
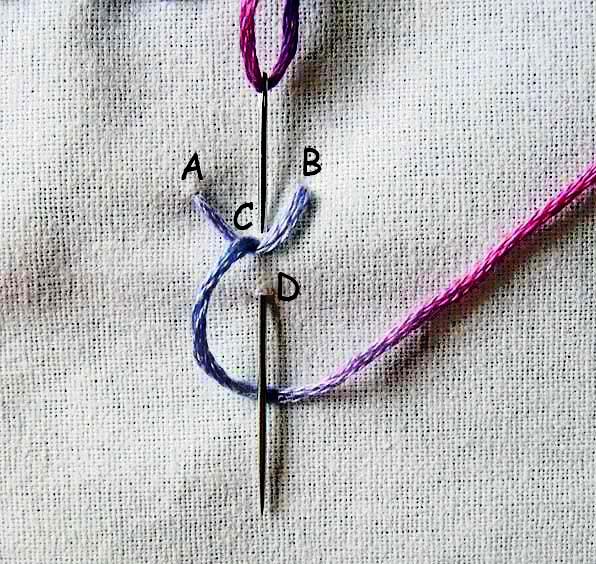
A tete de boeuf stitch may appear complicated but once tried, you will find it easy. It derives the French name from its figure forming an ox head shape.
It has a lower single loop forming the head and two upward stitches resembling the horns of an ox head. That’s why it is also referred to as the ox-head stitch.
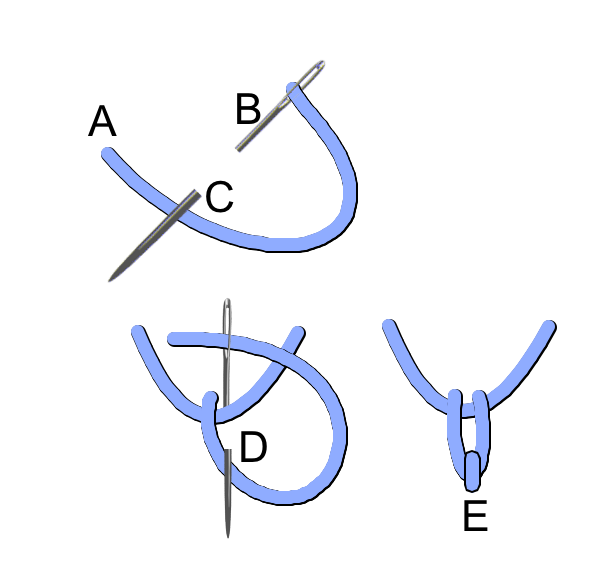


For the tutorial part, you may use a pattern to enable the stitch to have a consistent tapestry.
- First and foremost, sew from the back of the fabric, let the thread sew out in front, and hold the thread.
- Next, sew again from the back and make sure to align the stitch on the center; hence, it will form two diagonal lines facing opposite direction and intersecting at their endpoints. In short, the stitch should form a “V” shape.
- Thereafter, make a single loop by inserting the needle in front of the fabric and while holding the round shape of the thread, you should make another lock by inserting the needle from the back going in front of the fabric.
You will surely make a perfect shape of the ox-head once you’ve tried this basic tutorial.
How is it? Did you able to follow the tutorial? Is it pretty easy, right?
You may now have your personalized designs using this stitch technique and make your fabric in a voguish appearance.
You may also combine it with the other stitching designs and produce a stunning masterpiece using just your hands, needle, and thread.
Conclusion
Voila! Are you surprised that you can actually do it by yourself? You may now stitch any style that you desire and improve your skills in embroidery by trying out these techniques: tete de boeuf, sheaf, herringbone, chevron stitch, fishbone stitch, and couching.
Knowing all of these techniques will definitely enhance your skill when it comes to embroidery and craftsmanship.
Trying out the tutorial and watching the clip make your skill more efficient and stylish. Keep an eye of these beautiful designs and make your fabric an instant vogue appearance!
Read more: A Stumpwork Tutorial for the Starters
