Embroidery is a fun and interesting hobby or craft creation to do. This is because of its ability to bring out the most creative and the best artwork that an individual can do through the use of embroidery.
One can create different images, silhouettes, and shapes in different colors that they may seem to want.
In this variety of designs, one that stands out is the French knot. By the way, how to make a french knot embroidery?
What is a French Knot?
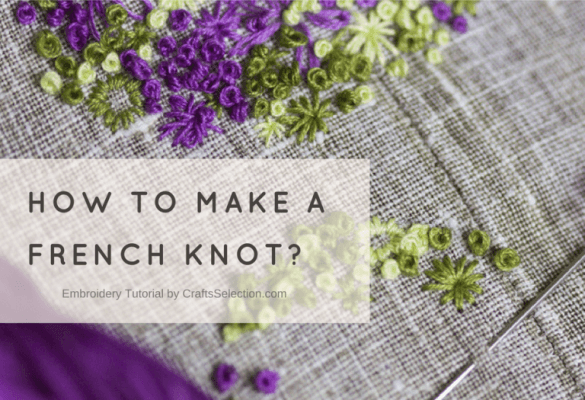
The French knot or also known to other people as the dreaded French knot. It is the decorative technique in embroidery where a small tight knot is created by creating thread that is looping two or more times around the needle.
The thread is then inserted into the fabric in single or groups to form an image or other creative forms of accents in an embroidery piece.
Where to Embroider a French Knot?
Despite its cute and small size, the French Knot is a very important and crucial part of embroidery that you need to learn.
This tiny stitch can create so much appeal to your designs as it brings the volume of focus on the portion of the design where it is located.
The volume or size of the French Knot is the primary reason why a realistic or three-dimensional effect is created on the embroidery craft.
For most of the time, these French Knots are used to create a center of a flower, a curly hair, and eye, and it can even be used to add an accent in a scattered or group in a big sized are of cross stitch.


That brief explanation sounds simple, right?
With all the good ideas on how this stitch will improve your embroidery design still then again questions will come to your mind such as how will you actually create a French knot properly? Is this stitch really easy to do?
You don’t need to worry because we will answer all your questions by presenting you the detailed steps on how to make a French knot and the wonderful effects that it will add to your craft.
How to Make a French Knot Tutorial
You can put a magic to this amazing craft from the simple stitch to an eye-catchy and splendid effect!
Giving life to this French knot requires a brainstorm of ideas, creativity, and style.
Start making your French knots today with these 6 easy to follow steps!
Step 1. Prepare the Needle
Insert a 30 cm long embroidery floss on your favorite needle and make sure to choose the best glossy, perfect hue, and a quality strand of thread.
A simple small dot knot can be a remarkable artwork when you started to stitch several French knots forming a beautiful image. Make it more stylish by combining it with various complementary colors for a voguish tapestry.
The trick is to insert different colors of embroidery floss in two to three needles for a quick stitch.
Furthermore, a pattern is an excellent foundation of your creative stitch so preparing one would make the embroidery craft convenient.
Step 2. Select the Thread
The outlook of the French knot art depends on the thread being used. Some tailors are fond of using quality ribbons, yarns, or glossy threads to create a standout and appealing work of art.
Moreover, using different types of thread depends on the pattern or image that you want to stitch.
Aside from the thread material, you should also consider the combination of thread colors so that they will complement each other.
You may also search some images and surf it over the net. Just make sure to add some twist and style to the pattern.
Step 3. Place it on the Hoop
There are various shapes and sizes of hoop depending on the craft that you will do. In this basic tutorial, you may use a wooden round hoop as your starter tool.
Just place the textile on the hoop and adjust the screws to tighten the textile so that when you begin with the stitches, it will not cause any scrunch effect on the fabric.
Step 4. Perform the Stitch Technique
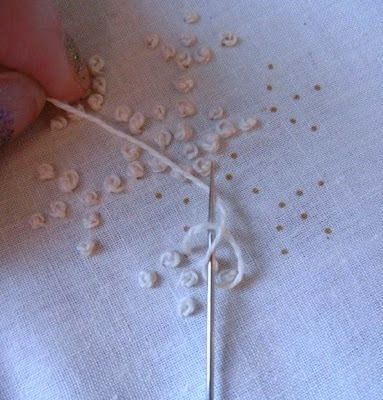


How to begin with the French knot?
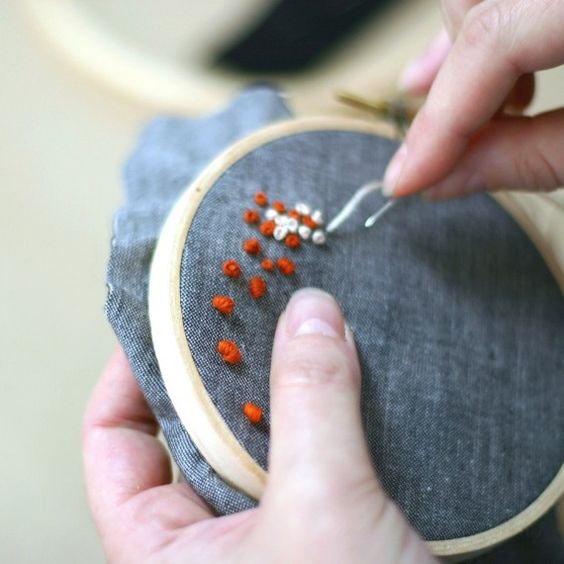
- First and foremost, insert the needle at the back of the textile and pull it through as it extends to the other side of the textile.
- Point your needle in a parallel position and loop the thread around the needle. The thicker the loop hence, the bulkier the French knot’s appearance.
- After creating a loop around the needle, point the needle back on the spot where you insert it and pull it back.
- Next, follow the pattern of the image that you want to imitate and make many French knots as you can. You can stitch the French knots with spaces in between or group them together intact.
Step 5. The Knot Practice
For a neophyte like you, begin the French knot by using an image of a flower. It is actually a basic craft towards an intermediate fine art.
You may try this Sakura flower using pink, light pink, and dark brown embroidery floss.
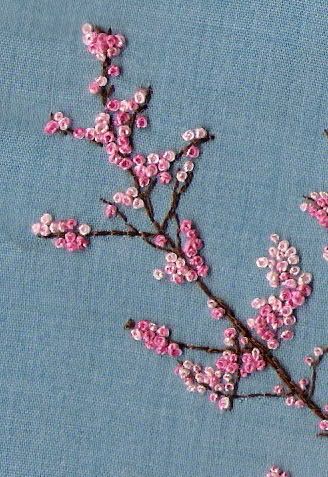


Draw a pattern of the Sakura flower and stitch first the twig part to have a guide on the Sakura flowers. Use the dark brown thread to come up with the twig.
Next, start making several French knots using the pink and light pink embroidery floss. The French knot should look like what you see in this picture above.
Step 6. Dazzle the French Knot with Designs
Infuse your French knot craft with stunning designs to make the art appear more unique, quality, and fabulous.
You may add some sequins, pearls, or beads to increase the appeal of the design. These ornaments provide a glitzy effect on the French knot thus, it will make the image stand out.
Actually, you may also use fabrics with exceptional designs as the main background of your embroidery.
Choose among these textiles to ensure the quality of your craft and embroidery such as silk, linen, tight weave, satin, or cotton.
Final Words
All the details from the smallest to the most important ones that I have listed and emphasized on this French knot tutorial are all the results of collaborating research and self-experiences that have been tested by many.
This is the primary reason why you should keep all these recommendations and tips on how to make a French knot because at the end of the day, after all the times of research and trial and error experiences, quality will always be your number one priority.
We are very hopeful that the tutorial has been helpful for you and your project.
If you loved our tutorial or you have any questions, we would love to hear your thoughts by sharing them on the comments section together with other reader’s comments and ideas and let your friends know about this stuff by sharing it with them on social media and the internet.


