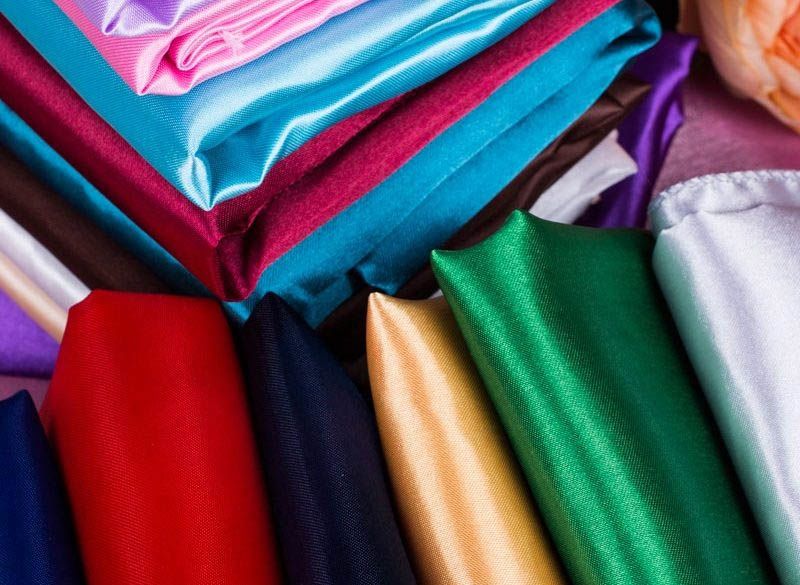
Everyone loves sewing the smooth and delicate satin fabric. The way satin reflects light adds an extra sprinkle of magic, making every project feel luxurious and special.
But there’s a little challenge with satin – it can be pretty slippery, sometimes making sewing tricky. Especially for sewing learners, keeping satin from sliding around can be quite an adventure!
The good news is anyone can master how to sew with satin fabric as long as they’ve got the right technique down.
Read on to find out cool facts about satin. This article will also reveal how to overcome sewing with satin.

What is Satin?
Satin is the remarkable glossy fabric popularly worn as evening gowns. Back then, satin represented luxury and was saved for fancy folks like nobles and royals.
Here’s an interesting historical tidbit: In 1663, André-Charles Boulle, Louis XIV’s furniture maker, worked his magic with satin to create jaw-dropping furniture for the Palace of Versailles.
Made from silk, satin originated from Medieval China. Typical satin fabrics have a dull texture on one side, but flip it over, and you will find a shiny surface.
Wrinkle-resistant satin fabrics often vary in quality depending on the weave and fabric used. Examples of common satin fabrics include Charmeuse, Antique, Crepe Back, Duchesse, and Jacquard.
Advantages of Satin
- Satin’s smooth silk-like texture oozes elegance; it flows and glides easily along with you.
- Satin fabric is durable thanks to its wrinkle-resistant properties.
- It is versatile. You can use satin to make beddings, sportswear, neckties, and other accessories.
Disadvantages of Satin
- It has poor melting resistance. Do not subject satin to heat to avoid melting, warping, or losing its original texture and appearance.
- Satin isn’t the best at soaking up moisture. It might get slightly clingy and not-so-comfy on a hot, sweaty afternoon.
- If you’re not careful and skilled in putting it together, your satin creation might not hang quite right.
How to Sew Satin Fabric


Begin your practice on sewing satin by getting the necessary materials ready. First and foremost, prepare your workspace with the sewing machine and satin fabric in the right places.
For your first satin sewing project, you also need pins, scissors, fabric glue, tailor’s chalk, a ruler, and iron. Afterward, follow the steps below:
Pre-Wash The Fabric
Before sewing, give the satin fabric a pre-wash to remove all manufacturing chemicals and finishes present. A little pre-wash will soften the fabric and also keep it from shrinking.
Here are some tips on pre-washing satin before sewing:
- Fill up your sink or a basin with cold water. Remember that satin fabrics do not love heat.
- Pour in detergent to the water and give it a swirl. Satin is too delicate for rough handling or machine washing.
- Let the fabric relax in the soapy water for 10-15 minutes.
- Afterward, give the fabric a good rinse under cold water.
- Lay your satin flat on a towel or drying rack and let it air dry.
- Sunbathing is optional, but keep it away from direct heat!
Your satin is all prepped and ready for sewing.
Find an Appropriate Pattern
Choosing a simple, beginner-friendly pattern for satin fabric is another important pre-sewing step. The best way to master satin sewing is to start with simple designs with less complicated seams or pockets.
Here are some simple patterns to choose from:
- Simple and elegant A-line skirts
- Satin envelope pillow covers
- Satin headbands
- Elastic-waist satin lounge pants
- Satin scarfs
- Simple satin camisole tops
- Satin hair scrunchies
- Satin wrap skirts
- Satin basic clutches
- Satin baby blankets
Pressing
Pressing satin sets the fabric in its best shape, making it easier to sew straight and accurate seams. Besides, it gives a better idea of how your fabric will flow while sewing.
Follow these steps to press the satin fabric:
- Use low-heat iron settings (silk or polyester) to prevent damaging the delicate satin weave.
- Place a clean, lightweight pressing cloth over the satin to protect it from direct heat and prevent shine marks.
- Use steam sparingly to avoid water spots or puckering; hold the iron slightly above the fabric.
- Always test a small piece of the satin fabric first to ensure it can endure the heat and steam without damage.
- Apply gentle pressure while pressing, avoiding excessive force that could stretch or distort the fabric.
- Follow the fabric’s grain and weave to maintain its original structure.
- Allow the fabric to cool down before moving to prevent stretching or warping.
Pattern Layout and Cutting


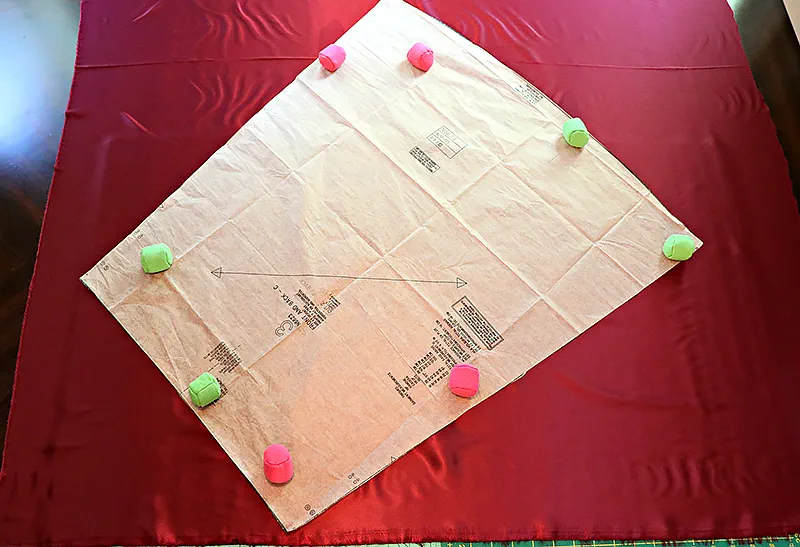
You need a flat, clean surface to lay patterns – a big table or neat floor. Ensure the satin fabric is wrinkle-free, nice, and smooth when laying out.
Next, put your paper pattern on top of the fabric. Align the pattern arrows with the fabric’s grain (those lines in the fabric).
Gently secure the pattern to the fabric with pins or pattern weights so it doesn’t shift while cutting. Be patient! Smooth out any edges or curves, and double-check everything before you cut.
For smooth cutting, a good pair of fabric scissors with sharp blades is your best friend. If you’re comfortable, a rotary cutter with a cutting mat can give precise cuts, especially for straight lines.
You can also use thread snips for making small cuts or trimming. Stay away from sewing pinking shears or regular household scissors to avoid fraying the edges.
Follow these steps to cut smoothly through satin fabrics:
- Hold the scissors or cutter steady while cutting. Slow and steady wins the race!
- Cut along the traced lines of your pattern, keeping an eye on the fabric’s grain.
- Use smooth, gentle movements while cutting to avoid snagging or pulling the fabric.
- If unsure, do a test cut on a scrap satin fabric to get the hang of it.
- Cut small notches or marks carefully, but don’t cut into the seam allowance.
Marking the Fabric
Mark satin fabrics to ensure the pieces fit perfectly together. These markings show you where to stitch, fold, or place elements like pockets and buttons.
Professional sewers often cut directly along the pattern’s edges without marking. As a sewing learner, you should mark pattern lines before cutting. You should also mark folds, darts, or any design details as you go for precise sewing.
Dos and don’ts of marking satin fabrics
- Do not use regular pencil ink that bleeds to mark delicate fabrics.
- Chalks, fabric pens, and disappearing ink pens are ideal for marking.
- Try your marking tool on scrap satin to make sure it’s removable.
- Ensure your marking tools are not too sharp to leave holes in the fabric.
- Mark lightly to prevent damaging the delicate fabric
- Take your time to mark accurately; haste can lead to mistakes.
- Only mark what you need – too many marks can get confusing.
Use The Right Needle and Thread
The right needle and thread combo usually prevents snags, pulls, and puckering. The type of needle selected is as important as the size.
Most professional sewers use microtex or universal sharp needles for smooth stitching. Since satins are lightweight, the ideal needle sizes should be 70 (10) or 80 (12). A fine polyester or silk thread is perfect for universal and microtex needles.
Other tips you must keep in mind include the following:
- Test on scrap satin fabrics to get your settings right.
- Swap needles after every layer or project.
- Balance tension for even stitches – not too tight or loose.
- Sew at a steady pace to avoid puckering or stretching.
Stabilizing the Fabric
Now that you are aware of satin’s slippery nature, the next question is, how can you prevent the fabric from moving around while you sew?
Simple! Use lightweight fusible interfacing to stabilize the fabric. Match interfacing size to fabric pieces and press as advised in the previous section. On the other hand, avoid thick interfacing that could weigh down delicate satin.
You can also place tissue paper between layers while sewing – it tears away later. Some water-soluble fabric stabilizers can help you hold the pieces down while you sew. Do not use masking tape, as it leaves a sticky residue.
Always test the interface on scrap satins to ensure your stabilizing method works. Also, use just enough stabilizing to support, not stiffen, your satin.
Sewing with Satin
Apart from its slippery property, fraying seams are another common problem when sewing satin. Follow these satin sewing techniques to ensure your first project is flawless:
- Use a shorter stitch for satin, around 2.0 to 2.5 mm.
- Straight stitches work best and zigzag for seams that need some stretch.
- Consider using a walking foot for even feeding, especially on very slippery satin. This way, you don’t have too many pins to hold down the fabric.
- Decrease the presser foot pressure to avoid leaving marks on satin.
- Fine-tune the thread tension, not too tight or loose, and find your satin’s sweet spot. Remember that tight thread tension can cause fabric distortion.
- Pin within the seam allowance to avoid holes; try clips for minimal marks.
- Do not use long stitches, which can lead to puckering or uneven seams.
Hemming/Finishing


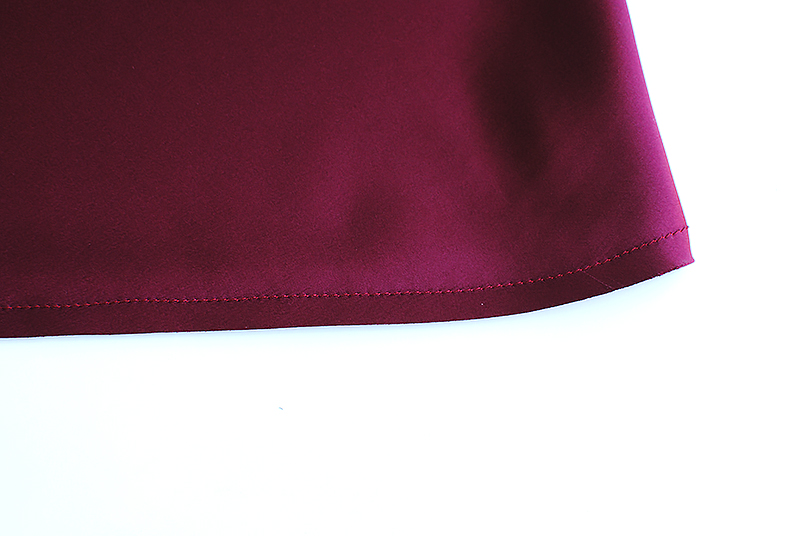
The final step in sewing satin involves finishing the hems to make the fabric look neat and prevent fraying. Hemming gives your project a pro touch and also makes the fabric durable.
When it comes to satin, narrow rolled hems or French seams are ideal for achieving that super clean finish. To sew a French seam:
- Place the fabric’s wrong sides together and sew a narrow seam.
- Trim down the seam allowance to around 1/8 inch.
- Open the material and press the seam flat.
- Fold the satin piece along the seam, right sides together.
- Sew another seam, enclosing the first seam allowance.
- Press again, and voila! A clean French seam on your satin.
You can work these neat hems with your hand or on your trusty sewing machine. Keep in mind to test any finishing techniques on a scrap satin fabric.
Some professionals use sergers (overlock machines) to tidy up the edges. But, for home sewers or learners, these machines can be bulky and are usually more suited for mass production.
FAQs – How to Sew Satin Fabric
What pins are best for sewing satin?
When sewing satin, go for extra-fine silk pins with sharp tips. These pins will hold satin fabrics in place without causing damage. The choice of pin size often varies with the fabric. For satins, short pins below 1 inch in length are ideal. Satin pins should also be skinny enough (around 0.5 mm thick) to not leave holes in the delicate material.
Can I use a ballpoint needle for satin?
Absolutely. Ballpoint needles are made with rounded tips to reduce snags and frayed seams. Choose a 70/10 or 80/12 ballpoint needle to ensure a smooth and neat finish.
What sewing foot is best for satin?
For slippery satins, a walking foot with a smooth sole is the way to go. Some examples of good sewing feet for satin fabrics are open-toe appliqué feet, satin stitch feet, or Teflon presser feet.
What stitch should I use to sew satin?
You should use straight stitches to sew satin fabrics. Set your sewing machine to a shorter stitch length, around 2.0 to 2.5 mm. This shorter length prevents any potential puckering or pulling that might occur with longer stitches. It also keeps your seams looking clean and polished.
How do you keep satin from fraying when sewing?
To keep satin from fraying, choose seams that encase the raw edges, like French seams or enclosed seams. These seams tuck the fraying edges safely inside, giving your satin a polished finish and preventing unruly fraying.
How do you stabilize the satin fabric?
Stabilizing satin is like giving it a little support system. You can use lightweight interfacing, fabric stabilizers, or even tissue paper. These materials add a touch of structure without making your satin feel weighed down. Remember to test on a scrap piece first to find the right balance.
Get Started!
In the sewing world, satin may seem like a luxurious challenge, but fear not, beginners! Armed with these friendly tips, you’re ready to confidently complete your first satin project.
Always remember to start slow and steady. Getting excited and rushing any process can ruin the result. With consistent practice and patience, satin will become your creative playground, and you’ll craft stunning pieces that shine with your newfound skills.


