Sewing can be such a fun and rewarding experience for kids of different ages and summer provides a wonderful opportunity to develop some sewing skills. There are about 20 easy hand sewing projects that kids can do compiled in this article.
Most of the steps here are just overviews, so you can click on the titles of the ones you decide to create to get their full steps. It’s time to grab your needle, thread, and other basic supplies you will need for some fun this summer!
Basic Supplies to Have for Sewing Projects
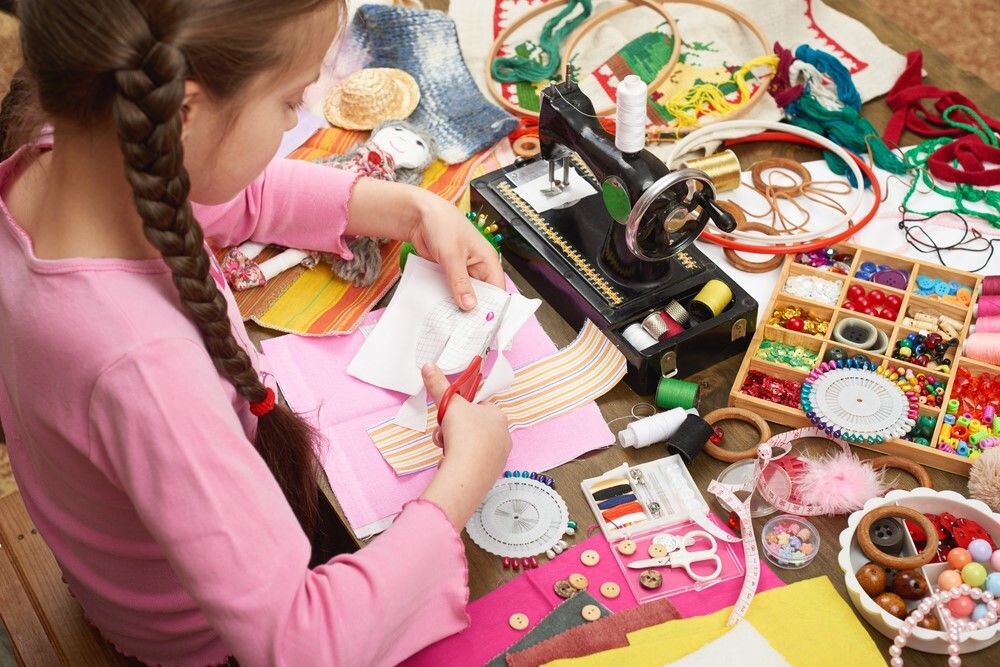
No matter the sewing project you will be engaging in, here are some essential materials that your kids should have at hand.
- Thread or Embroidery Thread
- Needles
- Scissors
- Fabric
- 2B pencil, wax pencil or chalk
- Stuffing
- Clips or pins
- Decorations
20 Easy Hand Sewing Projects for Kids to Do in Summertime
1- Never Ending Journal

The kids will need a standard felt square and some ribbon, yarn, or craft thread. To decorate the cover, some felt and fabric scraps will do.
And of course, paper for the journal! Let the kids start by cutting some ribbon and tying a knot a few inches from each end. Then let the felt square be folded in half with the ribbon lying inside the fold.
They will then sew each of the ends of the ribbon separately and also through both sides of the felt and tie them together in a bow. Then the kids can add paper by folding a few sheets in half and slipping them under the ribbon along the fold.
2 – Felt Fox Purse
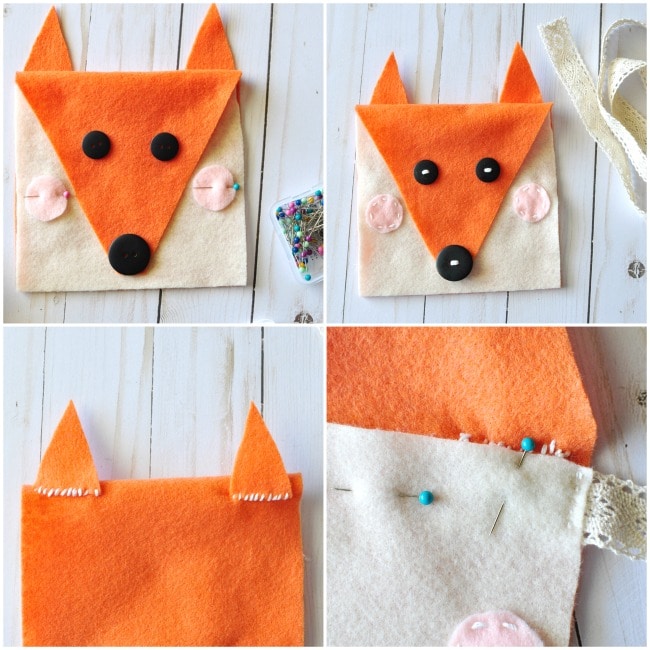


For this felt fox purse, it requires about 3 different colored felt pieces, embroidery thread, needles, lace ribbon, button, adhesive velcro, a ruler, scissors, and a marking pen.
After marking one of the felt pieces at an appropriate measurement with a pen, you will find yourself helping the kids make some shapes to create the face of the fox and 2 buttons will serve as the eyes.
They will all be sewn together, with the lace ribbon serving as the purse handle. By this time, the purse should already start taking shape.
After sewing around the edge of the purse to seal it, adhesive can be added to keep the nose of the fox in shape.
3 – School Supplies Organizer
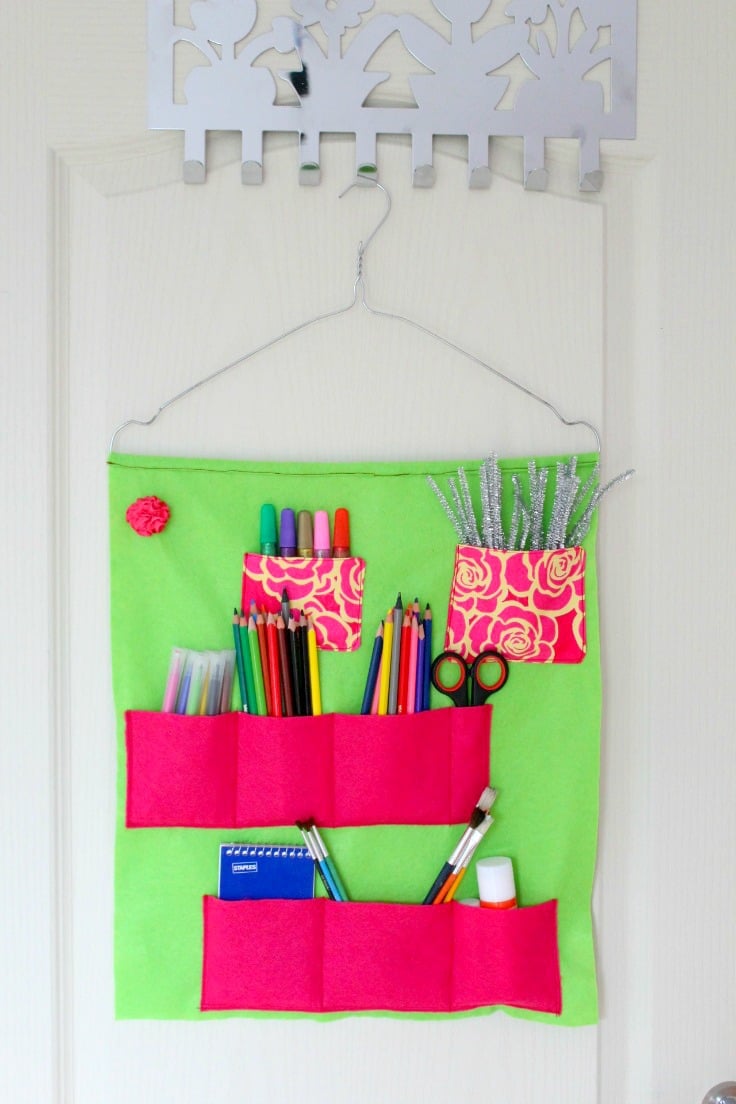


The kids will need 2 different colored felt fabrics, some other fabric scraps, scissors, some thread, a sewing needle, ribbon, and a hanger. The kids will decide on how wide and long they want the organizer and the pocket to be and also how many pockets it should have.
After cutting the fabrics for the base and pockets, they’ll lay the pocket fabrics properly on the base with some appropriate space between them and sew the pockets onto the base.
Afterward, the organizer can be sewn to the hanger. The kids can also use the ribbon to make some embellishments then you can hang it on the door or wall and place your supplies in it.
4 – Felt Pocket Kitty


For this project, the children will need some stuffing, a cat sewing pattern, a transfer method for the pattern, a needle, embroidery thread, scissors, chopsticks for stuffing, and wool blend felt. This kitty is quite fun and easy to make and can slip right inside the pocket of a child as a little toy.
The face of the cat is a heart and so is the nose. The children can decide to embroider the facial features or simply draw them using a fabric pen.
After cutting out the shape of the cat’s head and body, they can sew it round but make sure they leave a small space open for stuffing then afterward, close it. Also, make sure they don’t forget to transfer the face to the head.
5 – DIY Plush Toy


To make this simple toy project, the children will need a canvas or thick cotton fabric, felt fabrics, stuffing, fabric markers, pencil, painter’s tape, chopstick, or hemostat, quilter clips, needle, and thread.
This simple toy requires them to sketch what they want on the canvas with a pencil, and then afterward, they’ll fill in the sketch with fabric markers.
The children will cut out the shape, cut an identical piece with the felt, put the right sides together, and sew them, but not forgetting to leave some space for stuffing with the help of the chopstick or hemostat. Afterward, they can close it up and their plush toy is ready!
6 – Snuggle Snake Softie


To make this snuggle softie, it will require having a package of stick n’ stitch, cotton thread, embroidery needle, an old T-shirt or some other cotton knit fabric or felt material, stuffing, hemostats, or chopsticks for stuffing, 2 buttons for eyes, scissors, pink-colored scrap for the tongue, pins and a pattern. Children can draw the snake pattern, cut out, and sew it to the fabric and then sew the eyes on.
They’ll also find themselves doing a little embroidery, stuffing with some scraps, adding the tongue then washing off the pattern and leaving the toy to dry for some time. Afterward, they can then enjoy some snuggle time with their snake softie.
7 – Weather Sewing Card
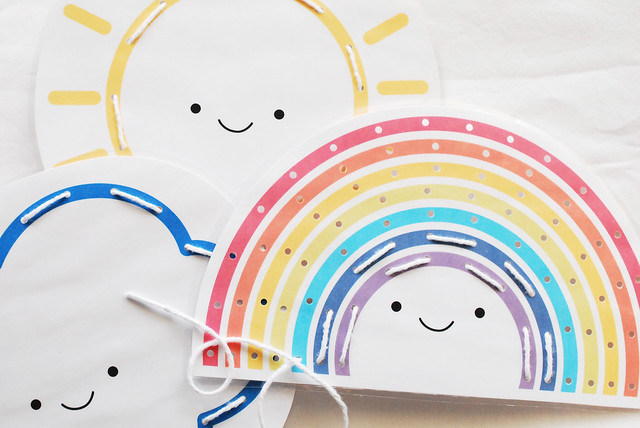


This is a simple hand sewing project kids can use to make a couple of weather cards this summer. They will print some weather characters onto card stock (these characters can be downloaded online). The dotted lines on the printed characters can then be trimmed.
Some printable weather cards come with holes that can be pre-poked with a needle.
Let them tie a bead to one end of the yarn strip (to prevent it from coming out again) and a piece of tape packing at the other end (to make threading through the holes in the card easy). Then they can start stitching from the back and pretty soon the weather sewing card is ready.
8 – DIY Emoji Pillows


To make their emoji pillow, children will need different colored felt fabrics, scissors, hand sewing needle, and matching threads, pins, and fabric markers.
They can draw some emoji facial features by themselves or they can download some ready-made samples online. This project can be entirely hand sewn.
After cutting out round shapes with the felt, one of them will have facial features drawn on them while the other one will serve as the back.
The two pieces are then sewn together, but ensure the kids remember to leave a little space for stuffing. Afterward, they can then finally close the pillow up.
9 – Up-cycled T-shirt Stuffed T-Rex


To make this stuffed toy, the supplies children will be needing are scissors, a fusible web transfer method, pressing iron, stuffing, matching thread, and hand sewing needle, a plain t-shirt, one T-Rex screen printed t-shirt, and pins. Kids will find themselves cutting out the front of the shirt with the T-Rex on it and a piece of the fusible transfer.
They’ll also be doing things like laying the well-trimmed dinosaur on the other old plain t-shirt and cutting two backgrounds of the T-Rex on it.
They’ll sew them together, leaving a little space for stuffing, then close up that space and before you know it, the stuffed T-Rex is ready to be played with.
10 – DIY Felt Clutch


Kids will need two pieces of felt, a piece of velcro, trim, or button for the front, a ruler, scissors, a disappearing ink marker, needle, and thread. They will start by lining up the wrong sides of the two felt pieces together.
Next, they should pin in place and sew down the edge of one of the short ends and trim off any excess fabric. They’ll fold up the edge that was sewn one-third of the way.
After pinning everything in place, they should sew along the side about a quarter of an inch of the edges and trim. They can sew or glue the velcro in place and add any other fancy accessories and the clutch is all set.
11- Easy Scrappy Bookmarks


To make a fabric bookmark, children will need a pressing iron, 3 scraps of fabric, one fabric scrap for the back cut, scissors, thread, and a needle. The bigger scrap piece should be laid in the middle and they can place one of the other two scraps on top and the other below.
Then they’ll sew the front scraps right sides together with some seam allowance, then press the seams open. They’ll also do some sewing-along of both horizontal seams and some quilting.
After sewing with some seam allowance around all four edges, the kids can then pink the edges.
12 – Easy to Make Felt Monster


To make their own felt monster, kids need some colored felt, embroidery floss, sewing needles, buttons, fiberfill, straight pins, paper, and pen. The children will need to draw their monster first on a sheet of paper, then cut the felt piece in half, laying one on top of the other, and then pin the monster pattern to the two pieces of felt.
They can add eyes using buttons or cut two circles of contrasting colored felt. Let them use the embroidery floss to sew the two pieces of felt together but ensure they leave some space to add the fiberfill then close it up completely.
13 – Felt Animal Key Chains


For this, children will need basic animal shapes, traced out and cut. They’ll also need different colored felts depending on the type of animal they want to create.
Also, they’ll need some ribbon for the loop at the top and yarns that match with the felt color for stitching. The kids will also need to get key rings for the key chains. They will cut the felt according to the cut-out shapes, creating a front and a matching back.
Now, they can stitch any embellishments like eyes and noses and then sew the two felt pieces together, leaving a little space for the stuffing. Let them hot glue the ribbon loop that holds the key rings to the gap and sew everything up.
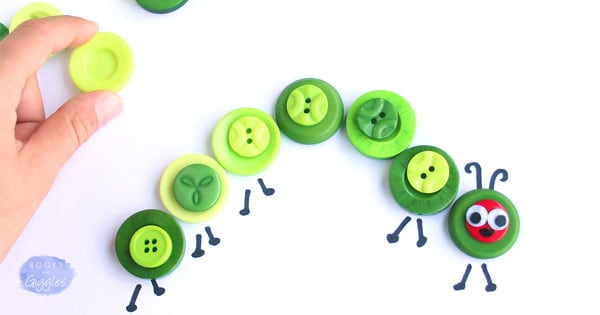


Children will need supplies like buttons, ribbon, colored sewing thread, needle, and pony beads. Let them choose a ribbon and cut it to their desired length, then sew the buttons onto the ribbons.
After this, they’ll need to create a fastener that will help attach it to the wrist. They can make use of the pony beads here.
Or they can hem the ribbon ends and use a simple bow to tie the button bracelet on if they don’t have pony beads. They can make use of buttons of different shapes and sizes to make the button bracelet look very pretty.
15 – DIY Felt Flower Rings
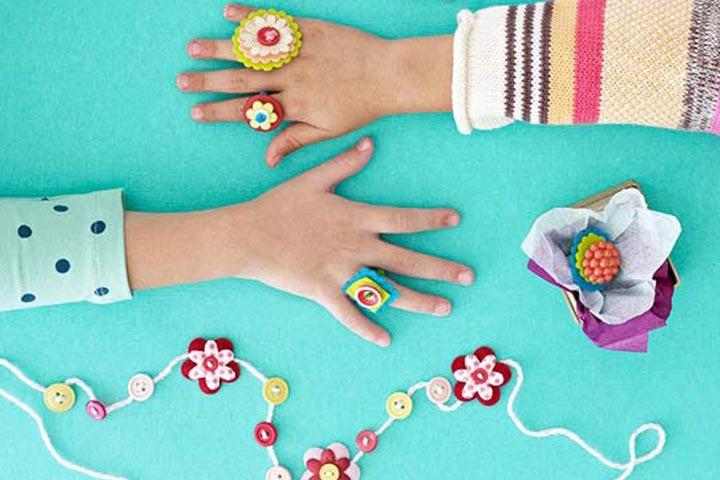


To make this beautiful ring, the kids will need felt scraps, needle, sewing thread, felt tip pen, and thick elastic. They’ll first make the petals of the felt flower by cutting out 5 petal shapes from the felt scraps, then arrange them in a flower shape and sew them together.
They’ll then need to add a ring to the felt flower using the elastic which they’ll knot into a circle that fits comfortably on their ring finger.
They will trim the end of the knot and carefully poke it into the middle of the petals, then sew the elastic into place. They can then place a flower center over the top of both the flower petals and the elastic and sew into place.
16 – Happy Paper Cloud Pillow
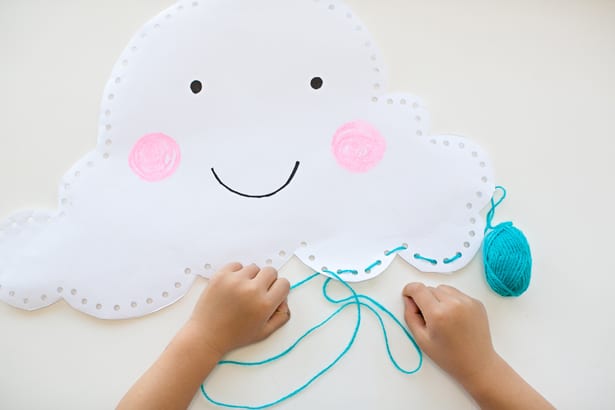


The materials children will use to make this happy paper cloud pillow include: white butcher paper, hole puncher, yarn, black marker, chalk pastels, and poly stuffing.
Let them draw a cloud shape on the white paper, fold it in two, and cut it out and punch some holes along the side. They can then draw a happy face with the marker and pastel.
Afterward, they can string the yarn through the holes but ensure they remember to leave an opening for the stuffing. Let them fill the pillow with poly stuffing and close up the pillow. By this time, the pillow is done and ready for use.
17 – Easy to Make Ribbon Bookmark


This simple bookmark makes use of a piece of ribbon. Kids can use any ribbon length they want to fit their books. They’ll also need a hairband elastic, a button, sewing needle, and thread. They’ll fold over one end of the ribbon and insert the elastic band inside the fold.
Then using a basic stitch, they’ll close the end that carries the elastic band.
On the other end of the ribbon, they can sew on a button. The ribbon will then go over the book (or page in the book) and the elastic band will be snug to the button to keep the bookmark in place.
18 – DIY Book Binding
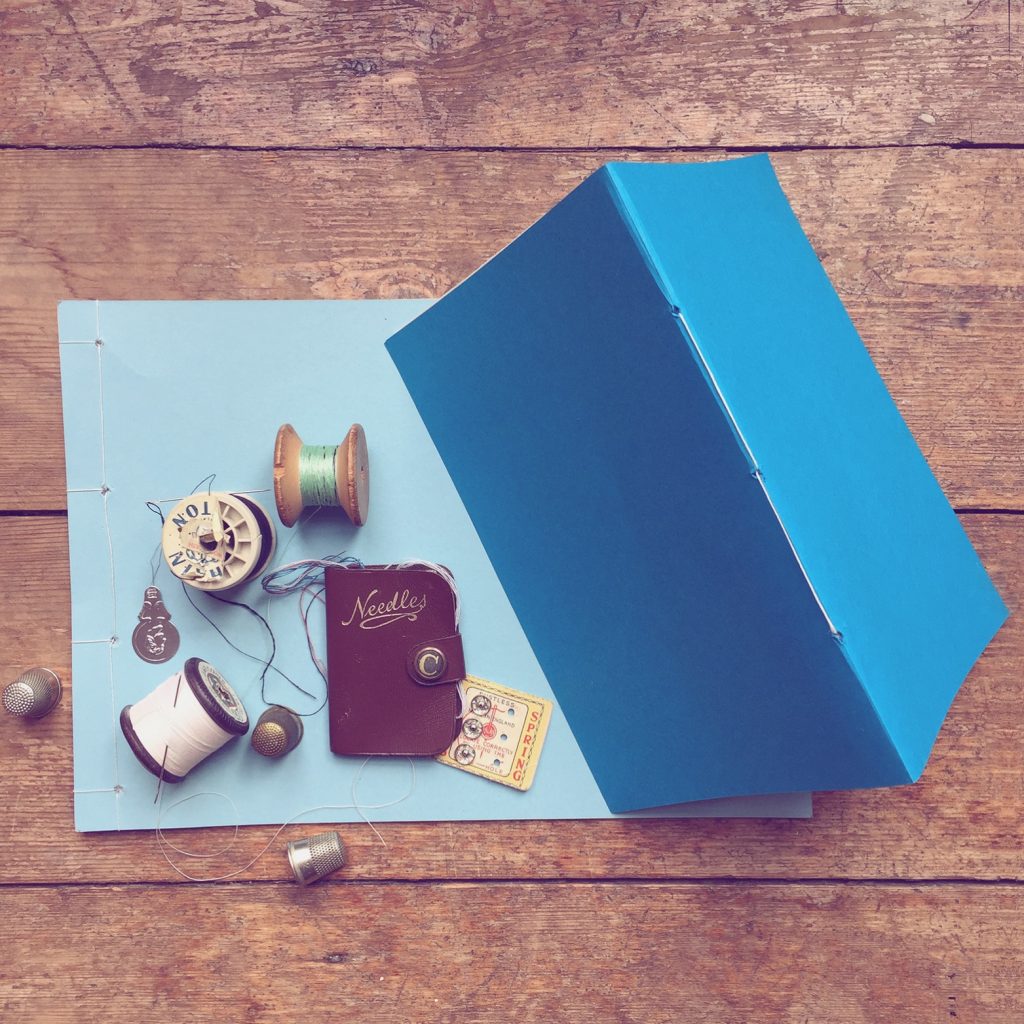


To make simple bookbinding, children will need paper, cardboard, cotton thread, a needle, ruler, and a brindle (or a sharp pencil to create holes).
Let the kids take about four to six sheets of paper and fold them in half. They should place marks in the middle of the top sheet and poke holes through the sheet of paper.
Afterward, they can place that paper on top of the next sheets and poke through the holes so that all the papers have holes at the same place.
Now let them stitch the book by poking the needle through the holes to the back of the book (which is the cardboard) again and again. They will then tie the thread tightly and the new book is ready!
19 – DIY Felt Pink Heart Brooch
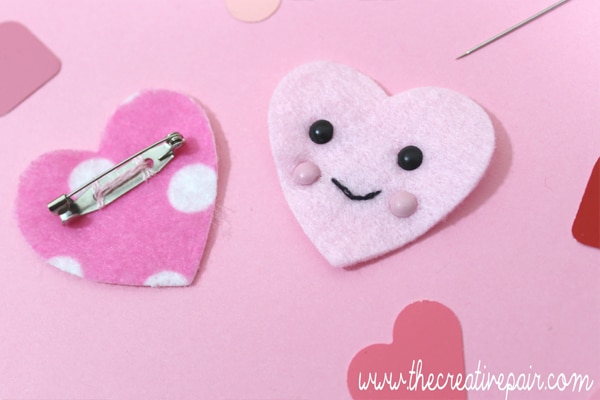


Kids will need a pink felt fabric, two black brads for eyes, two pink brads for cheeks, a brooch bar, pink and black embroidery thread, needle, stuffing, and scissors. They’ll be drawing and cutting out two identical heart shapes from the pink felt.
They’ll also securely place the brads on one of the heart shapes. They can use the black thread to stitch a smile.
Let them sew the brooch bar on the other heart shape, then place both heart shapes together and sew around, leaving a gap to add the stuffing before properly closing it up. The brooch is now all set and can make a cute gift.
20 – Easy Fabric Flowers
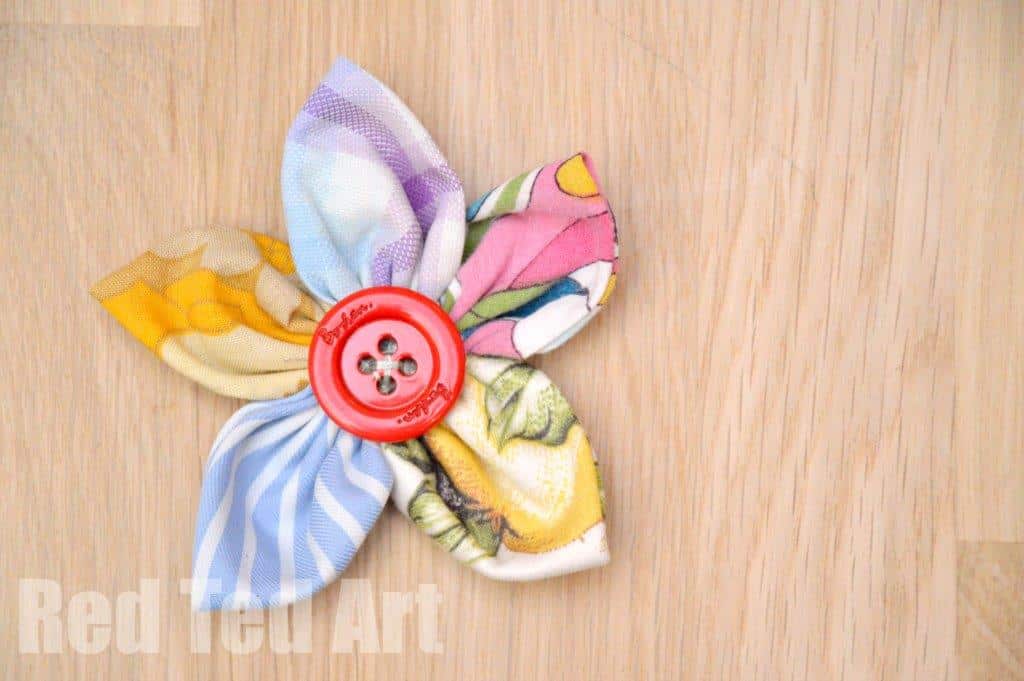


This can be easily made using 5 pieces of fabric, a circular stencil, needle, scissors, thread, a button, felt pieces for the back (optional), and an optional safety pin for brooch or hairband for hair.
Let the kids choose a fabric and cut five circles, then fold it twice till they have a quarter of a circle. They will then need to sew a stitch that runs across the curved part of the fabric, then pull tight and put a stitch in place.
With that same thread, let them move to the next already folded petal and repeat the same step with the remaining petals, securing the last petal to the first one. Then they can sew on their button and it is done!
Conclusion
Hand sewing is not just a fun project but it also helps kids develop motor skills as well. These 20 projects are quite easy for kids to make. You can make this summer full of learning and fun by crafting any of them with your kids!

