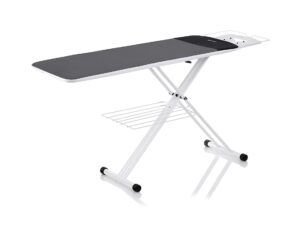
We all know that an ironing board is such an essential accessory to keep our clothing looking perfect. Even though ironing is considered a daily task and seems very simple at first glance, you will be surprised to know your clothing can be damaged when you misuse it.
Let’s take a look at our professional tips below on how to use an ironing board and get the most out of it!
How to Use an Ironing Board to Iron Shirts
Let’s start with shirts – the most popular item. Do you know that the first thing people want to learn is how to iron shirts?

Steps to Iron Shirts on an Ironing Board
Step 1: Start the ironing process with the space on the sleeves first. If you do the middle of your shirt first and then move to the sleeve, it will end up causing wrinkles even when you’ve already ironed them.
In case you find it difficult, try to iron them with the sleeve ironing board to easily iron the sleeves.
Step 2: Open the cuffs, lay the fabric flat on the ironing board, and finish your 2 sleeves.
Step 3: Move to the collar, remember to open it properly while laying the garment flat against the board.
Step 4: Move on to the rest of the shirt until the item is crease-less.
Step 5: Once finishing your ironing, hang your shirt for a couple of minutes before putting it back in the closet or wearing it.
Tips for Ironing Shirts


- Hang Up Ironed Shirts Immediately
After ironing, you can keep your shirts free from creases by immediately hanging them up. Plus, don’t put them back into the wardrobe too quickly as they need some time to set the form. It takes effort to do your iron, so don’t get it all wasted!
- Ironing in a Back-and-forth Motion
You will realize that keeping your iron slow and steady with a little bit of pressure back and forth will avoid stretching out your clothes. Don’t try the circular motion or else you might ruin your favorite shirts.
How to Use an Ironing Board to Iron Pants
For some reason, ironing pants can take you more time and effort. That’s why people use the word “press” for pants instead of “iron”. However, the point is that gentle pressure and steam make it work; not the motion, pressure or heat from the iron itself.
Steps to Iron Pants
Step 1: In case your main crease has been lost, it is pretty easy to find it back. First, lay your pants flat on the ironing board.
Step 2: Line up the seams of the leg to match. The crease is as far from those seams as the fabric goes.
Step 3: Stopping at around 6 inches below the waist, the crease should go all the way up the leg. Don’t forget to always set the front crease first. And in case it happens to have pleats, so the crease can go all the way to the pleat. To make this step easier, try using the sleeve ironing board to iron your pant legs.
Step 4: Once the crease has been pressed, the pants should hang by the waistband for around an hour (or two) to set. Or if you don’t put creases in your pants, a few minutes for them to cool down is alright.
Tips for Ironing Pants
- Use the Right Heat for the Right Fabrics
For pants, we unconsciously turn the temperature of the iron higher than normal, but the right answer is to choose the heat based on the type of fabric. Fabrics such as silk and polyester don’t need too much heat to iron, so make sure you’re always setting the lowest heat when ironing them. Wool and rayon use medium heat while cotton and linen are the highest.
- Iron from Cool to Hot
Just like we have mentioned above, different types of fabrics require different temperatures. The best way is to separate them into groups and iron from the least-heat-needed to the most-heat-needed ones. It only takes a couple of minutes but it can save your iron marks, creases and more.
How to Use an Ironing Board to Iron Skirts
Skirts are quite simple to iron, in fact, they are the easiest to iron because they don’t have as many hems and seams to worry about
Step 1: Lay your item flat against the ironing board.
Step 2: Start at the top of the skirt and move your way down to the bottom. If your skirt has a dramatic flare at the bottom, you might have to start at the bottom instead and iron each of the flounce (flares or the skirt).
How to Use an Ironing Board to Iron Dresses
At first, you may find this task quite complicated because you are not sure where to start first. However, ironing dresses can be easier compared to others.
Steps to Use an Ironing Board to Iron Dresses


Step 1: Contrary to what we usually do, ironing dresses should always start from the bottom. Hold the bottom of the dress and pull it over the board narrowest’s part.
Step 2: Your way should be starting from the waist and ending at the seams. In case your bottom is a pleated one, iron it in a triangle. This means nosing in at the top of the pleated and repeating until you finish the bottom part of the dress.
Step 3: After the skirt is done, let’s come to the top. If it does have a zip/button, unzip/unbutton it so you can place it nicely on the ironing board.
Step 4: For the front and back of the top, you can iron it the same as how you do with shirts. But for the collar, which is usually curvy, we have to iron it piece by piece. So, be flexible and move the collar around the board’s nose to iron it properly.
Step 5: Hang the dress for at least half an hour to cool it down and prevent wrinkles to appear when wearing.
How to Clean and Maintain an Ironing Board
How to Clean an Ironing Board
Actually, you don’t have to clean your ironing board every time after use. Instead, it would be better if you clean it every two months.
Step 1: You can start by wiping out dust from the board with a clean cloth. Then carefully take off the ironing board cover.
Step 2: Always remember to check the label whether this cover can be machine-washed or not. If yes, problem solved. If not, you can have it hand-washed or you can spot-treat the stain on the surface. Try mixing water, vinegar, and baking soda together, spray on the stain and let it rest for 5 minutes.


Step 3: Next, take the pad out of the ironing board and clean it out. You can make an extra step here by using the vacuum cleaner to completely get rid of the dirt and dust from the pad.
Step 4: Now, coming to the board and you might want to rinse your cloth to make it damp. Carefully clean the board and don’t miss any spots, including the legs and underneath the board.
Step 5: This is also an extra step, but surely you will thank us for this! Dry your ironing board again with a dry cloth before reassembling it to avoid mold and rust.
How to Maintain an Ironing Board
A well-maintained ironing board is a quality board. Knowing how to preserve your board well will make this daily task much less of a chore. It is still much better and cheaper than buying a new one, isn’t it?
- Leaving the iron face on the cover could damage the cover, the pad and could start a fire once left too long. So remember to always keep the iron face off the cover.
- Usually, clean your iron cover to prevent dust and dirt from transferring to your clothes.
- Check the tag before cleaning, you will find the maintenance recommended by the manufacturer.
- In order to avoid mold, you should reassure that all pieces dry completely after cleaning and reassemble them later.
How to Store an Ironing Board


It’s a must-not to buy an ironing board and leave it forgotten in a dark storage cupboard. Now is the time to stop if you have been neglecting your ironing board for far too long.
Finding the perfect spot for this bulky laundry item can be tricky sometimes, especially when your living space is kinda small and limited. Thus, you have to get a little more creative and flexible when it comes to storing an ironing board; depending on its size and your storage space.
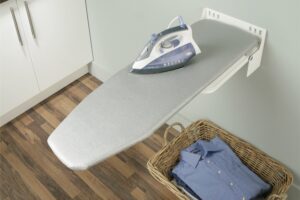
The most common way is to hang it on a door or mount it on a wall. Since this item needs specific accessibility, an over-the-door hook or wall-mounted method can help you take it down and hide it away easily.
Or else, if your apartment/house has a gap between the wall and the washing machine/dryer, don’t hesitate to take advantage of that unused space. Make sure you have an eye on the machine temperature before placing the board in because this could cause a fire hazard.
Conclusion
Coming to the end of this article, we bet you now know how to use an ironing board properly, including some pro-tips and maintenance methods as well. Leave some comments below if you have any questions, and don’t forget to share with us your experiences too!

